Step 1

Facing the chair from the front left side, tie the cord in a square knot (aka: reef knot) around the left side of the front bar.
Step 2

Pull the cord behind the back of the chair and up to the top bar. Create a loop and pull it over the front of the top bar and behind to the left hand side.
Step 3

Insert your hook into the loop and pull the loose end of the cord tight. Rest your crochet hook against the chair frame.
Step 4

Bring the cord down behind the back brace. Create a loop, then pull it over the top of the front bar and behind to the left, as you did earlier in Step 2.
Step 5

Insert your hook into the loop. Pull the loose cord taut to create tension. Again, rest the hook on the chair frame.
Step 6

Pull the cord behind the back brace of the chair and up to the top bar. Create a loop again.
Step 7

Pull the loop over the front of the top bar and behind to the left of the last vertical cord you made.
Step 8

Hook the newly-made loop. The loop on your crochet hook should now overlap the two vertical cords to its right.
Step 9

Pull the loop taut and pull it through the loop you created in Step 2, creating a chain stitch. Let the hook rest in the loop.
Step 10

Pull the loose cord down behind the back brace. Create a loop and pull it over the top of the front bar.
Step 11

Pull the loop around the top bar and to the left of the last vertical cord you created.
Step 12

Using the crochet hook, hook the new loop.
Step 13

Pull the new loop through the loop you made in Step 5, creating a chain stitch. Pull the loose cord taut. Let the hook rest in the loop.
Step 14

Repeat Steps 6–13 until you have created 59 vertical cords. At that point, you will be at the top right hand corner of the chair.
Step 15
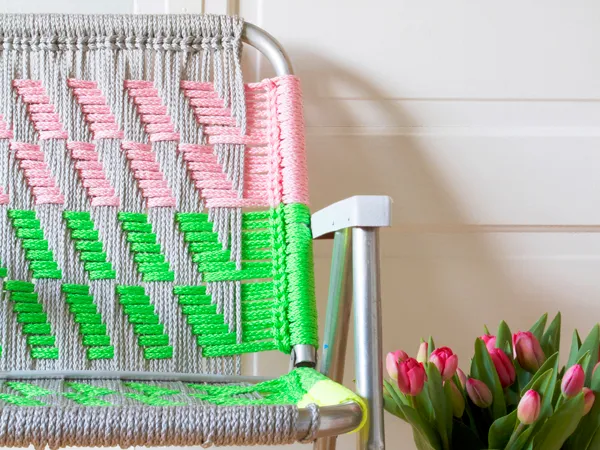
To finish vertical cording, first cut the cord from the skein, leaving about 120cm (4ft). Pull the cord through the last loop, removing the crochet hook. Bring the cord down behind the back brace and over the front bar, then through the loop on the crochet hook. Pull through and finish with a square knot. You now have 60 vertical cords, and are ready to begin horizontally cording the seat and back of the chair – both will be done using exactly the same technique.
Step 16

Create another square knot in the lower left hand area of where you’ll be working (seat or back). Create a loop with your cord and weave it through the vertical cording according to the pattern you are following on page 92.
Step 17
Pull the loop over the right bar and bring it down and under the newly-made horizontal cords, in a similar way to how you created the vertical cording. Insert the crochet hook and pull the loose end (now on the left side) taut. Let the hook rest in the loop.
Step 18

Create a loop with the loose cord on the left side of the chair frame. Bring the loop over the top of the left bar and down under the newly-created horizontal cord. Insert your crochet hook into the loop and pull the cord taut. Let the hook rest in the loop.
Step 19
Create a loop and continue weaving through the vertical cording according to the pattern
Step 20
Repeat Steps 16-18, pulling the newly-created loop through the previously made loop on the crochet hook for each pass, until you have come to the 55th horizontal row of the pattern. Finish the horizontal cording the same way you finished the vertical cording. You should now have a total of 56 horizontal cords.
Step 21
To finish, trim cord ends to 2.5cm (1″), then use a flame to melt the end of your cord and press it into a discrete location on the underside of your chair. Now find a sunny garden corner to display it in and get started on your next macramé mash-up.