How to make beeswax wraps
All products were chosen independently by our editorial team. This review contains affiliate links and we may receive a commission for purchases made. Please read our affiliates FAQ page to find out more.

How to make beeswax wraps

Want to learn how to make beeswax wraps with an iron? Craft your own reusable beeswax food wraps for a plastic-free and beautiful alternative to cling film

Try our magazines – get 6 issues from just £9.99!

Published: March 24, 2021 at 8:07 am

We bet you've seen reusable beeswax food wraps in health food shops and admired their beautiful fabric prints – but then been rather put off by the hefty price tag. Beeswax wraps are great in theory; use them as a plastic-free alternative to cling film to wrap sandwiches and cheeses, cover bowls of leftovers and store non-standard shaped food that won't fit in storage boxes – their pliable finish and ability to hold any shape makes them ideal for this. But you can easily pay over £20 for a couple of store-bought reusable beeswax food wraps, which can seem a bit off-putting. If you treat them well, they can easily pay for themselves in clingfilm cost saving over time, as you can use them again and again. But how about learning how to make beeswax food wraps? How easy would it be to make DIY beeswax food wraps?

The answer is very easy! There are several methods you can use, but we are going to look at how to make beeswax wraps with an iron here as we think it is the easiest and least wasteful way to craft these – that's a win-win in our book. We are using beeswax pellets for our beeswax wraps diy guide but if you have beeswax sticks in your supplies or if this is all you can find available, you can use these. You'll just need to grate them first which takes a little longer. Use cosmetic or food quality beeswax to make these as they will be coming into contact with things you eat, and make sure your 100 percent cotton fabric is clean before you start, too, as once you add the beeswax, you won't be able to clean the fabric again.

Tke a look at our How to make beeswax wraps tutorial video below to see just how simple it is to craft you own beeswax wraps DIY craft style! If you prefer a photo walkthrough for your reusable beeswax food wraps, we've included a how to make beeswax wraps photo walkthrough guide for you under the video, too.

How to make your own DIY beeswax wraps

You will need:

  • beeswax pellets
  • greaseproof paper
  • Fabric (100 percent cotton)
  • Iron
  • Sewing needle
  • Matching sewing thread

Step 1

beeswax wraps diy step 1

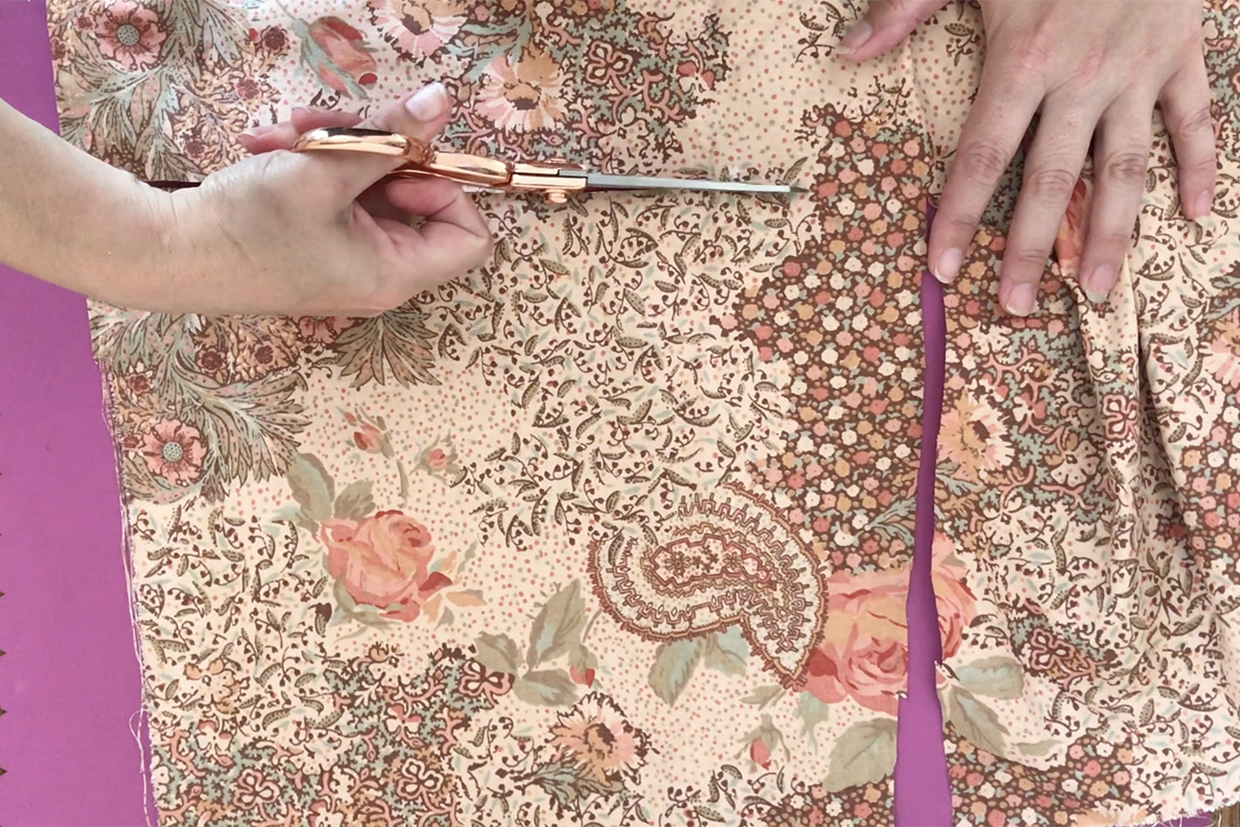
Cut your 100 percent cotton fabric to the size you want. Reusable beeswax food wraps can be as big or as small as you like – it will depend on the ways you want to use them. 20x20cm is a good size to cover a bowl of leftovers or wrap a single piece of fruit. We’re using 30 x 30cm piece to make reusable beeswax food wraps for sandwiches. You want to choose a fabric with quite a close weave and a pretty pattern is always a bonus when you are learning how to make beeswax wraps! The beeswax will stop the fabric fraying so there is no need to use pinking shears, but you could use them if you’d like to have a pretty chevron edge to your wraps.

Step 2

beeswax wraps diy step 2

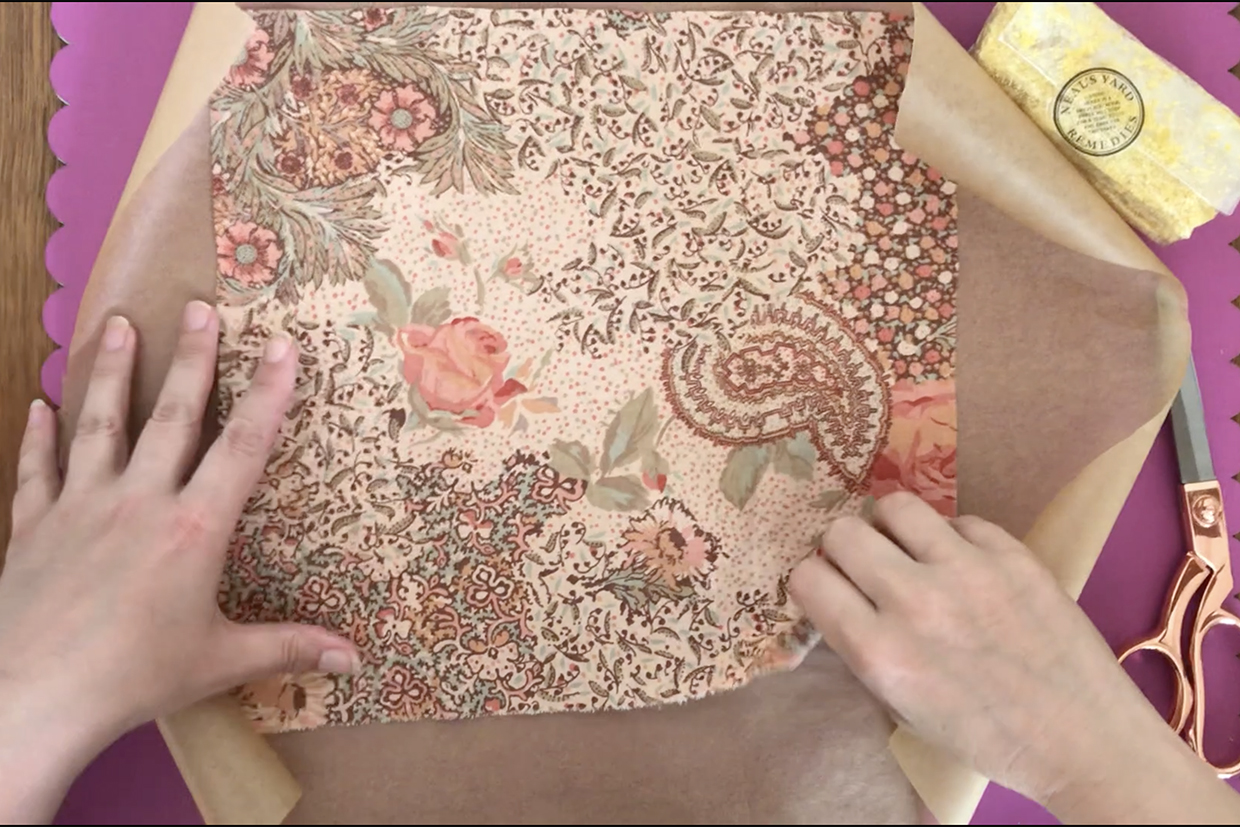
Cut two pieces of greaseproof paper at least 2cm wider all the way round than your fabric size. If you are using a very large piece of fabric, overlap greaseproof paper sheets until large enough. Place your fabric on top of the layer of greaseproof paper. You can have right side up or down, it does not matter as we are going to apply beeswax all the way through the fabric.

Step 3

how to make beeswax wrap step 3

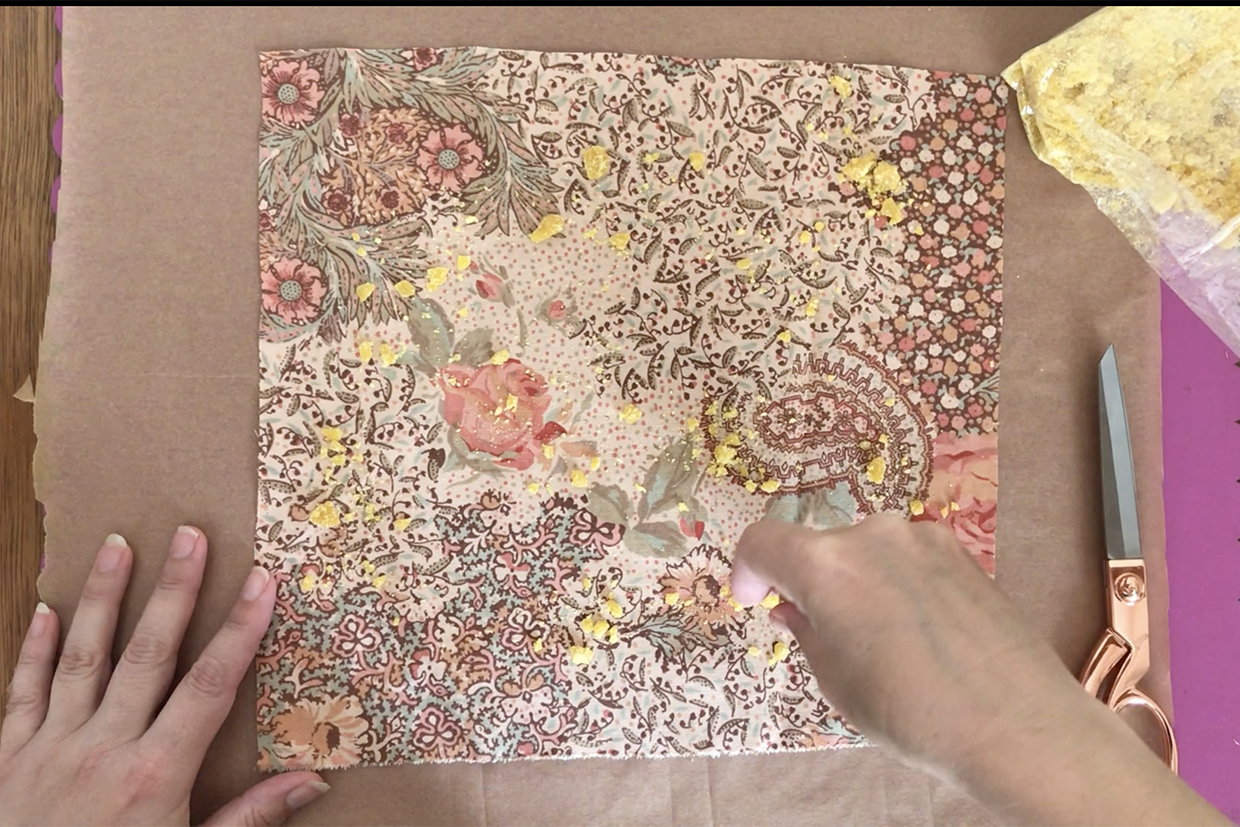
Sprinkle beeswax pellets evenly over the surface of the fabric. It is best to start out with too few as you can always add more pellets, so apply sparingly at first. The pellets should be cosmetic or food quality grade. We’re using yellow pellets but you can also use white beeswax which is better with whiter fabric as it won’t change their colour as much. We bought ours from high street cosmetics store Neil’s Yard Remedies, but ecological friendly scoop refill shops often have then too as part of their green cleaning supplies. Learning how to make beeswax wraps is a great environmental choice, and the eco stores are here to help with this!

Step 4

beeswax wraps diy step 4

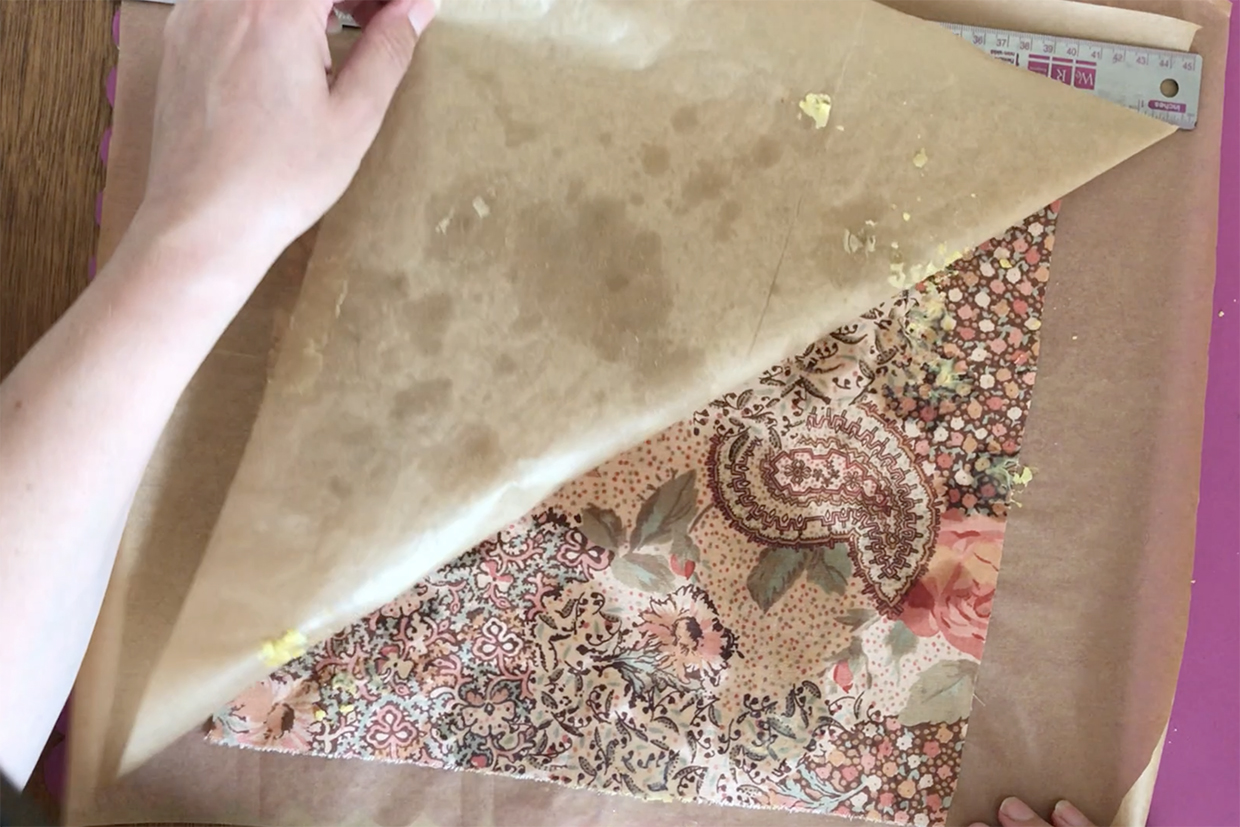
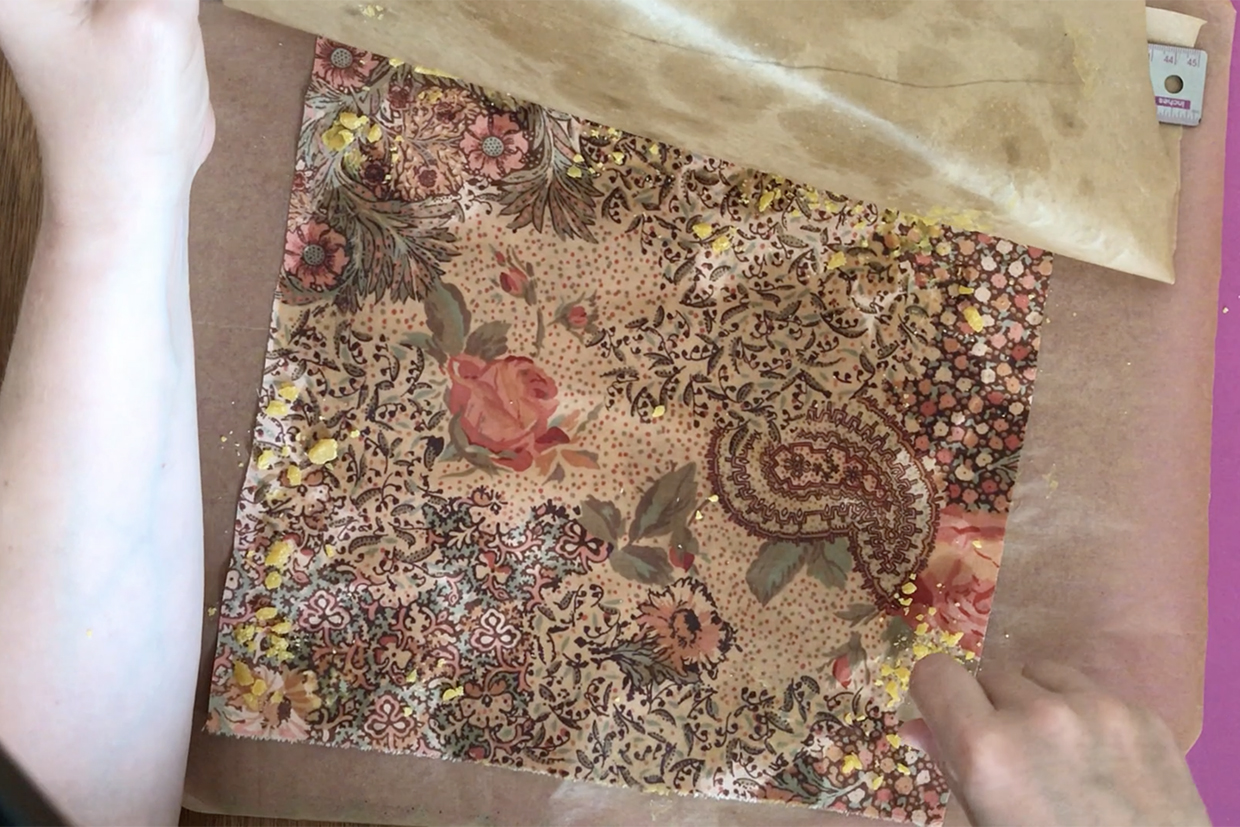
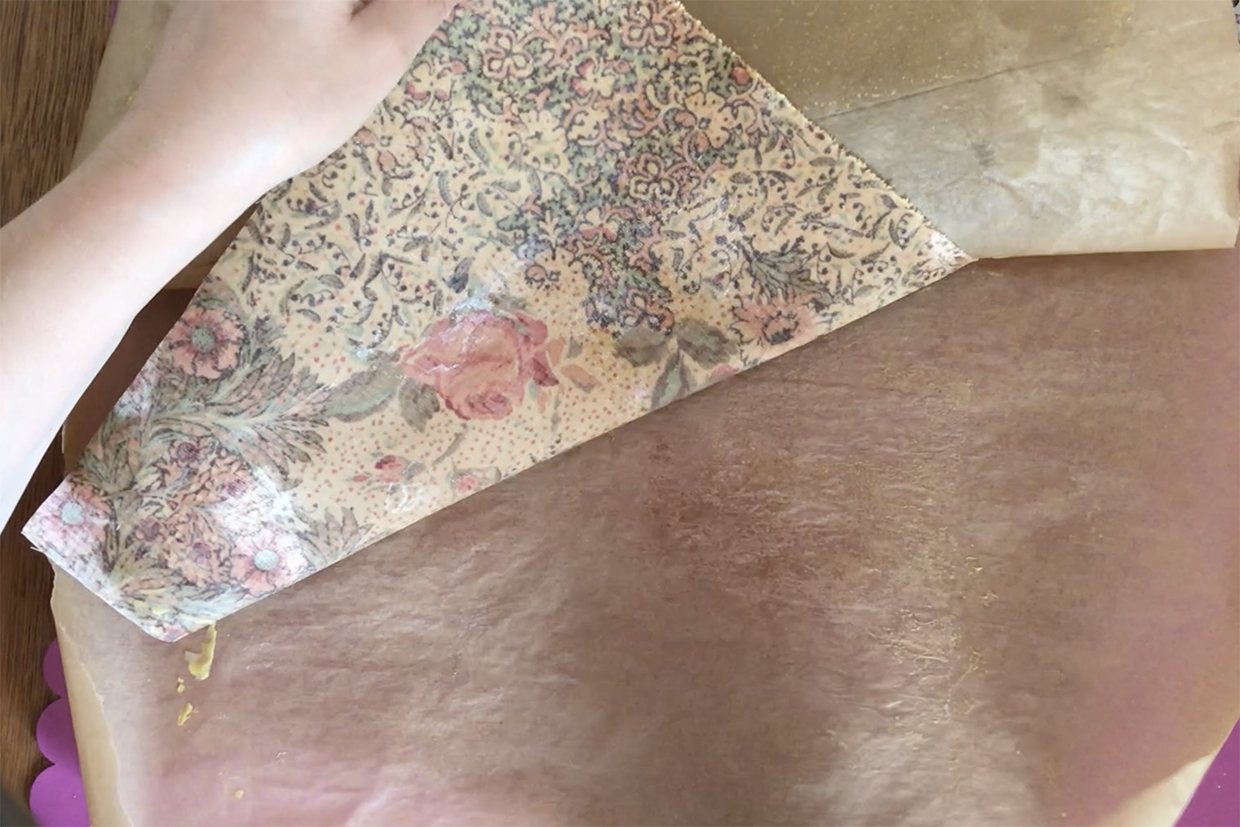
Place your second sheet of greaseproof paper on top of the beeswax and fabric. Using a low iron, press lightly on the greaseproof paper to start melting the beeswax pellets. As the beeswax pellets start to melt, apply more pressure with the iron to push the beeswax into the fabric. If you lift up the top sheet of greaseproof paper, you’ll see that where the wax has melted into the fabric below, the fabric has changed colour and looks much darker.

Step 5


beeswax wraps diy step 5

Replace the top layer of greaseproof paper and keep ironing, moving the iron over the areas where you can see solid wax pellets through the paper. Make sure the beeswax pellets stay under the paper as you are ironing or you will end up with beeswax on your iron which is hard to remove. Once all the beeswax has melted into the fabric, lift up the paper again and look for any areas on the fabric which are still light and unwaxed. Add more pellets to these areas.

Step 6

beeswax wraps diy step 6

As you add more wax, you’ll see some areas on the paper where the beeswax has solidified. Rather than adding extra pellets, you can adjust your fabric so that light, unwaxed areas sit on the wax on the paper. Apply the top layer of greaseproof paper and melt the wax into the fabric. Moving the fabric like this helps you save your beeswax pellets, but can expose parts of your waxed fabric beyond your top greaseproof paper layer. Be very careful not to iron these directly! You should only iron through the greaseproof paper to avoid getting beeswax on your iron.

Step 7


beeswax wraps diy step 7

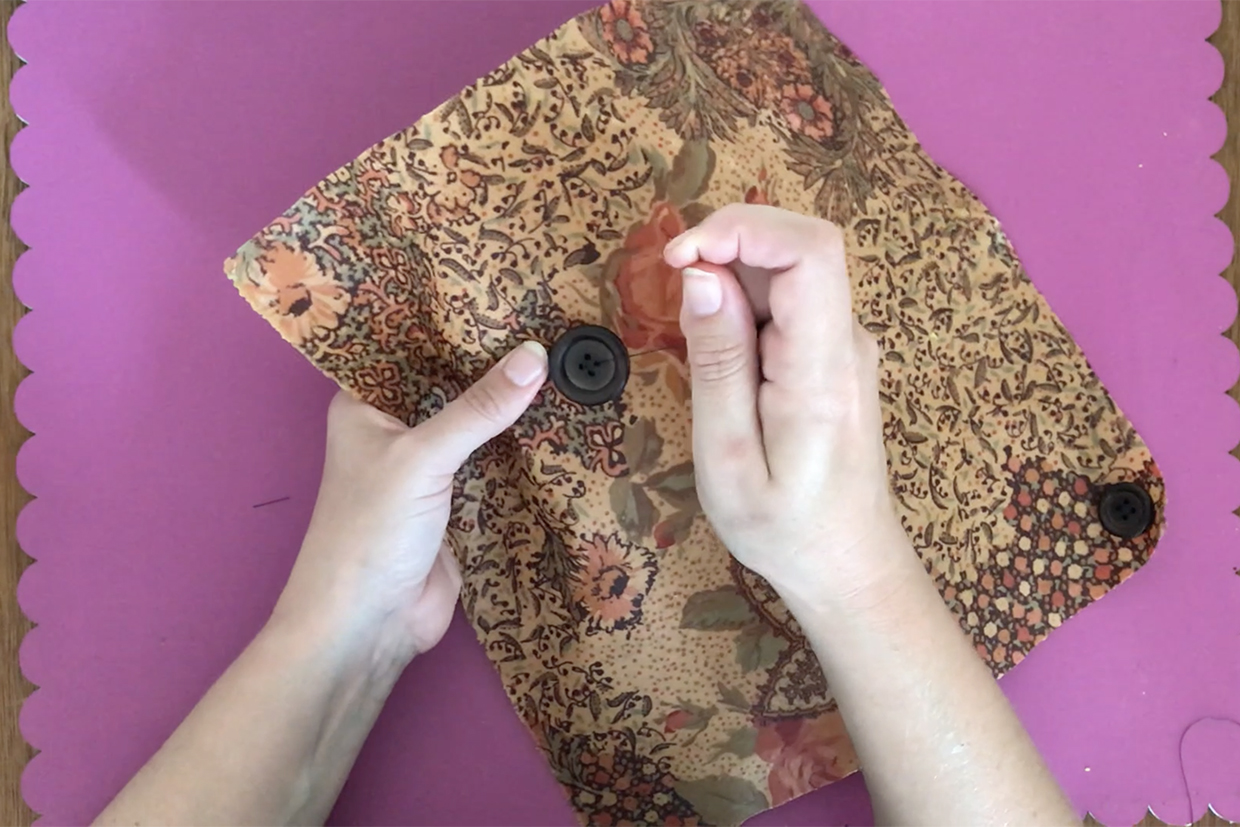
Once all the fabric has changed colour and no light areas remain, leave the beeswax to dry for a few minutes until it is cool to the touch. With the right side facing up, attach a button to one of the corners of the beeswax wrap using needle and thread.

Step 8


beeswax wraps diy step 8

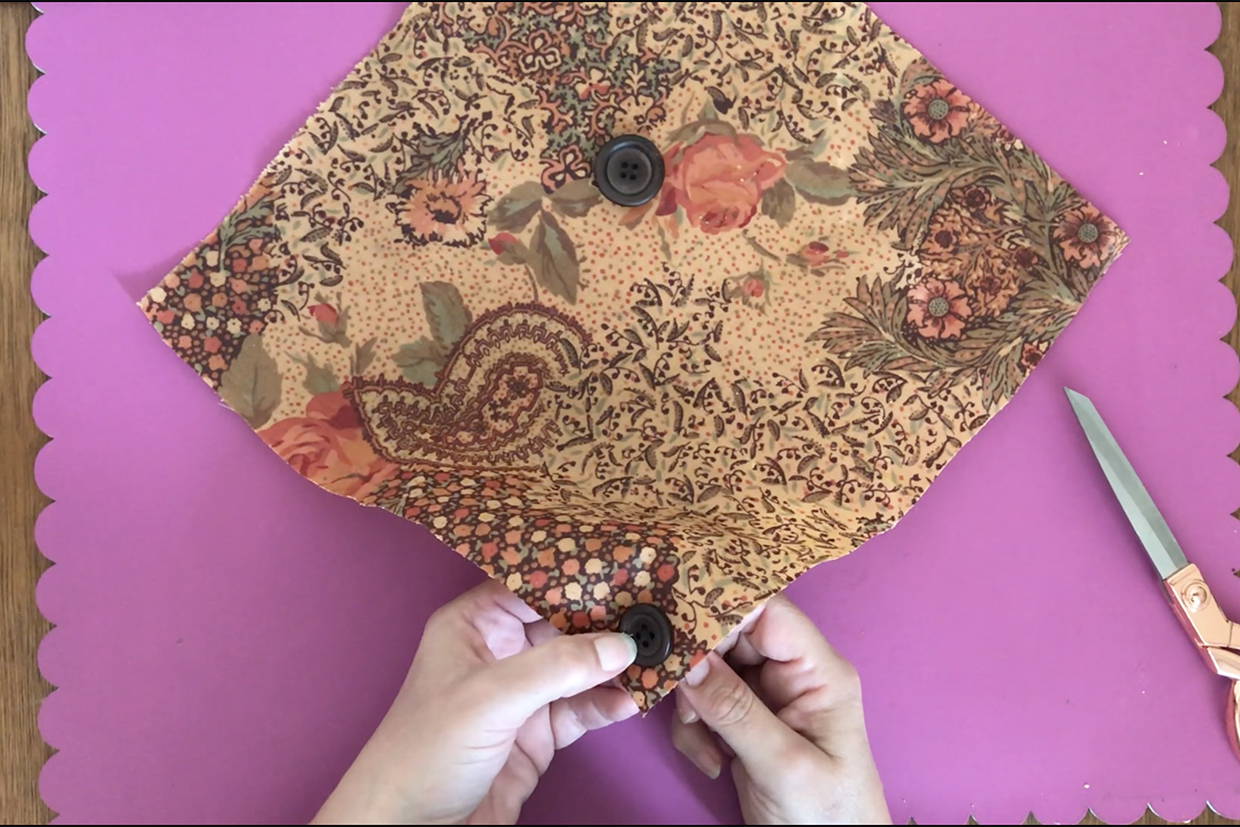
Attach a second button  on the same diagonal fold line as the first button, but place it 1cm up from the opposite diagonal folds line, so it is sitting just on the other side of the diagonal fold line to the first button.

Step 9


beeswax wraps diy step 9

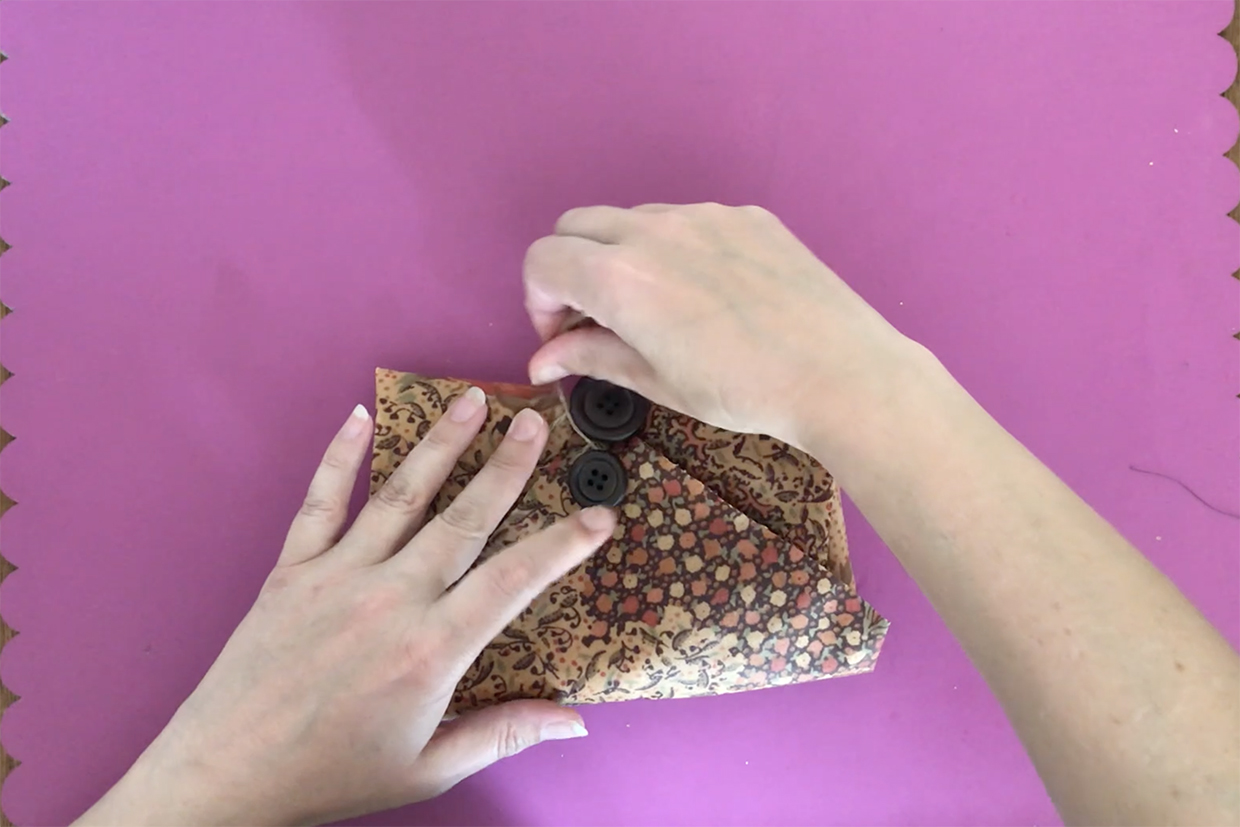
Place your sandwich in the centre of the wrap, fold the 2 non-button corners over it, then fold up the middle button edge and finally fold the corner button edge on top. Secure the wrap closed by looping twine between the two buttons. To clean the wrap after use, simply rinse in cool water and leave too dry. Do not wash up in hot water or you will melt the beeswax.

Making your own beeswax food wraps: FAQ

Why use jojoba oil in beeswax wraps?

Adding jojoba oil to your beeswax wraps makes them more pliable, less stiff and easier to mould into different shapes. This is not straightforward with the iron method, so we have not included jojoba oil in our how to make beeswax wraps tutorial. Instead, if you find it hard to mould your beeswax wraps into different shapes, hold it in your hands to warm it and maker it a little more pliable.

How to use beeswax wraps

In our how to make beeswax wraps tutorial, we’ve made our beeswax wrap into a reusable food wrap to wrap sandwiches, but if you don’t add the buttons, they work like a combination of cling film and silver foil. Use them to cover bowls of leftovers in your fridge, moulding the fabric around the bowl opening so it takes on the right shape and clings on. They are great for keeping cut herbs fresh in the fridge as they slow down desication without stopping things from breathing – this makes them great for non-sweaty storage of cheese, too.

How to clean beeswax wraps

Don’t use any heat to clean your wraps as this could melt the beeswax and shorten their life. A simple rinse under the cold tap is enough to clean off most foods, or apply a little washing up liquid on a sponge rinsed in cold water to get off any oily residues.

White beeswax or yellow beeswax wraps?

We’d say it is better to prioritise the quality of the beeswax over the colour. You need cosmetic or food quality for this project as the beeswax will be regularly coming into contact with your food. If you are using a white background fabric, white beeswax will give you less discolouration than yellow, but both will change the colour of your fabric. This is actually a useful feature that lets you see when your fabric is properly infused with the wax.

Is there a vegan version of beeswax wraps?

The great thing about using beeswax is it brings some antimicrobial qualities. But if you are avoiding animal products entirely, you can substitute in soy wax. Make sure the soy wax you use is certified for food use.

What about using pine resin to make my reusable food wraps?

Like jojoba oil, you can’t add pine resin using this easy ironing method, so we’ve not used it in our wraps. Adding pine resin in with the beeswax helps makes them more sticky and clingy, so they will grip on to things more which makes them a closer match for clingfilm. To use this, you need to melt down the beeswax and the resin together at a much higher temperature than you’d need to melt beeswax alone. Typically this is done in a saucepan on the stove – but it will ruin your saucepan for all other things. If you are keen on tying this method, you can find a tutorial from Countryfile magazine  click for the Countryfile beeswax wrap tutorial

How to make beeswax wraps materials

If you are struggling to get hot of the materials you need for our how to make beeswax wraps tutorial locally, here are some online options for you. But for maximum ecological benefit, we recommend you check out your high street scoop stores and natural beauty retailers first to save on postage packaging and emissions.

White beeswax pellets
how to make beeswax wraps WP

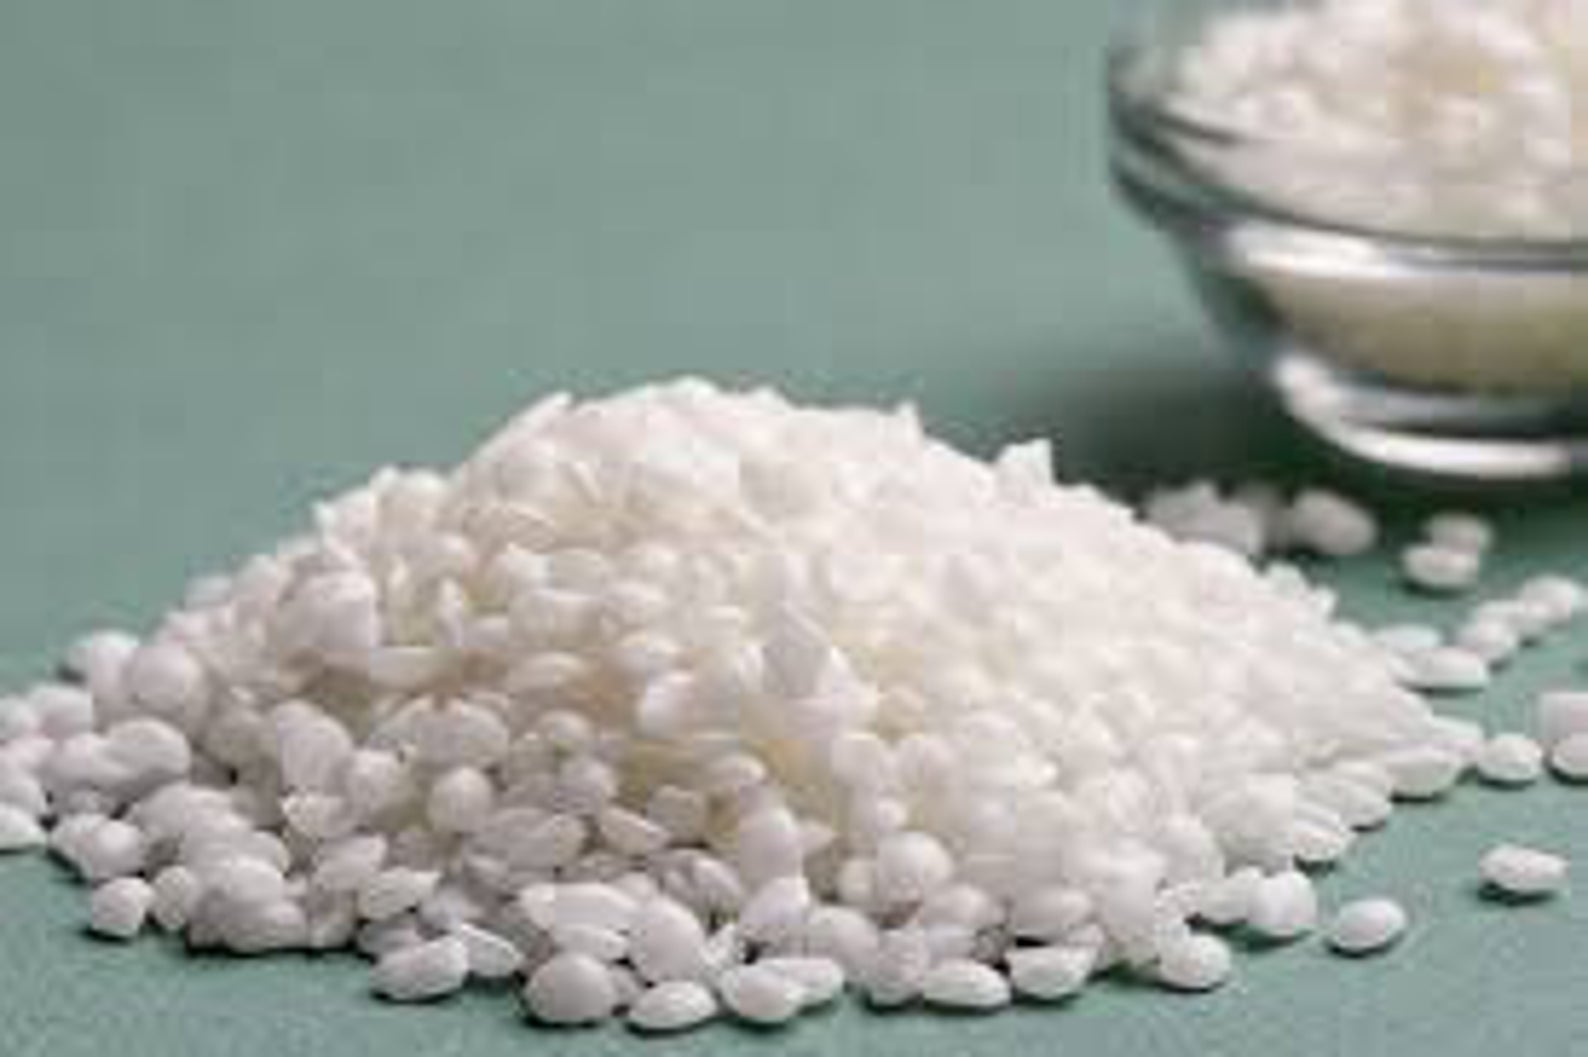
White beeswax is the colour to choose if you are using a light coloured fabric, as it won’t change the colour of the fabric as much as yellow beeswax pellets. But it is much harder to find white beeswax rather than yellow beeswax. Here is a great option to use with out how to make beeswax wraps tutorial if you have lighter fabrics. You can choose different quantities, starting at 1.7 fl oz, which should be enough to craft one large or two small beeswax food wraps.

Find on the AuthenticOilCo Etsy store

Beeswax wrap refresher
how to make beeswax wraps refresh

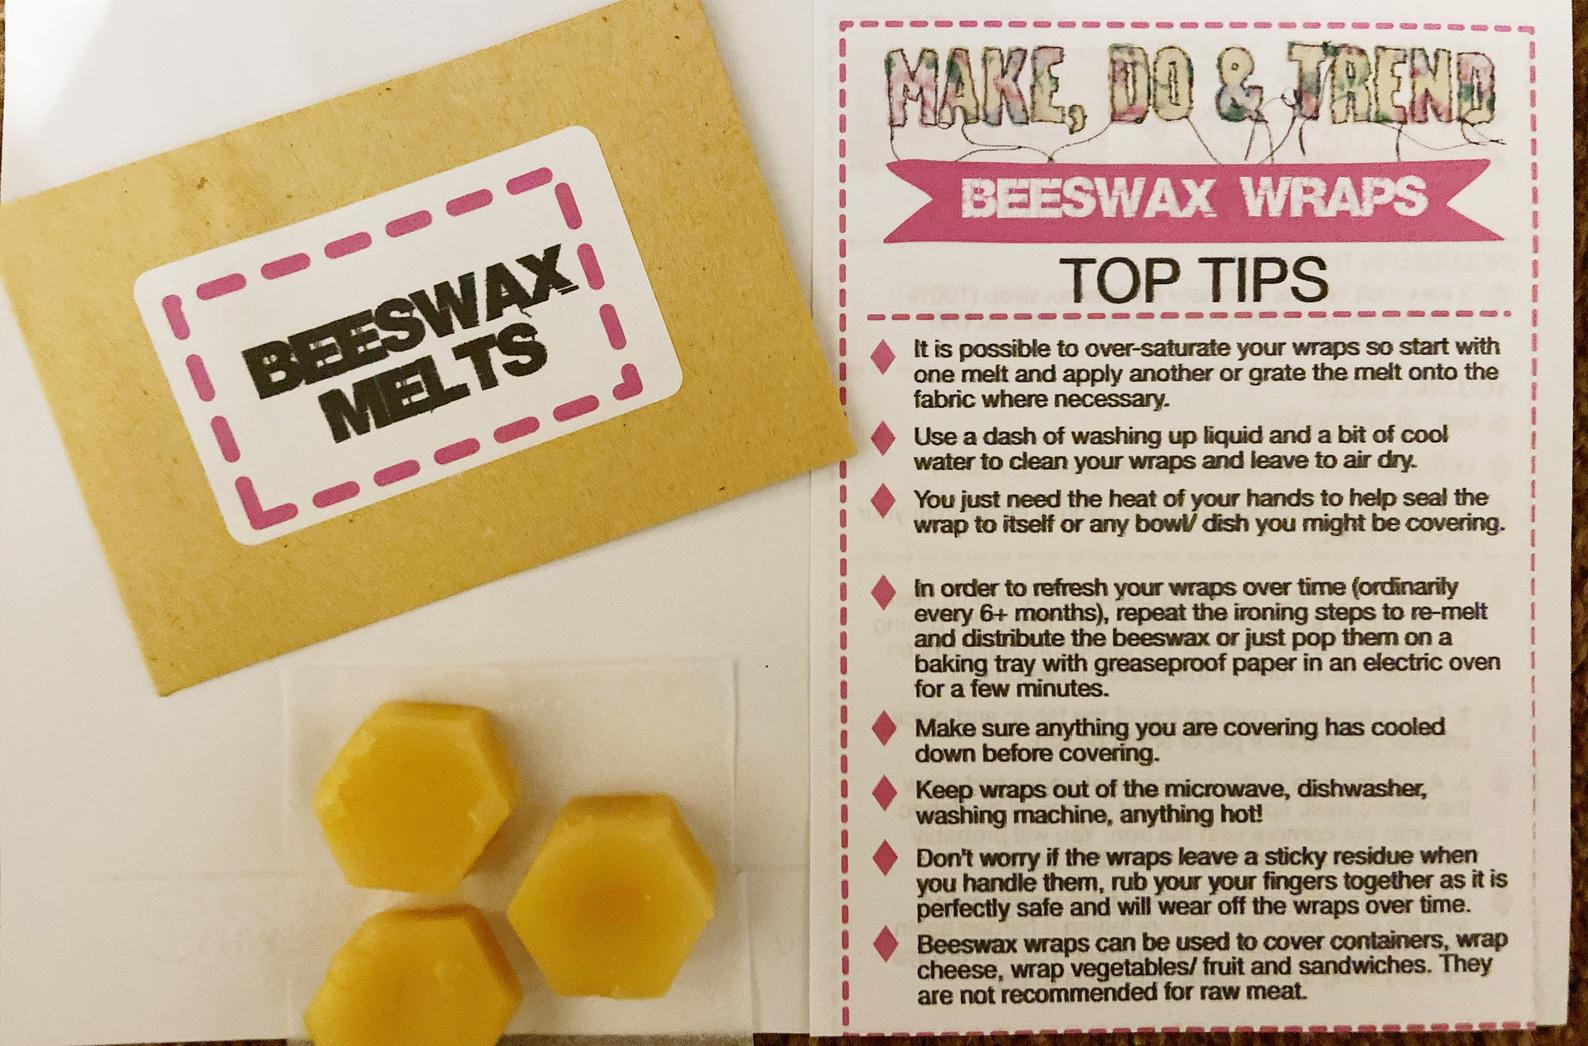
Here’s a handy little hack to use in our how to make beeswax wraps tutorial if you want to include jojoba and resin in your wraps. If you buy beeswax wrap refreshers, you can buy blocks of wax that have already been combined with jojoba and resin and then allowed to solidify again. So you can then grate the blocks and add to fabric with an iron, exactly as described in our how to make beeswax wraps tutorial, but with the added stickiness and pliability you get from having these two substances in the mix.

Find on the MakeDoandTrendUK Etsy store


More like the how to make beeswax wraps tutorial

If you have enjoyed our how to make beeswax wraps tutorial, try one of our other great natural beauty or plastic reducing projects! Learn how to make soap at home or how to make wax melts to fill your home with t e natural aroma of essential oils. Essential oils are a key ingredient in our how to make bath bombs projects well. Try our how to make reusable cotton pads project in easy beginner crochet, or upcycle old clothes and fabric scraps in our with our t-shirt yarn patterns article and our how to make a rag rug with hessian tutorial.