Mug cosy pattern

Mug cosy pattern

Use Samantha Stas's mug cosy pattern to make your own super cute mug cosy. Your fingers will be protected forever more!

Try 6 issues of your choice of craft magazine from just £9.99

Published: September 6, 2021 at 8:20 am

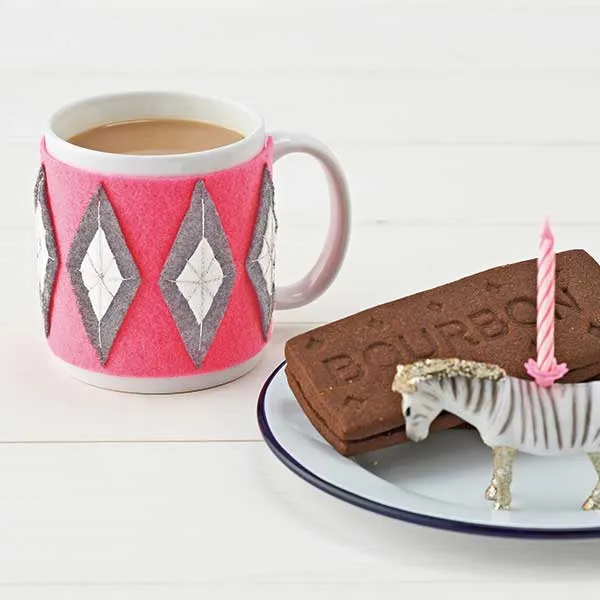
Stitch our exclusive neon mug cosy pattern with Samantha Stas. Go on, be a diamond! Samatha has created this mug cosy pattern just for you so you can keep your fingers protected from hot liquids. We love her neon palette but you could easily make yours in a more neutral palette. Or, for a stashbuster approach, use up spare felts and thread you have around the house. It would also make a great gift for new colleagues - we can just imagine you catching up over a cuppa with your new mug cosies!

This project is great for newbie sewists as it's all hand-stitched with a simple running stitch. If you are looking to up your mug cosy pattern then check out our sewing for beginners guide which teaches you how to use a sewing machine and a range of the best sewing machines for beginners. Now it's over to Samantha...

Neon doesn’t have to be an 80s nightmare. Touches of neon can really pep up your interior. I have a real love of 1950s and 60s fabrics and patterns, and own quite a collection of textiles, books and clothes from this era, so decided to team this up with the trend for neon. I find the geometric shapes and lines and bold use of colour very inspiring. The mid-century period was often called ‘contemporary’ in style terms, and has been copied time and time again, giving it a real place in design history. I’ve used an elongated diamond shape, simply overlaid and repeated – a common style from the time. The metallic thread lifts it slightly, while the neon pink felt brings it right up to date.

Samantha Stas

Learn how to make Samatha's easy felt mug cosy, as seen in Mollie Makes 37, below…
How to make a mug cosy cropped

You will need:

Mollie Makes 37 free craft kit OR • 3ocm x 9cm grey and neon pink felt • 9cm x 9cm turquoise and white felt • Neon button • 6cm x 2cm Velcro • 1m silver sewing thread • Needle and thread

Download the templates from Mollie Makes issue 37.
Mug cosy pattern

You will need:

  • Felt
  • Velcro
  • Thread

Step 1

How to make a mug cosy step 1

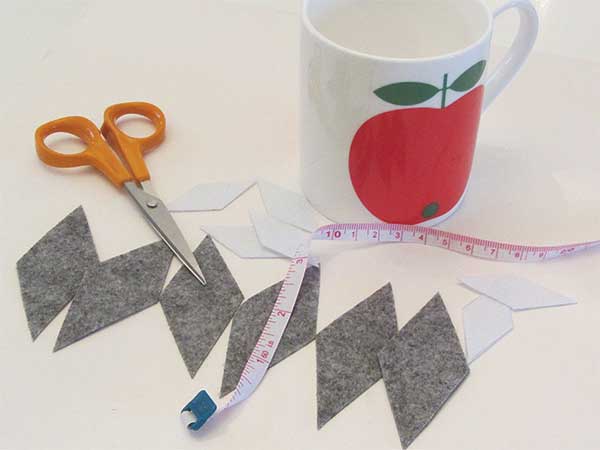
Using the templates provided, cut out the diamond shapes.

Step 2

How to make a mug cosy step 2

Take the mug you wish to make a cosy for and measure its depth and circumference. This project works best on a straight-sided mug as opposed to one that ‘flutes’ at the top. Trim the pink neon felt to fit. Using the template cut the tab shape at one end, allowing an overlap of about 3cm (1¼).

Step 3

How to make a mug cosy step 3

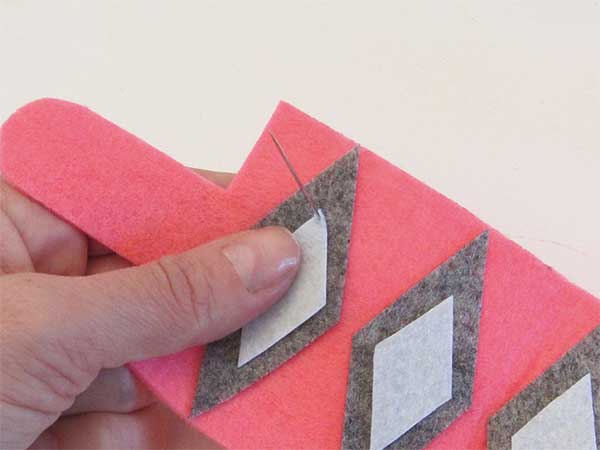
Lay your larger grey diamonds out along the pink neon felt and, once you’re happy with the spacing, stick them down using just enough fabric glue to keep them secured in place. Do the same with the white diamonds. You can also use the black and white thread provided to ‘tack’ down the diamond corners and prevent them from curling.

Step 4

How to make a mug cosy step 4

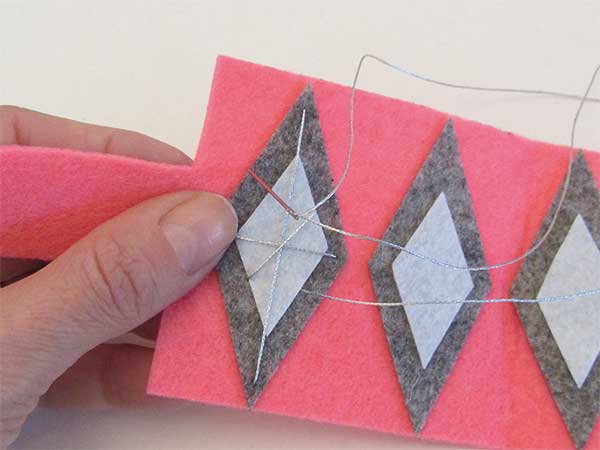
Thread your needle with the silver thread and create one large stitch from the top to the bottom of the grey felt diamond. Bring your needle back up and create a second stitch diagonally across the middle. Start each stitch a couple of mm in from the point edges. Refer to the image above for guidance.

Step 5

How to make a mug cosy step 6

Once you’ve stitched the grey diamonds create the same pattern on the smaller white diamonds. This time, start the stitch just outside the diamond shape and taking it on the diagonal to form an ‘X’ shape. Try and keep your stitches nice and regular for a neater finish.

Step 6

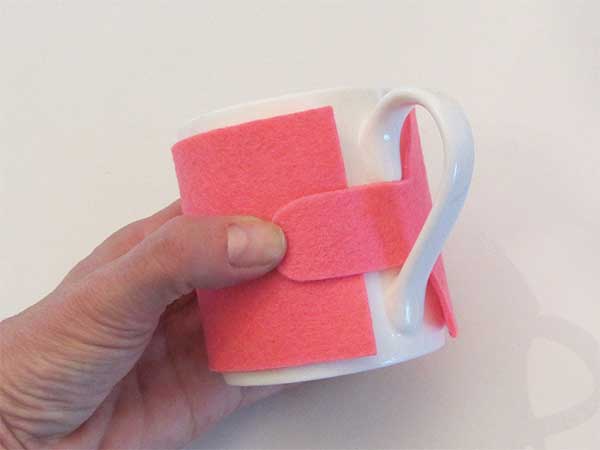
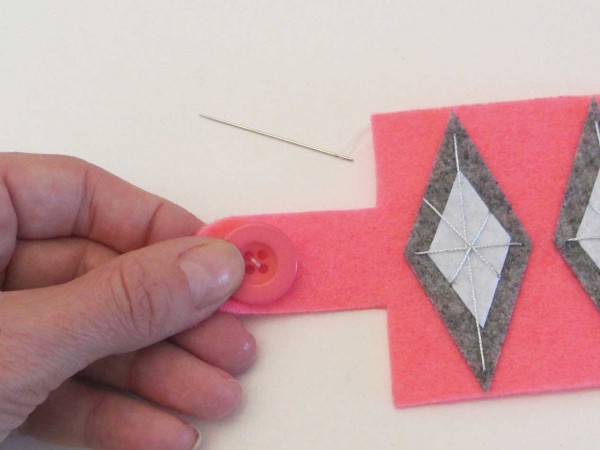
Almost time to put the kettle on! Sew the button in place on the outside of the flap then glue one piece of Velcro on the reverse of the button, inside of the flap. Grab your mug and locate where you need to place the second piece of Velcro, this time on the right side of the cosy. Try and keep the cosy quite taut around the mug. Once you’re happy, glue the Velcro in place. Leave enough time to dry before you attach them together or they’ll pull off. Your mug is ready for its debut tea break – now, where are the biscuits?

We hope you’ve enjoyed Samatha’s mug cosy pattern. For more sweet sewing patterns for beginners head to our free rabbit sewing pattern and our pinafore dress sewing pattern

Meet the maker

Samantha originally trained as a graphic designer but her passion for fabrics led her to work with textiles, which she’s been doing for over 16 years now. She works from home, producing an ever-evolving line of fabric homewares and accessories with a strong retro feel.