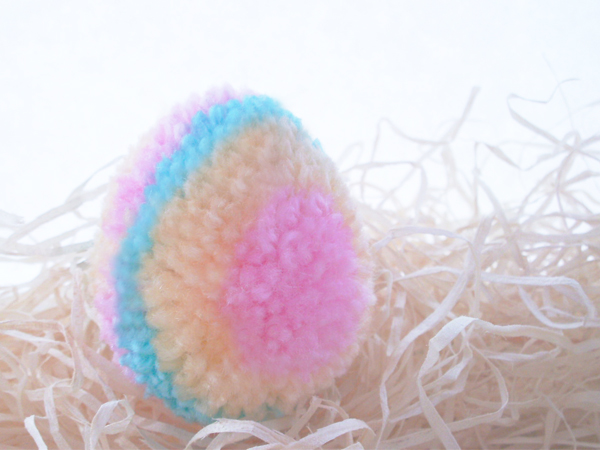
Make the DIY Easter pom-pom maker
Step 1
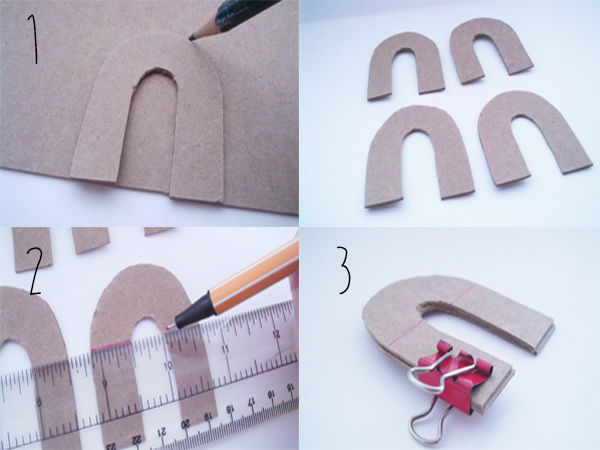
Make a DIY pom pom maker by cutting out four horseshoe shapes onto thick cardboard. You can make these as big as you like but for this tutorial, we’ve created 1.5” across and 2’’ tall.
Draw a guideline where the curved part looks like a half circle. If you are making pom poms with children, this helps to show them where to stop.
Take two horseshoes and hold them back to back with the lines visible on both sides. Hold it together with a small bulldog clip or paper clip. Do the same with the remaining two.
Making your Easter pom-pom
Step 1
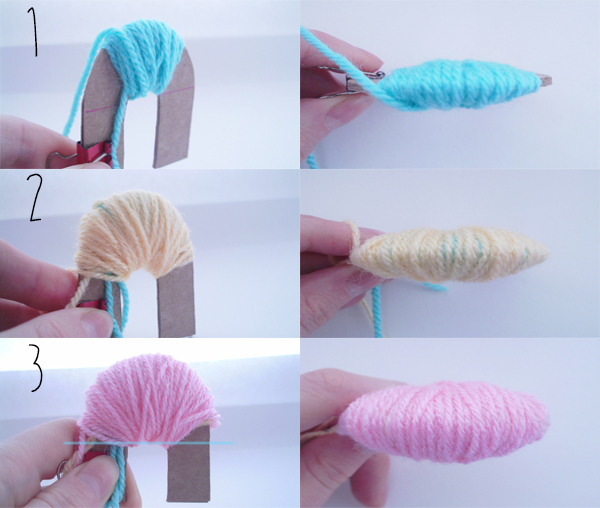
Now you need to wrap the yarn around the pom pom maker. To do this wrap blue yarn in the centre of your half-circle. Then with yellow yarn ‘fill in’ the spaces on either side of the blue to equal thickness, then wind a few layers of yellow yarn on top until the blue is fully covered. Wrap pink yarn on top until the yellow is covered and the inner curve looks flat.
Step 2
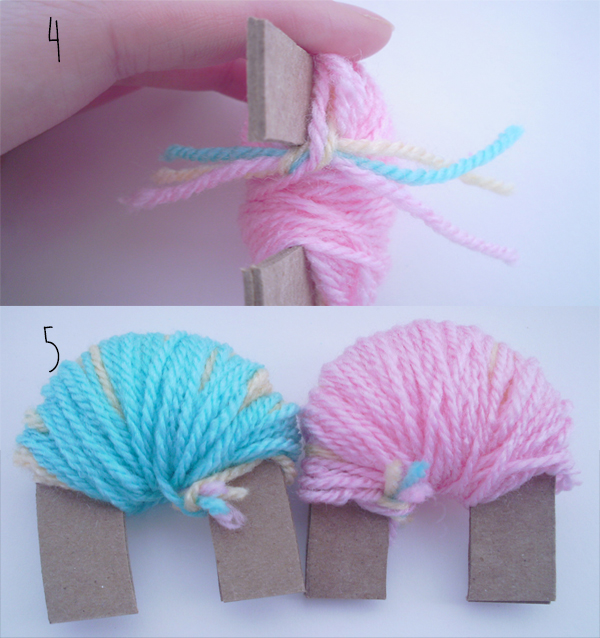
Next you need to cut the yarns and tie them off with a simple knot. For the second horseshoe wind the yarn in the same way, but with the colours reversed: pink, yellow and blue.
Step 3
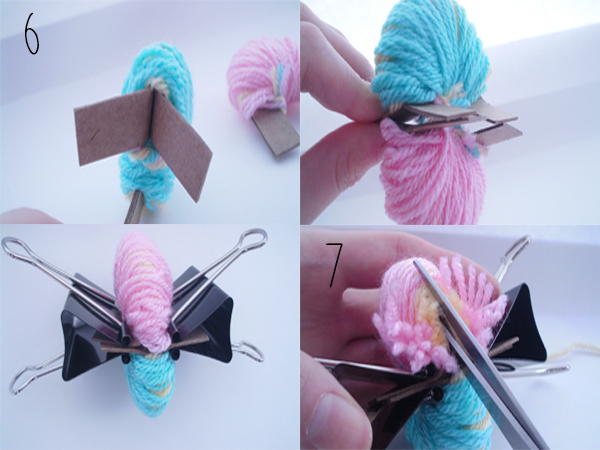
Bend all of the horseshoe’s tabs outwards so the tabs align. Hold in place with two large bulldog clips. Gently pull back the yarn where the tabs meet, insert your scissors and carefully start cutting in between the two horseshoes.
Step 4
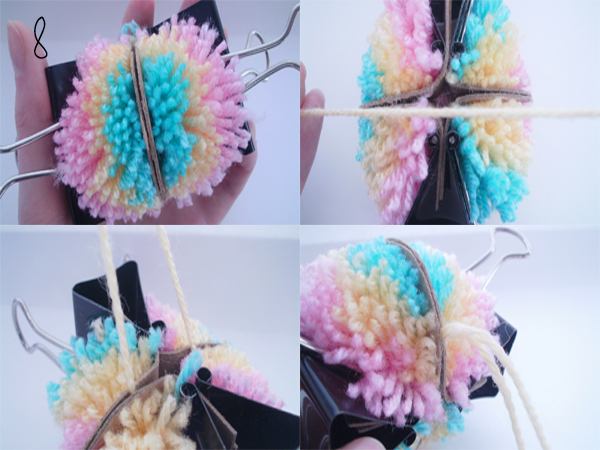
Slide a 25cm length of yarn in between the two pieces of card, wrapping it around the entire pom. Tie with a simple knot and pull tight twice to secure.
Step 5
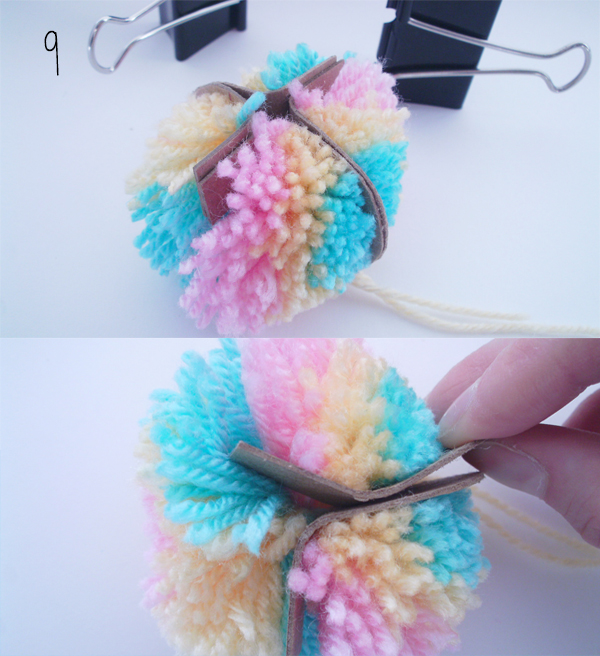
Take off the bulldog clips and carefully pull out each cardboard horseshoe one at a time.
Step 6
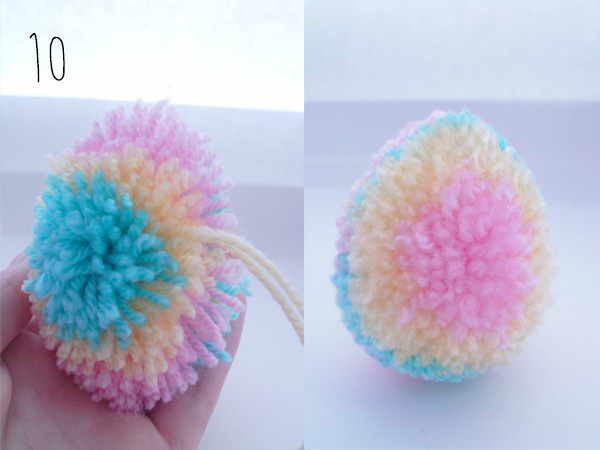
Your Easter pom pom should come out looking like an oval egg shape. Using the scissors, trim and neaten the shape until you’re happy with your egg!
