How to paint a watercolor portrait
All products were chosen independently by our editorial team. This review contains affiliate links and we may receive a commission for purchases made. Please read our affiliates FAQ page to find out more.

How to paint a watercolor portrait

Watercolor paints can be used to create stunning portraits. Learn how to paint a watercolor portrait step by step with Rhiannon Bull

Try our magazines – get 6 issues from just £9.99!

Published: April 3, 2024 at 8:00 am

A watercolor portrait can be a great way to develop your watercolor painting skills. However, If you’re not sure how to paint a portrait or are new to painting with watercolors, then a watercolor portrait can seem daunting.

Painting skin tones, hair, and detailed facial features all require different techniques to render them accurately. But breaking it down into smaller steps can make it easier to see how it’s done, and that’s exactly what I’ll be doing in this watercolor portrait tutorial.

I’ll run through some tips that will make it simple to paint a watercolor portrait, then will list out all the materials you’ll need to get started. I’ll also talk you through everything from choosing a reference photo to layer paints to get a realistic skin tone, to painting the details of someone’s face.

I’ve been painting portraits for more than a decade, but I never get tired of capturing faces on paper. I paint in a variety of different mediums, but I like watercolors for the subtle color variations you can develop by layering different colors into skin tones.

Watercolors are also great for combining a more realistic portrait with a stylised background, providing an easy and interesting way of giving your portrait a ‘painterly’ look.


Tips and techniques to make watercolor portrait painting easier

In my experience, there are a few things you can do to make watercolor portrait painting easier:

  • Paint in light layers. It’s tempting to put loads of color down on paper right away, but using lots of lighter layers makes it easier to correct a mistake and to build up more smoother skin tones.
  • Wait for layers to dry properly. Patience is a virtue when it comes to watercolor portrait painting – if you don’t wait for each layer to dry before starting on the next, your layers will muddy and blur into one another.
  • Use different brush sizes. You’ll want a bigger brush to cover larger areas quickly, and a smaller brush to paint in fine details.
  • Keep one clean brush for blending. A clean, damp brush can help smooth out harsh lines, or be used to “pull” paint across the paper.
  • Keep paper towels to hand. A paper towel is essential for making sure your brushes aren’t too wet, and for quickly fixing any minor mistakes.

Materials you'll need for your watercolor portrait

To create your own watercolor portrait, first of all – you guessed it – you’ll need some watercolor paints. I mostly use the Winsor and Newton Professional Watercolour tubes, as I find they dry to really bright, saturated colors. If you’re intending to sell your original artwork, then professional-grade paints are also important because the paint won’t fade over time.

If you’re just getting started, paint as a hobby, or plan to turn your painting into digital art to sell as prints, then a cheaper set can look just as good. I like the Winsor and Newton Cotman range. For this painting, I used a set from an Artful subscription box.

It’s also really important to use paper designed for watercolors. Thinner papers won’t be able to absorb the paint, so you’ll end up with crinkled paper that disintegrates as you paint more layers onto it. Most recently, I’ve been using the Cass Art own-brand paper.

I’m not fussy about the brushes I use, but I find that a tip that tapers to a fine point works well for the detail needed for watercolor portrait painting. It’s good to have at least a few different sizes – I swap between these as I paint.

Finally, it’s helpful to have some masking tape on hand to fix your paper to a desk or board. If you don’t have any, washi tape works almost as well.

Watercolor paints

Here are some recommended watercolor paint sets to buy…

Watercolor paper

Watercolor brushes

Want to stock up on art supplies? Check out our guides to the best watercolor paints, best acrylic paints or buy the best drawing tablet for beginners.
Step-by-step guide to watercolor portrait painting

Step 1

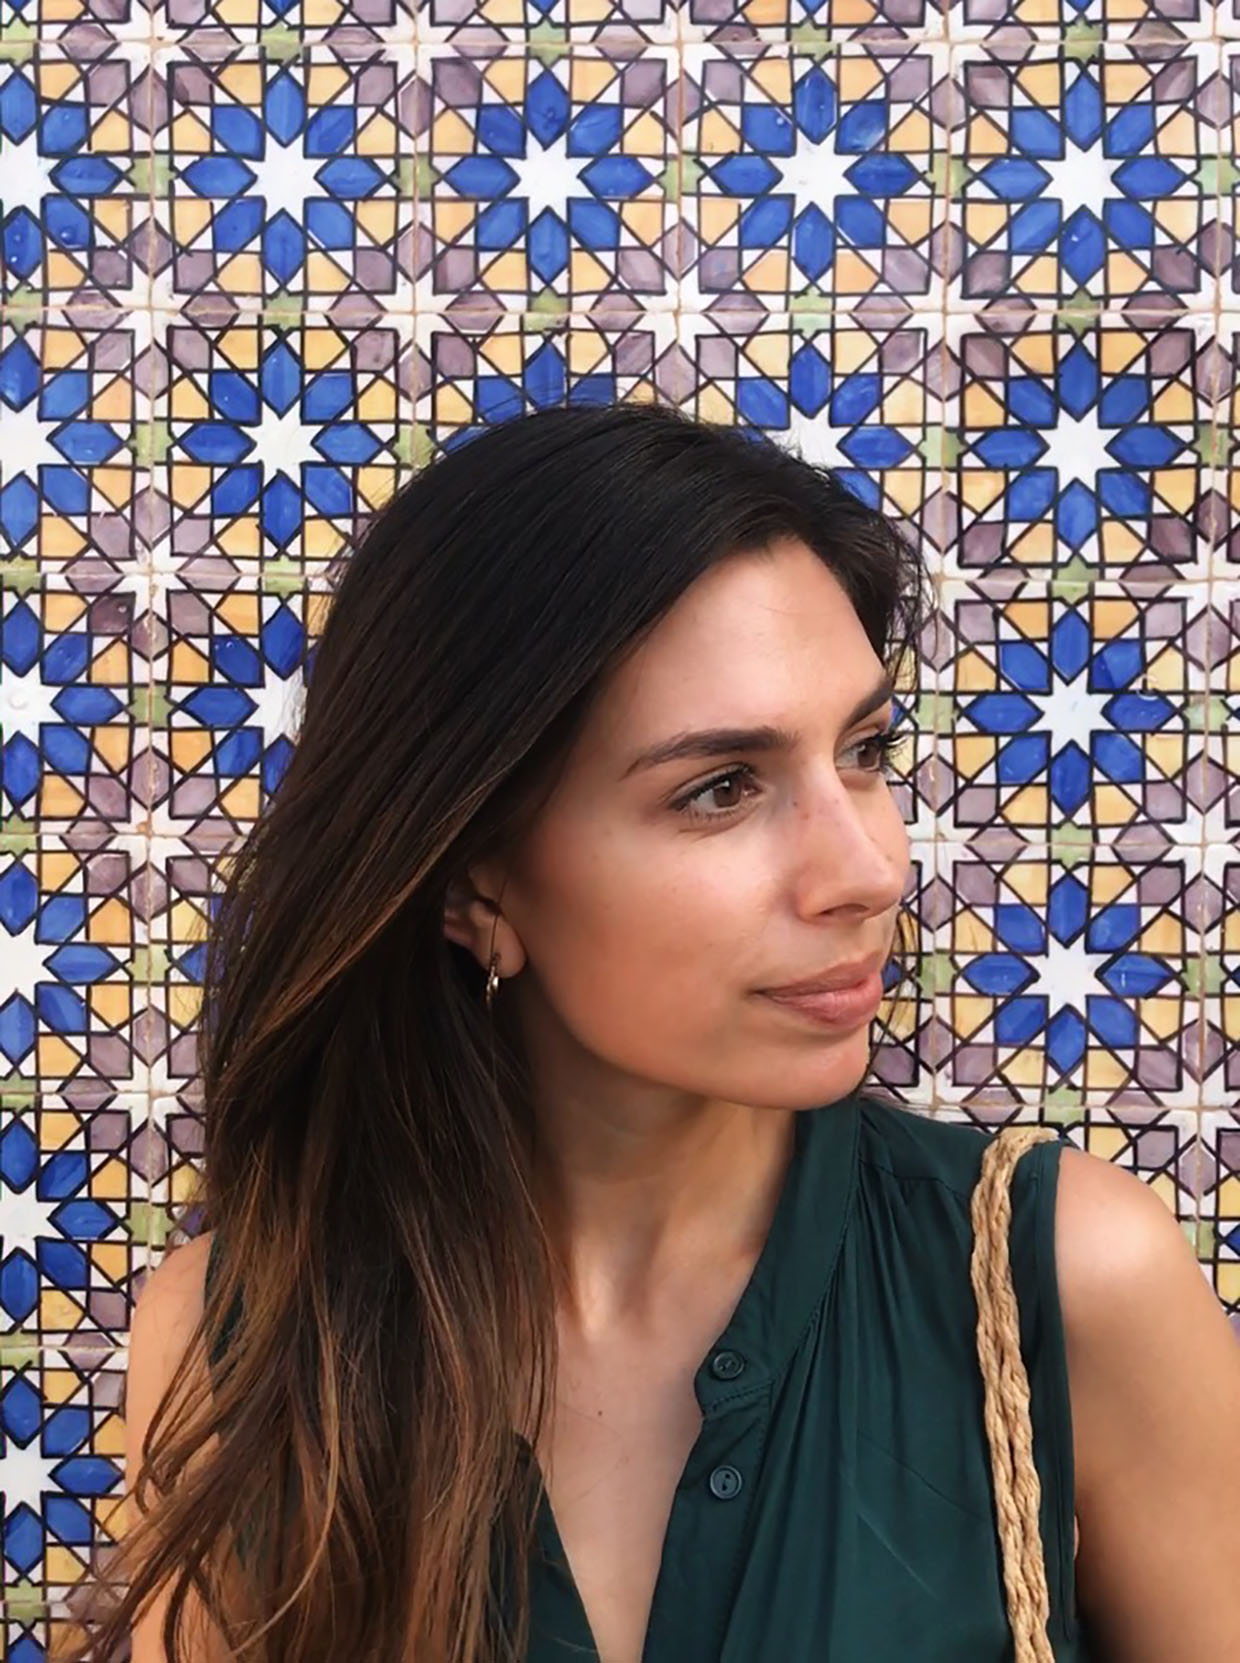
Before you start painting, spend some time choosing a reference photo. Bearing in mind the following considerations will make painting easier:

🎨  Choose a good quality photo. These days, that doesn’t necessarily mean you need to use a DSLR – the reference photo I used here was taken on a phone – but you want your subject’s face to be big enough to see the details without the image looking blurry.

🎨  Opt for dramatic lighting. Contrasting areas of light and dark will make for a more interesting painting and will be easier to paint.

🎨  Choose a photo you’re excited to paint. Sounds obvious – but if you’re feeling inspired by an image, that probably means it’s a good one to choose!

Once you’ve chosen your photo, take some time to study how it’s built up. Where are the darkest and lightest areas? Are there any areas of colors in the skin you don’t usually associate with skin tones, such as greens or lilacs or pinks? Where are the very brightest areas, which you might want to leave completely white?

Taking the time to look at your photo properly now will make sure you end up with the most realistic watercolor portrait.

Step 1 – reference photo


Step 2

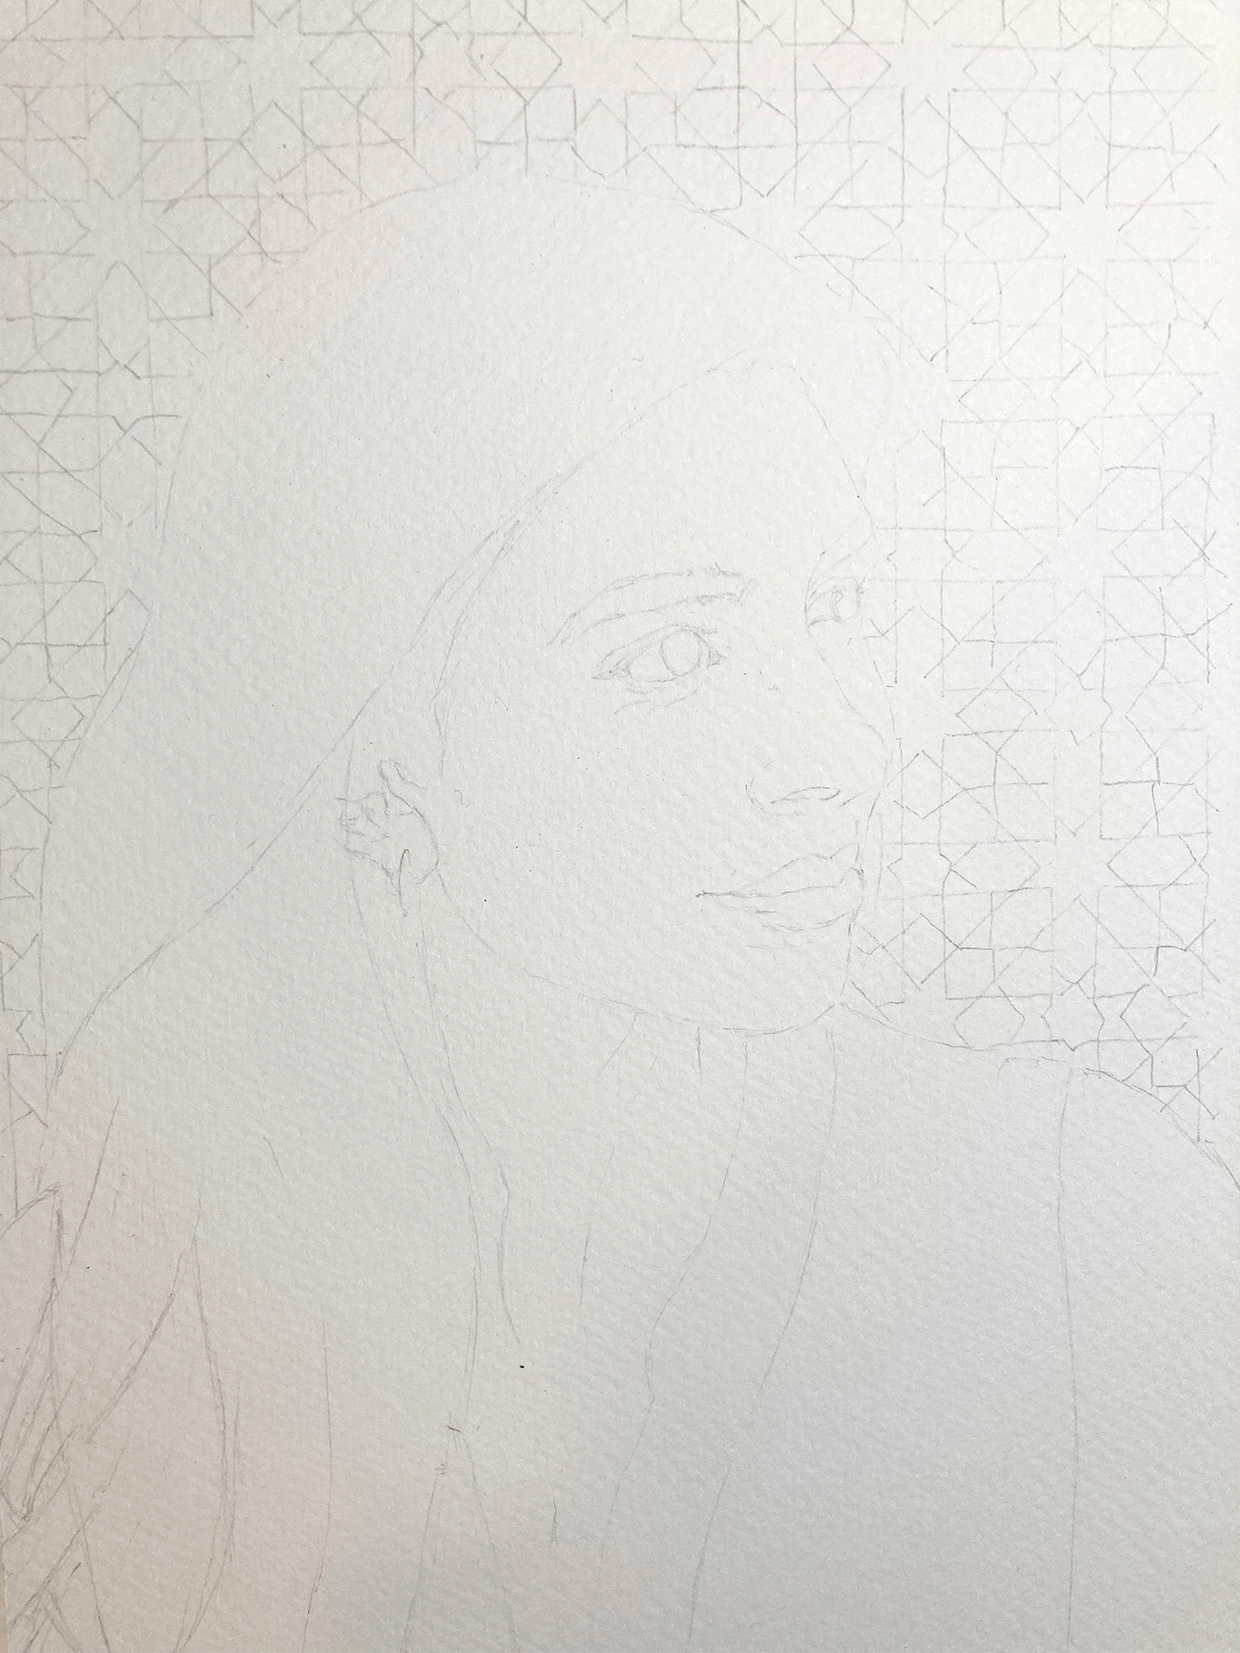
Next, sketch out the portrait. This will help you to get a better likeness of your subject when you start painting.

Be aware that dark pencil marks will show through transparent watercolors and can muddy the paints. This means you want your pencil sketch to be as light as possible.

To make this easier, I usually complete a preliminary sketch on a separate piece of cartridge paper, then use a lightbox (or alternatively a window and some masking tape works almost as well) to trace over the top using a very light pencil – I typically use a 4H, but an HB used very lightly should work fine.

If you’re not confident in your sketching skills, you can always use the same method to trace out a printed photo. Starting with a sketch can be a good way of improving other elements of your skills in portraiture, but there’s nothing wrong with making life easier for yourself while you’re learning!

Once you’ve finished your sketch, use masking tape to fix your painting to a board. This will give you a neat border at the edges and lessens the amount your paper will warp.

Step 2 – Faint pencil


Step 3

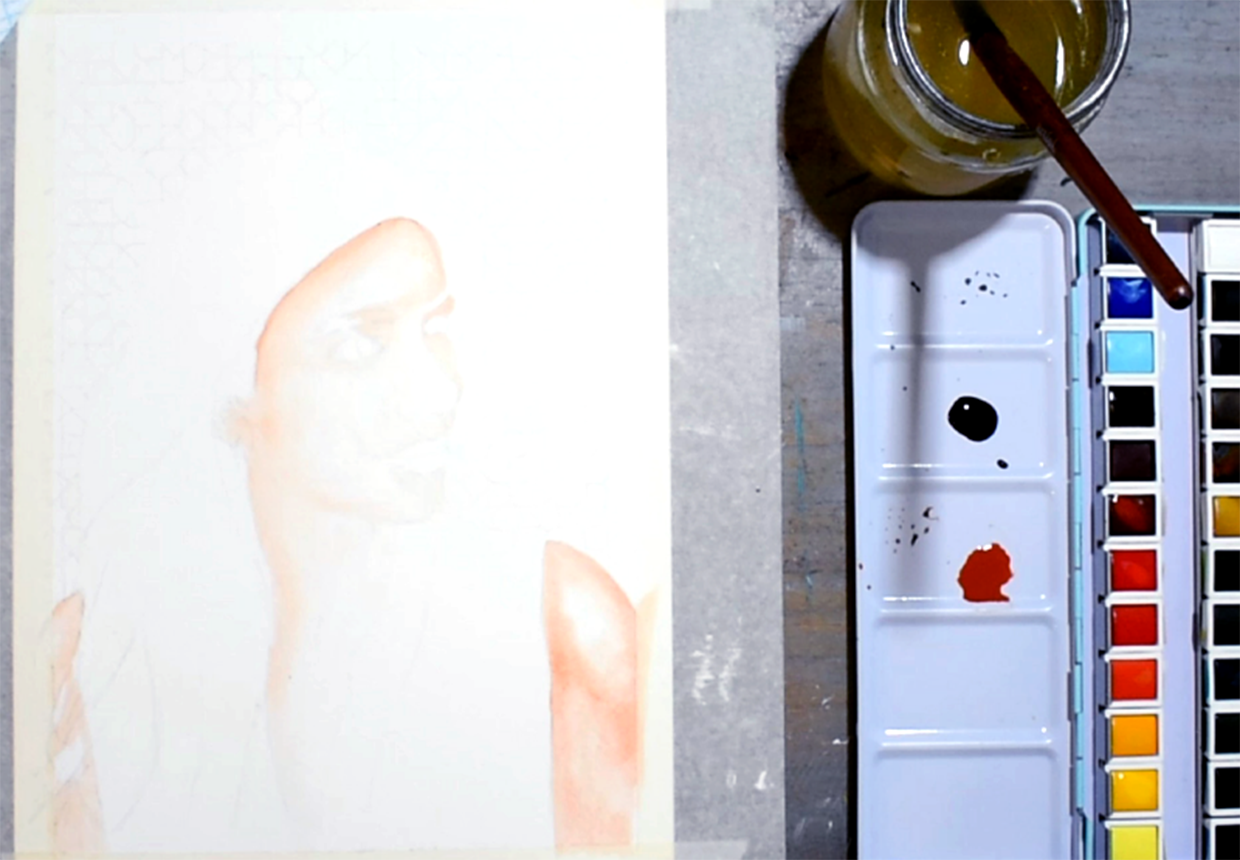
Having carefully studied your photo in step 1, you should already be aware of any areas you want to leave white (without any paint), so remember to note where you don’t want to put down color.

For example, I always leave a flash in the eyes to make them look more alive. If you’re not confident you can paint neatly enough to leave any smaller highlights completely white, use masking fluid to cover those areas now.

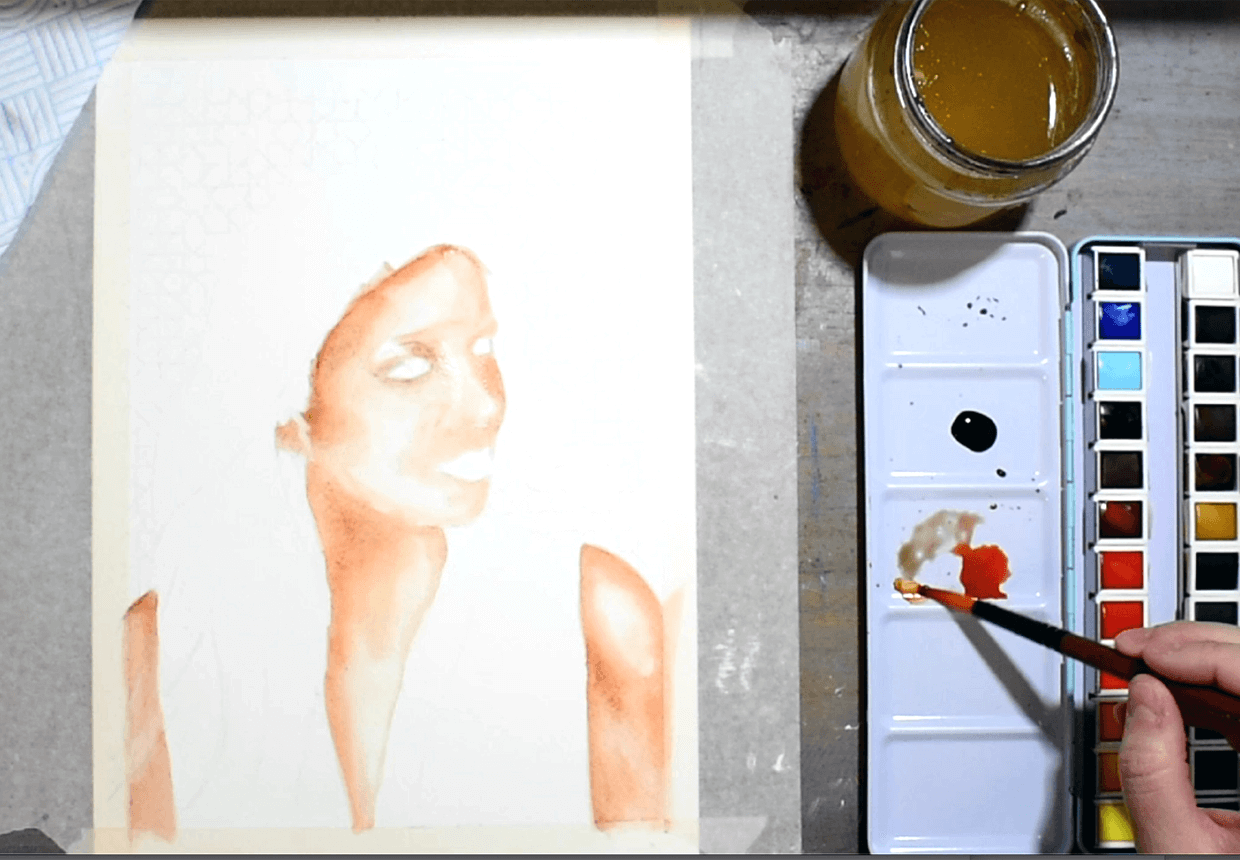
Skin is smooth, and the color change is gradual, so I always recommend painting in the lightest, softest layers you can when it comes to building up skin tones. Start by looking at the lightest tones in your reference photo and mix up some paint to match that.

If you’re new to mixing skin tones, I recommend having a spare piece of paper nearby where you can test out your colors before putting anything down on your watercolor portrait.

To make sure that you don’t end up with harsh lines on the skin, there are a couple of painting techniques I’d recommend here. The first is to paint wet-on-wet. This means wetting the area you’re planning to paint with plain water before adding color.

The second is to use the ‘pulling’ technique I mentioned earlier. This involves putting down a slightly darker color, then using a clean, slightly damp brush to pull the paint away. Keep the brush angled so that you’re using more of the side of the brush on the paper. This allows you to transition smoothly from a dark to light area of the painting.

Step 3 – adding light skin tones


Step 4

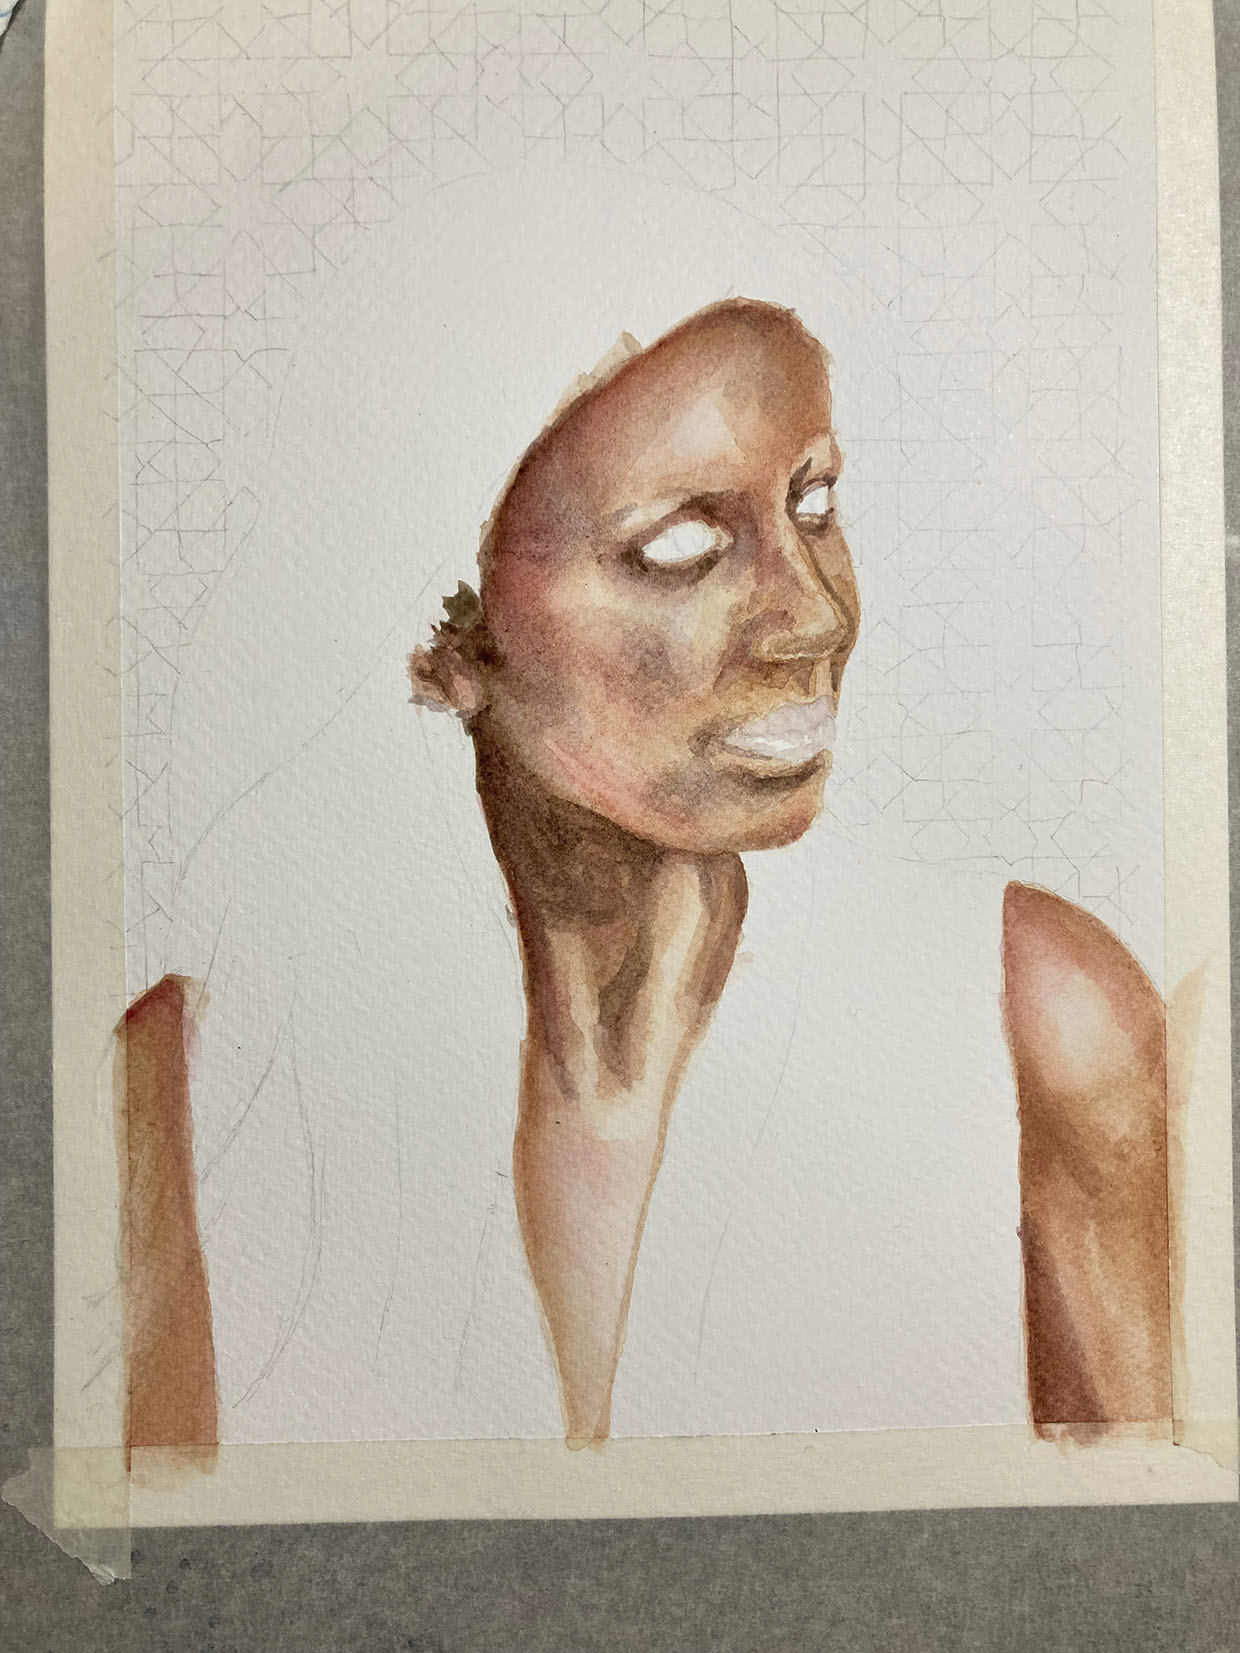
Keep adding more and more layers to darken the painting. Remember to be patient and let each layer dry before moving onto the next! Try varying the shades you’re using between layers to get a less uniform look. Your earlier study of your reference photo will help you here.

Are there some areas of the face with a yellower tinge? Do those shadows look grey? Is there a slight pinkness to the nose? These subtle changes will make your painting look more realistic.

Step 4 – adding more layers

As I move to paint the darker areas of the portrait, I tend to move away from painting wet-on-wet to using more of a pulling technique, as I find this lets me contain the paint to the (usually smaller) darker areas.

Step 4 – final layered skintones


Step 5

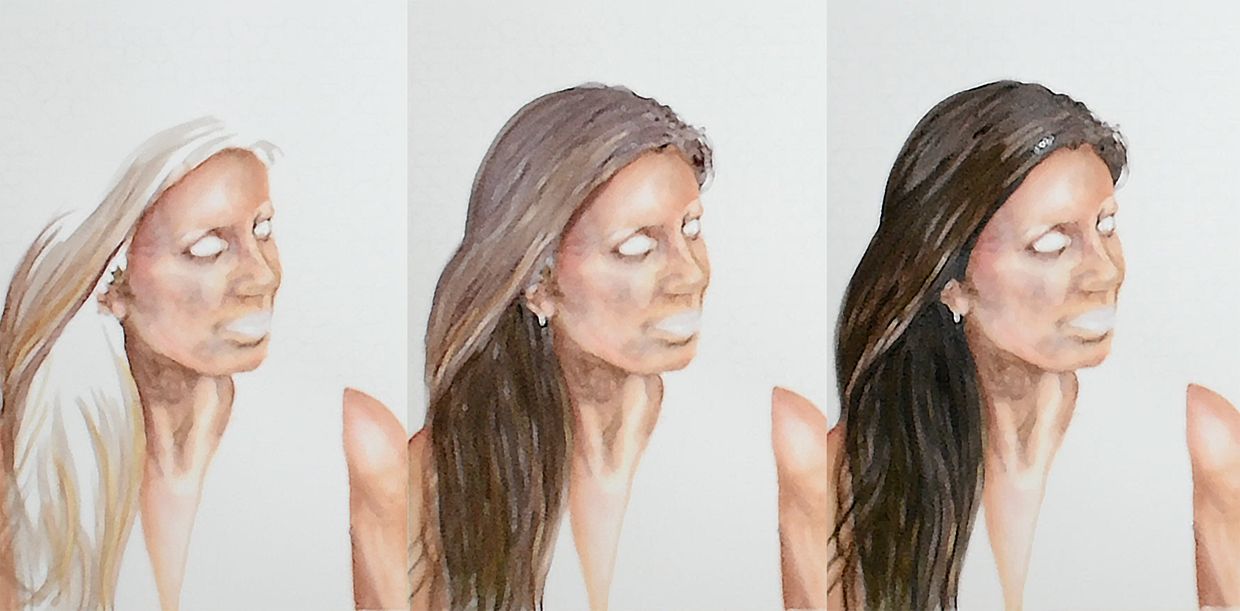
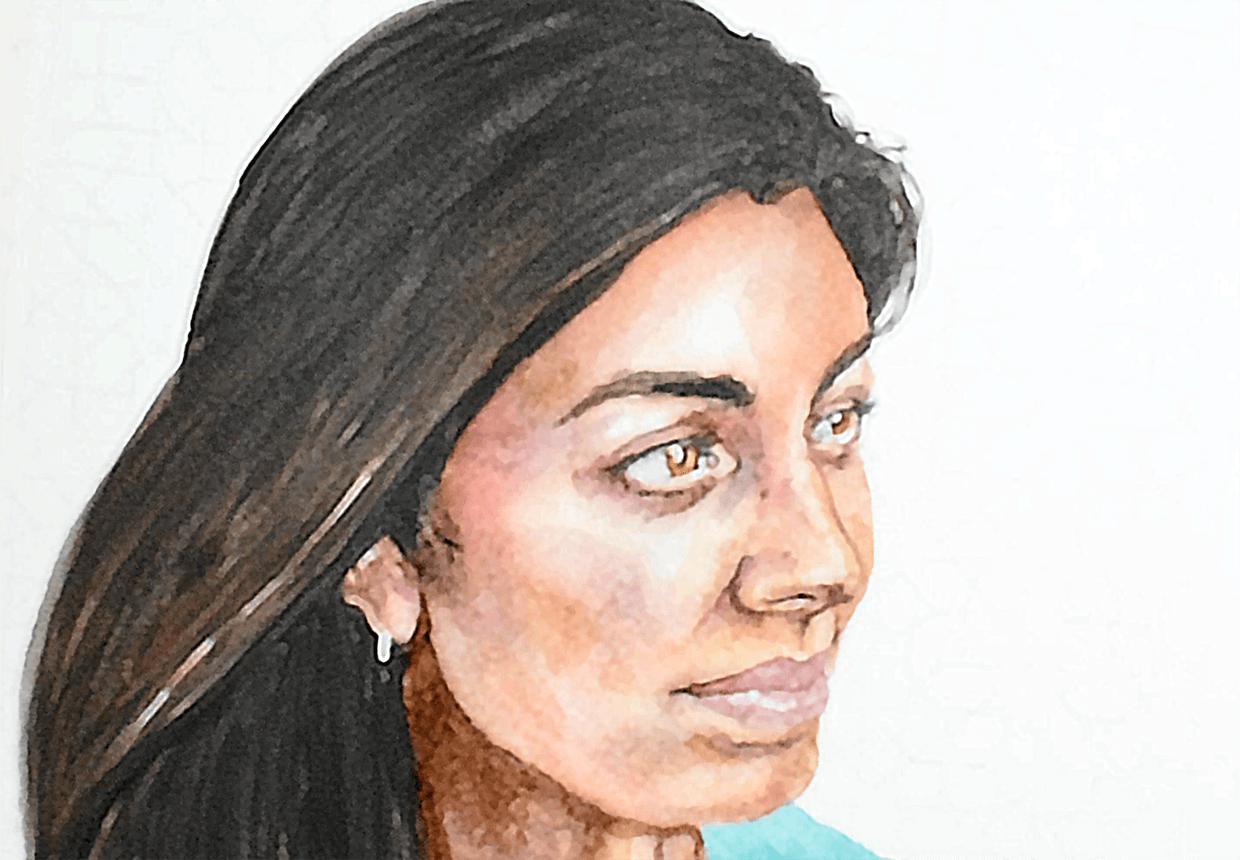
Your painting might look a little odd at this stage, without any of the facial features painted in – but at this point I usually pause to get the hair and clothes down on paper.

Adding these values often changes the look of what you’ve painted so far, so adding them in at this stage means you can still make some tweaks to the skin tones when you come to paint the facial details.

Just like with painting skin, I recommend painting hair in gradually darker layers to give it a more realistic look. I alternate between simply layering on more and more paint, so that the colors blur slightly, and waiting for each layer to dry, so that I can paint in individual hairs.

Step 5 – layering hair


Step 6

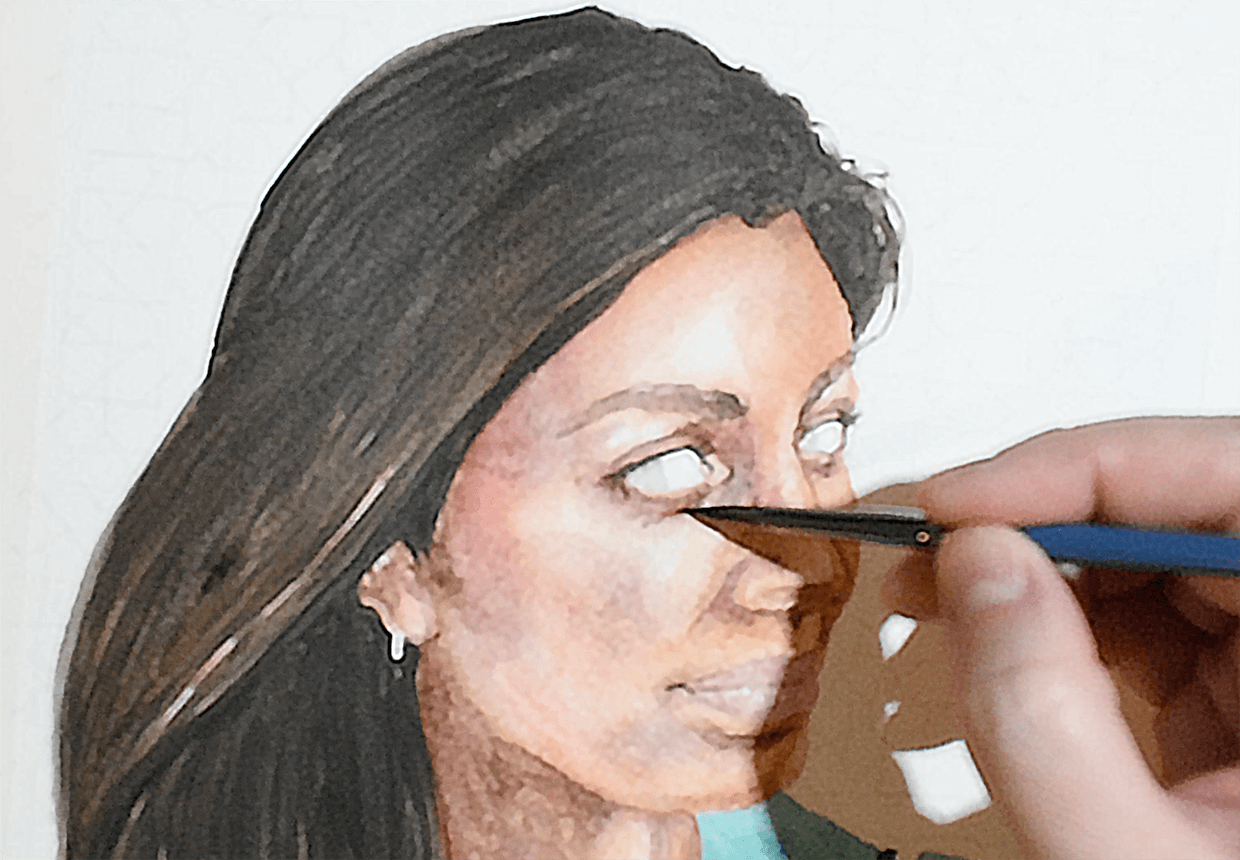
Once the bulk of the color is down and everything is completely dry, I use a smaller brush to paint in the facial details – the eyes, eyebrows, nostrils, and lips. I still paint these in layers but tend to paint onto dry paper to allow for sharper lines.

Step 6 – facial details

This also tends to be the stage when I feel more confident adding in any more ‘unusual’ colors in skin tones, since a light application of color looks less dramatic once you’ve already got the ‘main’ skin tones down.

In this case, there were some areas where I introduced some pale lilacs and some yellower areas.

Step 6 – more facial details


Step 7

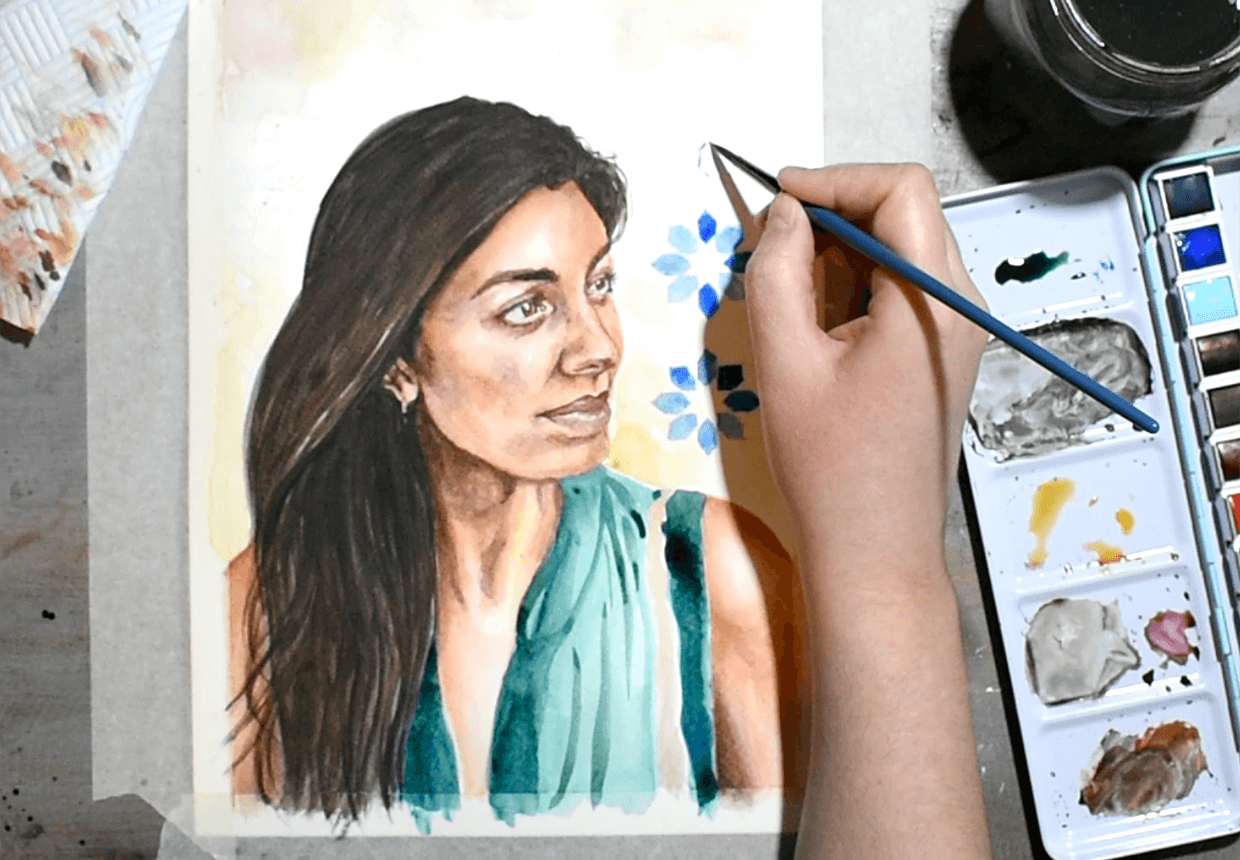
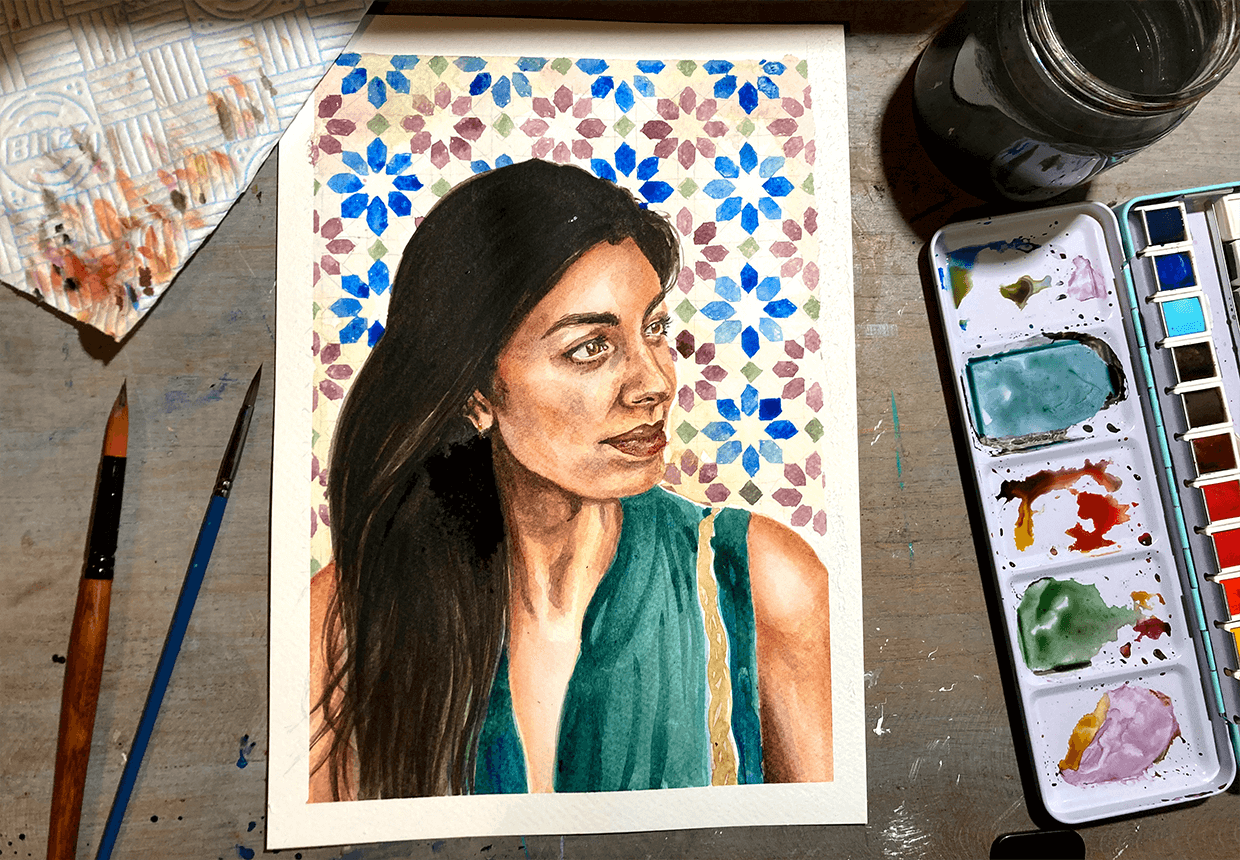
When I’ve finished refining the face, I move on to paint the background – if I’m including one. Often, I think a watercolor portrait looks striking with the background left plain. If you are painting in a background, think about what kind of look you want your finished piece to have, and what will suit the portrait.

For example, if you’ve got a very dramatically lit portrait, with lots of areas of skin left very light, then some color on the background (or even a wash of grey) can help make the lighting pop.

Alternatively, you might decide to give your watercolor portrait a more stylistic look by mixing your realistic portrait with an expressive background.

You can get some beautiful effects by really playing with the paint, allowing it to dribble down the page or flicking the brush towards it to create a spattered effect. In this case,

I liked the tiles in the reference photo, so I decided to include these. But as you can see, I painted in a simpler version than in the photo, helping to keep the focus on the person in my portrait.

Step 7 – background


Step 8

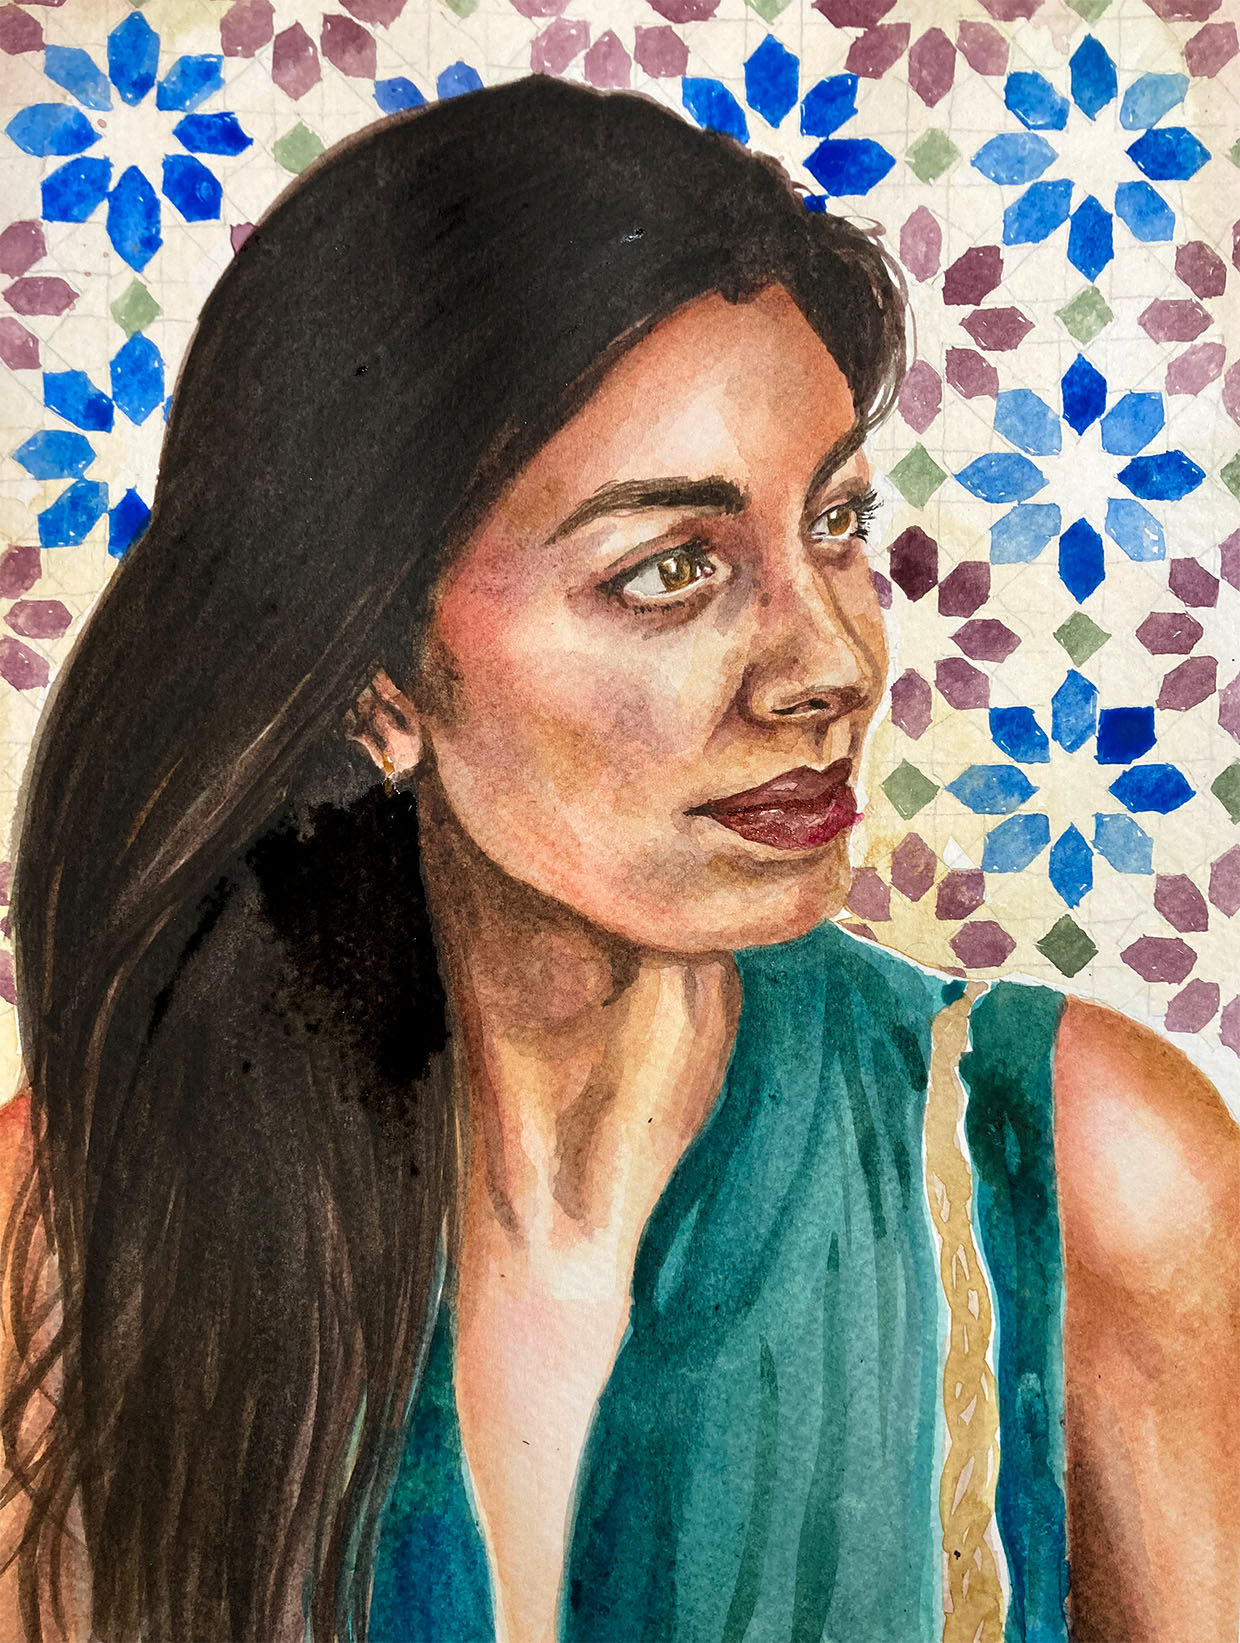
At the very end, I add a final wash of dark paint to the very darkest areas of the painting – here, to the hair, some areas of the skin, and the mouth. Upping the contrast at the end makes your watercolor portrait really pop.

Step 8 – final image


Your watercolor portrait is now finished! Make sure to let your painting fully dry before removing from your pad or placing in a frame.

Finished watercolor portrait

Practice will make your watercolour portrait perfect

You should now hopefully be feeling more confident about trying a watercolour portrait. But with so many different elements that make up a portrait, it's important to give yourself time to experiment and learn from your mistakes. Even the best artists can struggle with capturing a persons likeness, but keep practicing and you'll quickly start to get a feel for it and find ways to add your own creative style.

Get inspired with Gathered.

Painting a wide range of subjects is a great way of developing your brushwork and learning new techniques. Find your next project in our roundup of watercolor painting ideas.

Watercolour painting ideas