Step 1
Plan out the proportions

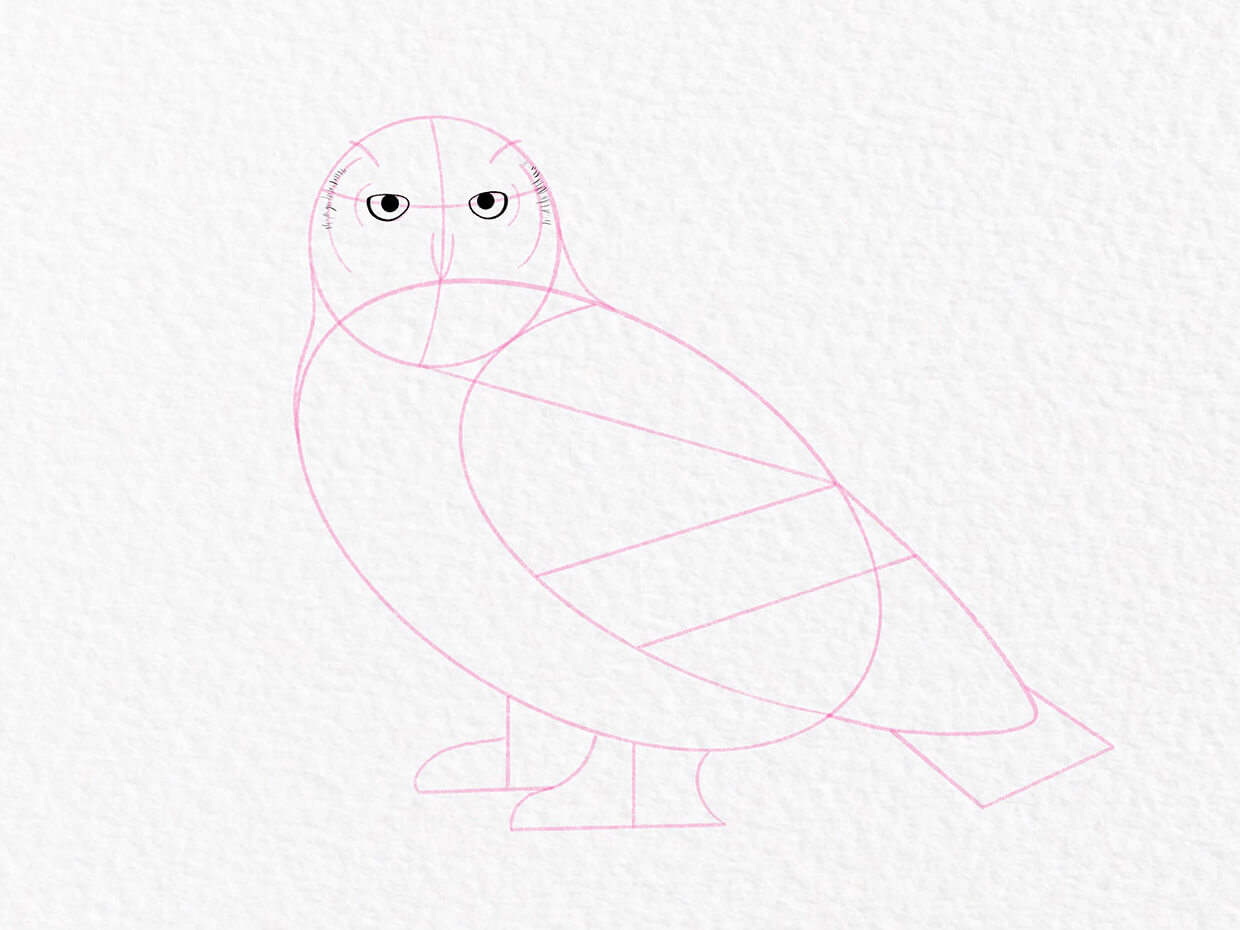
Start by planning the proportions of your owl drawing. Draw a circle for the head, and an oval (orientated top-left to bottom-right) for the body. Overlap them slightly.
Step 2
Plan the face

Draw a curved vertical line in the middle of the head. Halfway between the top of the body and the top of the head, draw a curved horizontal line.
On the vertical line, draw an elongated ‘V’ shape, for the beak. On the horizontal line, draw two ovals (more like sideways ‘D’ shapes) for the eyes.
Add two, short, curved lines above each eye for the ears.
Step 3
Add the wing and tail

Touching the bottom of the head, draw a semi-circle that swoops down from the owl’s shoulder to the bottom-right.
Make it slightly larger than half the size of the main body oval. Extend the wing out behind the body, tapering it into a triangular point for the tail.
Step 4
Plan the feather groups

Draw a straight, diagonal line from the middle of the head (touching that vertical line in the middle of the face) to the top of the tail.
Then draw two parallel lines across the middle of the wing, making sure the first touches the end of the diagonal line.
Finally, add a shorter parallel line outside of the tail, and join it to the body with two more straight lines.
Step 5
Add some feet and facial features

Draw two stick feet at the base of the body. Make the one nearest us slightly larger, to give the impression of depth.
Draw two curved lines either side of the head and body, joining the two together in a nice, smooth curve.
Finally, draw two semi-circles either side of the eyes to help inform where to place the tufts later.
Step 6
Fill out the feet

Give the feet some bulk by joining them onto the body with curved lines.
The back of the first foot (the foot most towards the left) is hidden by the front of the second foot (the foot nearest us and most towards the right).
Make them quite chunky, as we’ll be adding a lot of fluff later.
Step 7
Draw the eyes

(For the purpose of this tutorial, from this step onwards we have lightened the construction lines. You may choose to do the same, or leave them as-is.)
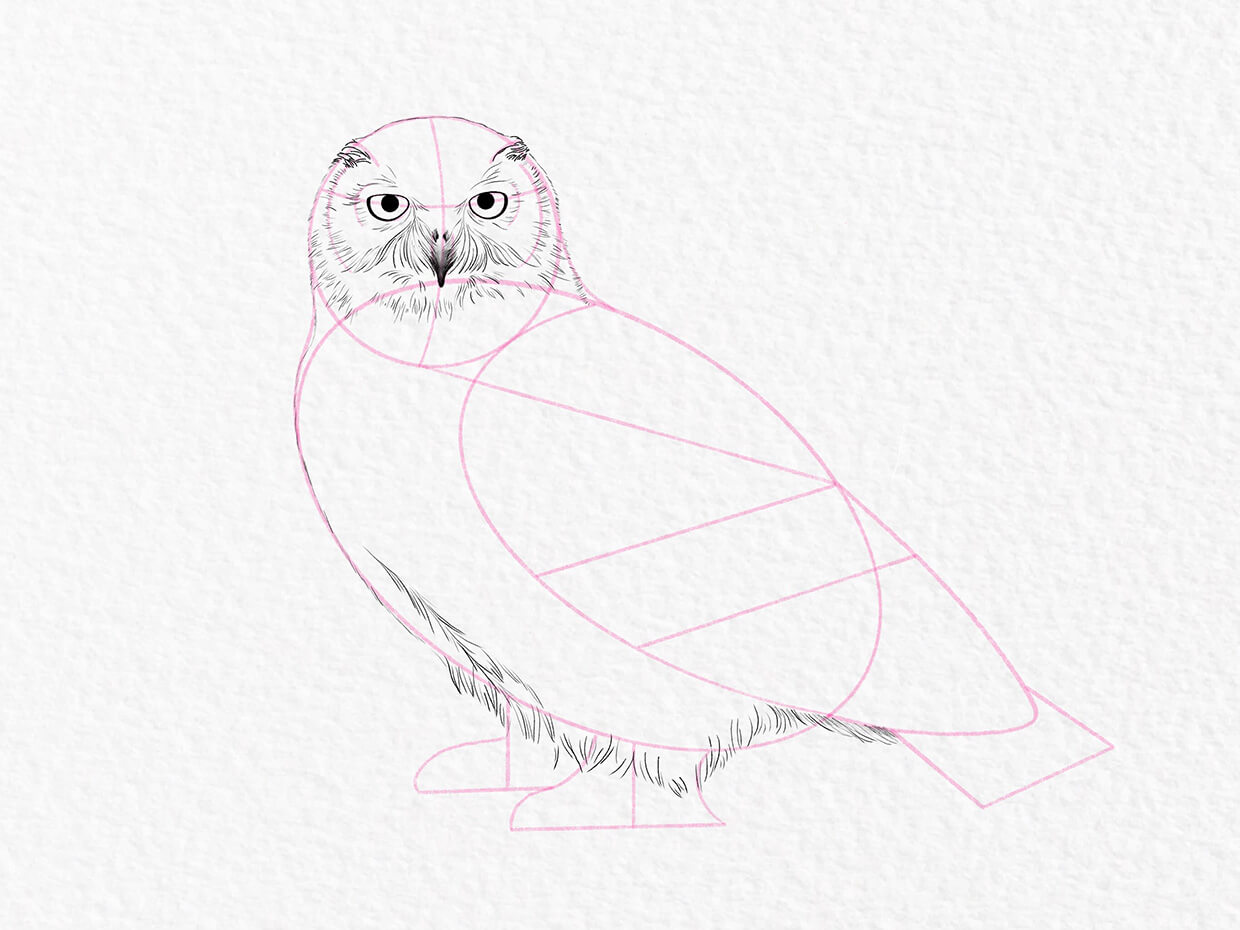
Starting with the eyes, add detail by going over the construction lines. Darken the eyes and add a pupil to each one.
Following the lines of the outer semi-circles on the face, add some random, short, outwards-pointing lines (tufts).
Step 8
Add more facial tufts

Continue adding more lines around the face, following the semi-circles as a guide. Add a few lines above and below each eye, radiating them outwards as you do so.
To make the beak appear more natural, add a few inwards-facing lines around the edge of the beak. Angle these lines diagonally, as though they’re hanging down from the top of the beak.
Step 9
Add the beak

Shade in the ‘V’ shape you drew to plan out the beak. Taper the shape slightly towards the tip, and make the shading darker at the tip, and lighter at the sides.
Once you’re happy with the shading, add some more longer tufts around the beak to emphasise the shape of the owl’s face.
Step 10
Fluff up the head

Add some more lines around the eyes and beak. Radiate them outwards as you do so, and try to keep them loose and carefree.
For the ears, use a slightly darker pencil, and add some short lines in a roughly triangular shape, following the direction of the ear-construction line.
Extend them slightly past the border of the head, and curve them back round to join with the head.
How to draw a bird
Looking for more easy drawing tutorials? Why not learn how to draw a bird and watch your creation take flight!
Step 11
Fluff up the belly

Roughly following the shape of the main body oval, start defining the shape of the owl by going over the construction lines.
At the base of the owl, where the legs meet the body, add some longer tufts. Try to draw your tufts in ‘clusters’, to create a more natural and ruffled look.
Step 12
Give your owl some feet

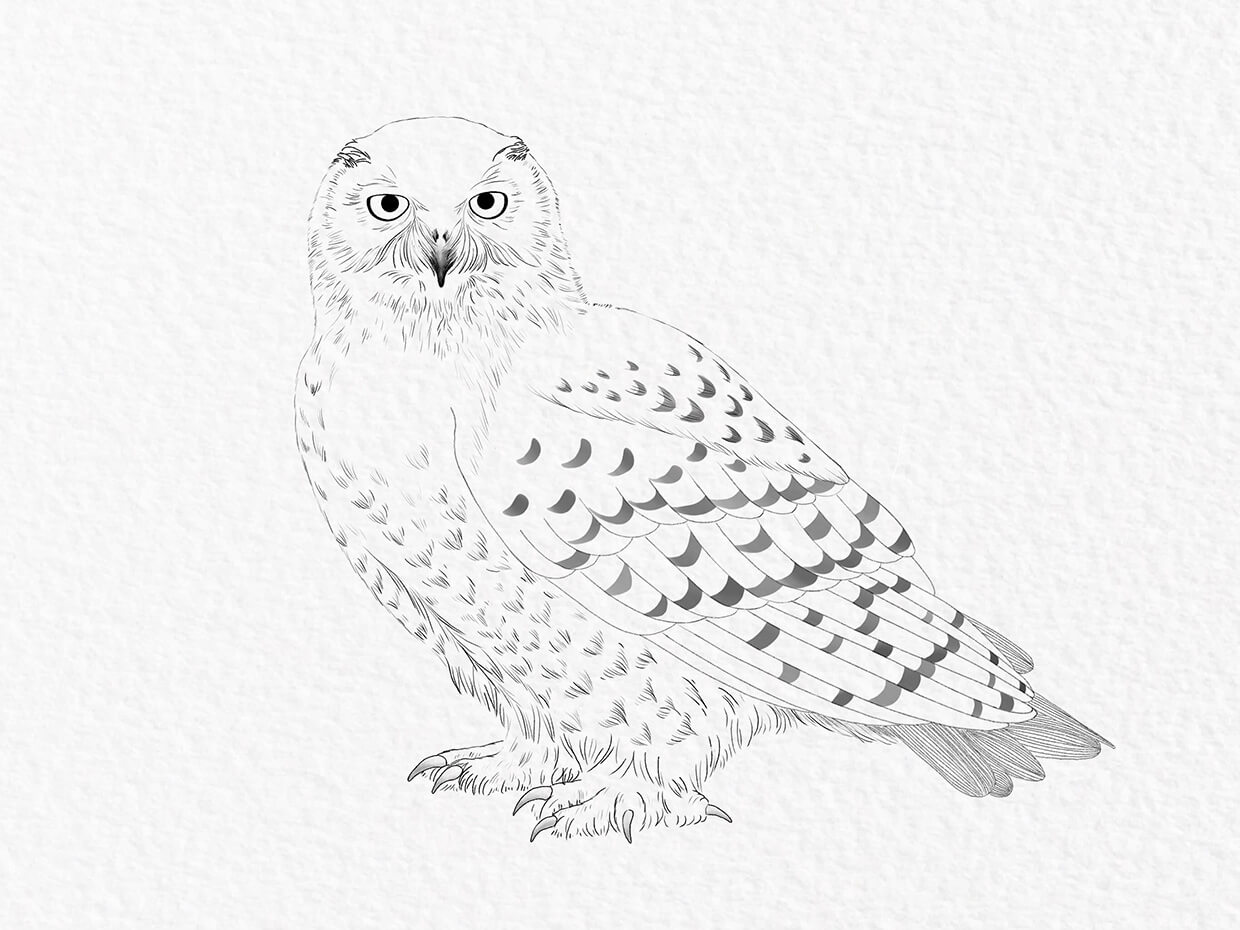
Again, following the construction lines, draw in some fluffy feet. You don’t need to join up the lines of the feet exactly, but instead draw a series of curved, downwards-facing lines around the shape of the feet.
The left-hand most foot has two visible talons, while the right-hand most foot has four.
Step 13
Begin defining the wing

The wing is perhaps the trickiest part of this owl drawing, so be sure to take it slow.
First, sketch out the top of the wing, following the diagonal construction line. Don’t use a solid line; instead use a series of short, scruffy, curved lines to denote the bottom edge of the wing.
Close up the top of the wing by roughly following the outer edge of the main body oval.
Step 14
Add some feathers

If you look at a real-life snowy owl, it’s relatively difficult to discern individual feathers on the wings. But for the purpose of this tutorial, we’ve decided to add in individual feathers, to help you get a feel for the layering and structure of a bird’s wings (they’re all quite similar).
Following the two parallel lines you drew in the middle of the wings, add in a series of feathers. Practise on a piece of scrap paper first, but essentially, you’re just drawing a series of interlocking stretched-semi-circles, with each one touching the one before.
Start on the right-hand side, working your way towards the left.
Step 15
Complete the wing

In the third segment of the wing, add in a series of longer feathers. Use the same overlapping pattern that you used with the other feather groups, and taper them into a point at the end of the wing.
Make the tail feathers less uniform, and fan them out slightly so they stick out at odd angles.
Step 16
Use detail to emphasise key features

Shade in the tail feathers, then add some ‘V’ shaped tufts on the upper wing.
Taper the ends of the tufts together, and space them roughly evenly over the upper wing. Snowy owls have lots of different wing patterns, so have fun with it.
Step 17
Add detail to the belly

Replicate the tufts you drew on the wings, on the belly. Leave a white bib at the top of the owl, then scatter the ‘V’ shape tufts all the way down the front of the owl.
It’s quite common for snowy owls to be completely white, so don’t feel that you must add these darker areas if you don’t want to.
Step 18
Add some dark spots on the wings

Using a brush pen, add some sweeping, darker ‘ticks’ (or ‘check marks’) to the base of each of the tufts.
These dark colourings create a mottled appearance to provide camouflage among the Arctic tundra, but to draw them is optional.
Step 19
Add some finishing touches

Repeat these marks over the larger feathers that make up the bulk of the wings. You can do them randomly, or add them just up from the tips of the feathers, as we’ve done.
Add a few more dark marks here and there, as many or as little as you like. Every owl is different!
Step 20
Erase the construction lines

Finally, erase the construction lines and enjoy your masterpiece! If you’re doing this owl drawing just for you, there’s no need to erase the construction lines, and it’s quite useful to keep them in the drawing.
Otherwise, sit back and give yourself a big pat on the back for completing your owl drawing.


