21 cyanotype ideas to inspire you this spring!
Sun printing is an incredibly fun and rewarding creative practice, with plenty of scope for creativity and experimentation. It’s an almost magical process, where you get to watch your cyanotype ideas develop as it is exposed.
Cyanotype printing was invented in 1842, and within a year artist Anna Atkins was using this unique technique to capture algae in the form of cyanotype photograms – the name for a photographic image created without a camera.
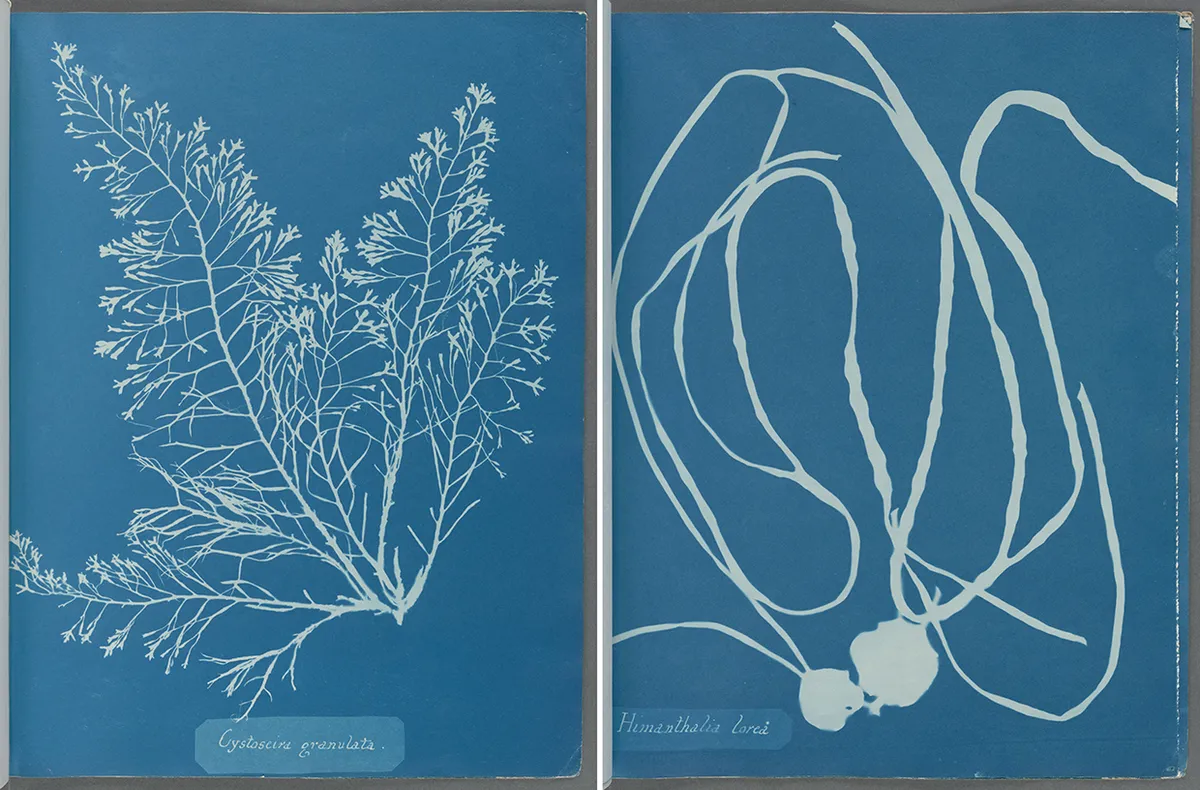
It was used commercially to create blueprints until it was eventually replaced by advancements in photography and printing. The technique also became popular with many artists (such as Dadaist Man Ray and Pop artist Robert Rauschenberg) and continues to be used by many practising artists to this day.
You don’t have to be a fine artist to enjoy cyanotype printing though, as there are many applications and techniques that creative crafters can enjoy too. If you fancy trying your hand at cyanotype art and need a bit of inspiration first, we’ve found 21 examples of cyanotype ideas to help get your creative juices flowing.
21 of the best cyanotype ideas to try
1. Go natural with our guide
Before we dive into all the different cyanotype ideas and techniques, it's important to master the basics. Follow our complete guide to cyanotype printing which covers materials, methods and much much more. We even show you how to use sweet flowers to create your first print!


Not sure where to start?
Take a look through our cyanotype printing kits which are great for beginners.
2. Start with small cyanotype ideas
Once you start solar printing, you’ll soon build up a collection of different prints from experimenting with various cyanotype ideas.
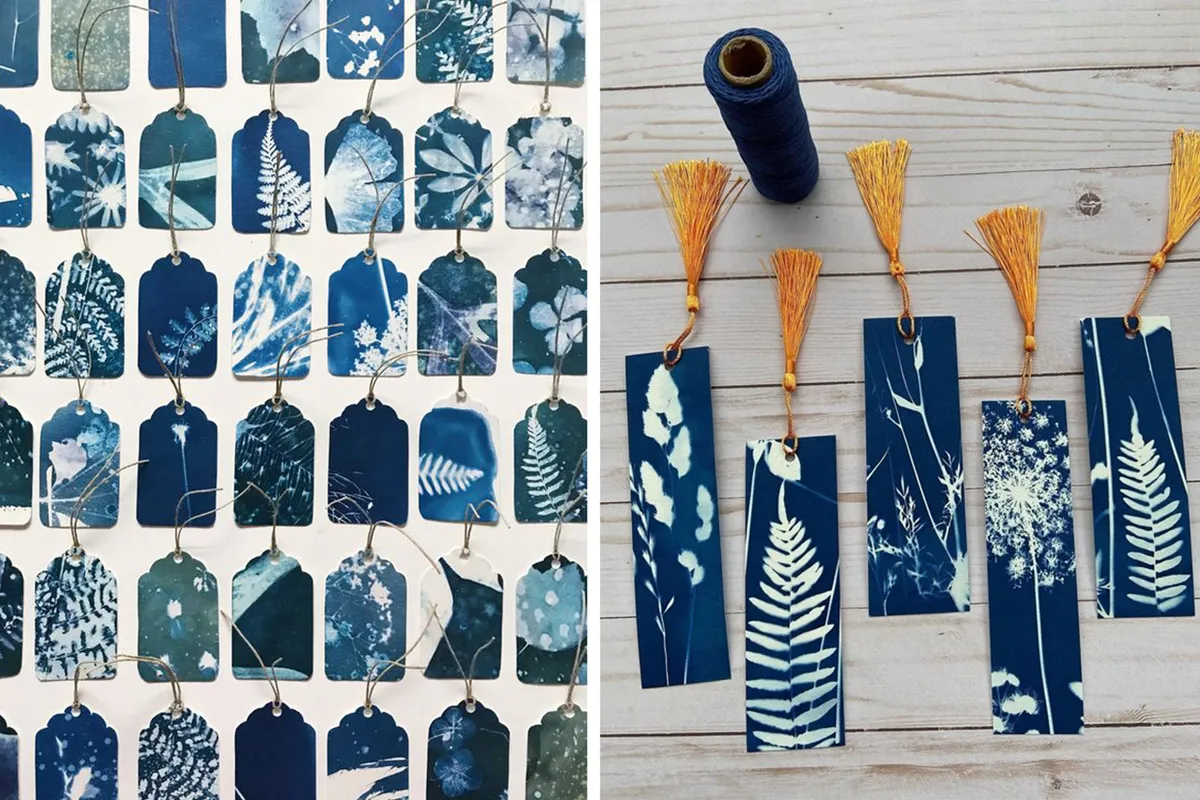
Make the most of all those little pieces of paper or card by turning them into handy bookmarks or transform them into gift tags!
3. Cyanotype ideas: Use stencils
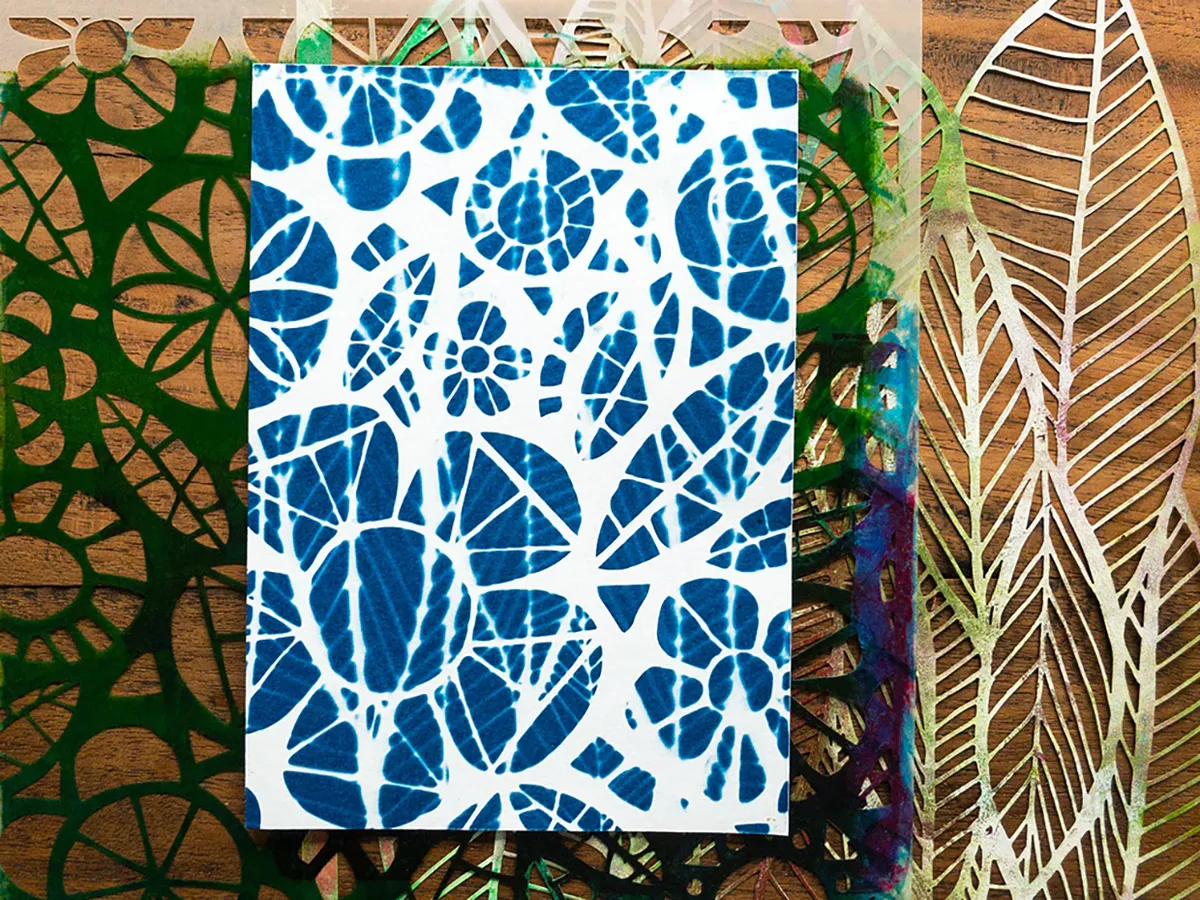
Many items with holes can be used as stencils within your cyanotype image, however, you can also utilise actual stencils to prepare your cyanotype too!
Try applying your cyanotype solution onto your surface through a custom-made stencil. When you add on your different elements and expose them to the sun, your image will appear only on the areas of your stencil.
It’s a great technique for adding a double layer of detail, and can be as simple or as complicated as you like.
You could get really fancy and make a leaf stencil like below, which has then been exposed with a second leaf stencil to create the sun-printed geometric lines.
4. Switch up your surface
Printmaking not only allows you to get creative with your subject matter, but you can also experiment with printing on different surfaces too.
The classic cyanotype produces a lovely deep blue on a plain white surface, and as much as we love this combo, there’s no rule that your surface has to be white, or even plain!
Using different coloured card or paper will create visually interesting and different images, with the surface colour sometimes altering the shade of blue too. Try using reds, yellows or pink as they are complementary colours for blues, or even go bright with fluorescent papers.
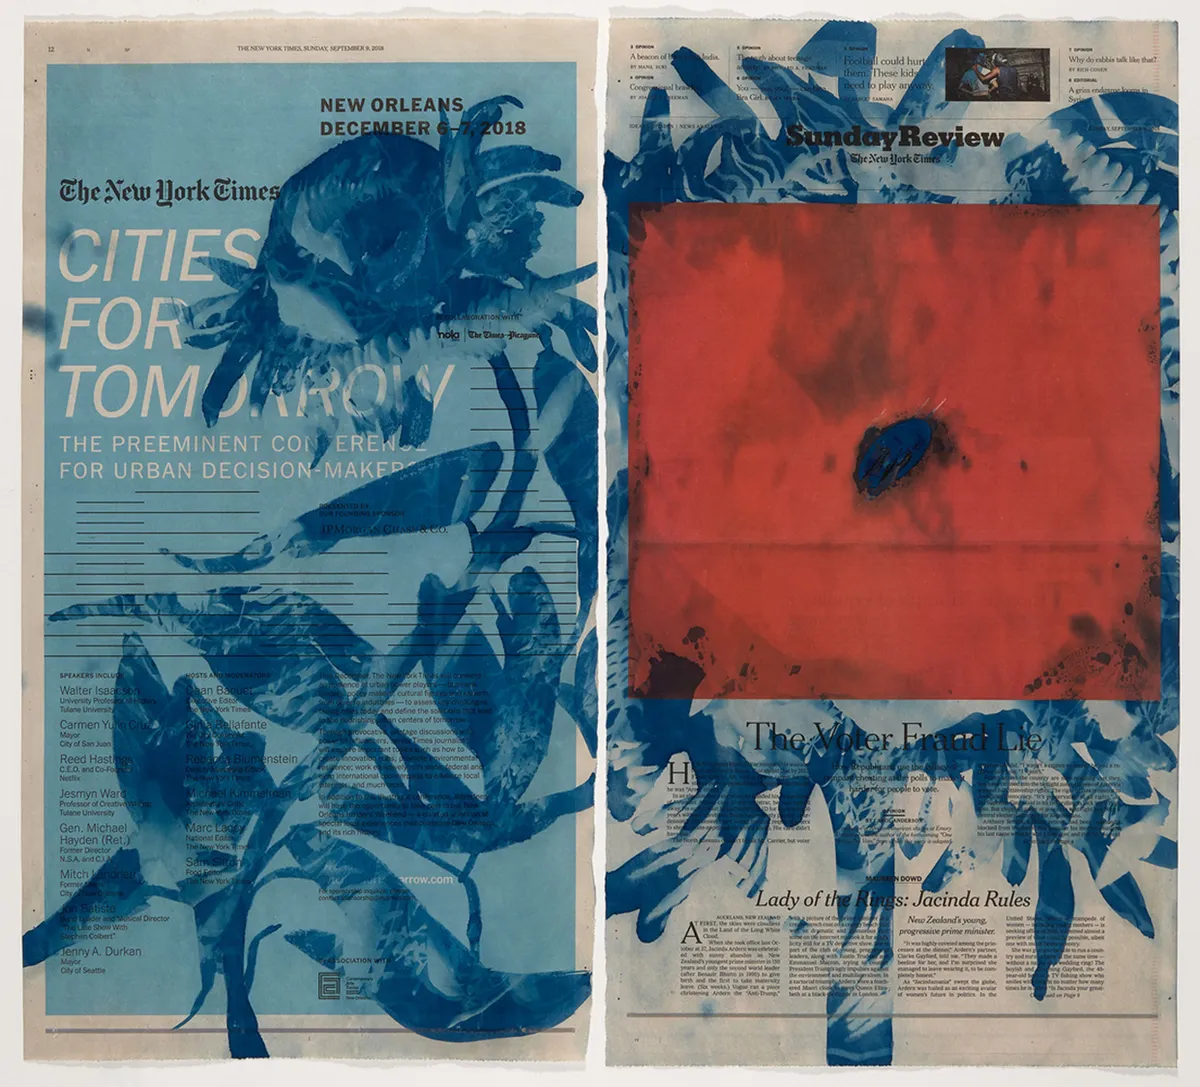
You don’t have to stop there – you could also print on surfaces that are already decorated. If you’re a confident artist, you could try drawing elements on your surface before preparing it with the cyanotype solution.
Alternatively, you could be inspired by mixed media artist Cynthia MacCullum who combines painting with the cyanotype process on newspapers and other mediums.
5. Create your own canvas
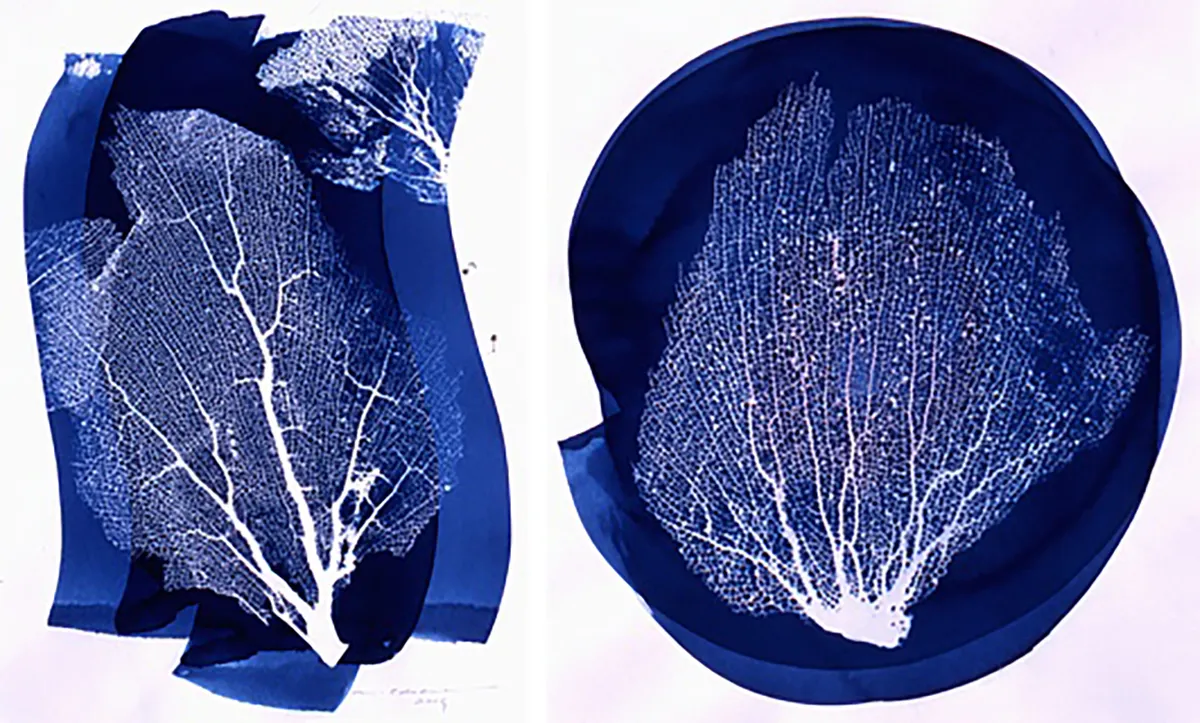
If you’re mixing your own chemicals, there’s nothing to say your cyanotype surface has to be a plain and perfect rectangle. In fact, you could use the application of your solution to act as a visual element in itself.
Use a simple stencil to create a basic circular shape to frame your cyanotype image, or you could even paint the solution onto your surface in a form of your choice.
Artist Martha Casanave’s work shows off this technique beautifully, and her choice of using watercolour paper as her medium adds an extra element where you can see the different thickness of applications of cyanotype solution.
6. Make sun prints that rock!
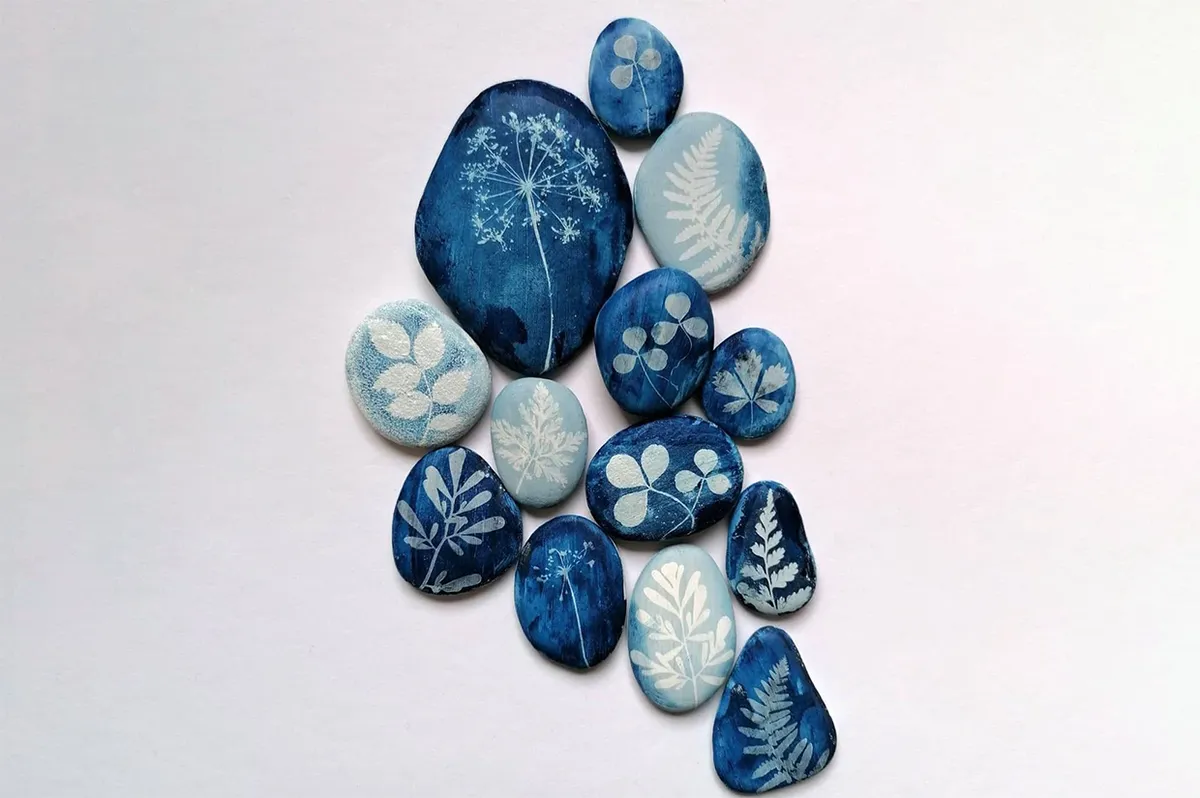
We did tell you that cyanotype printing was great for experimenting, and what could be more experimental than sun printing on stones and rocks?
You’ll want to source relatively flat stones to get the best results, and adding a base coat to your stone will help the cyanotype solution adhere and develop better.
They’d make great decorations for the home or garden. Your friends and family will be amazed when they learn that you made them yourself.
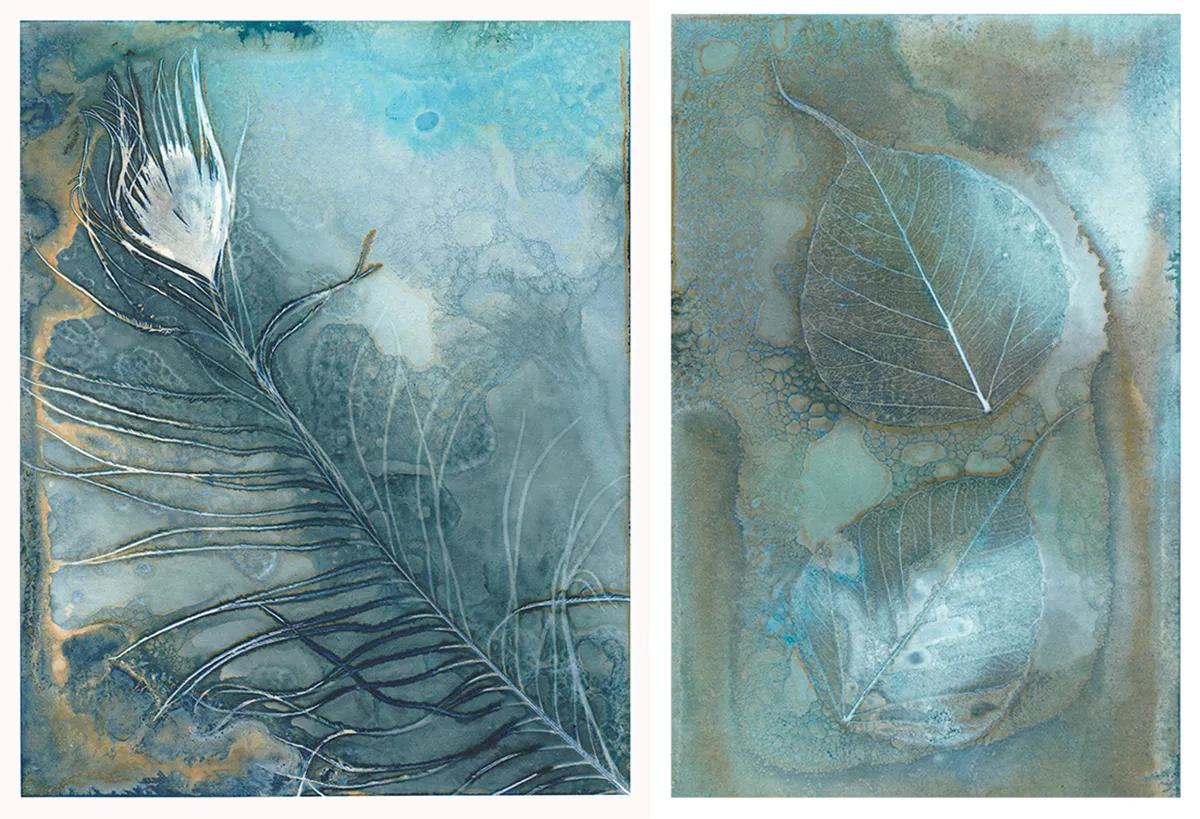
7. Go wild with wet cyanotypes
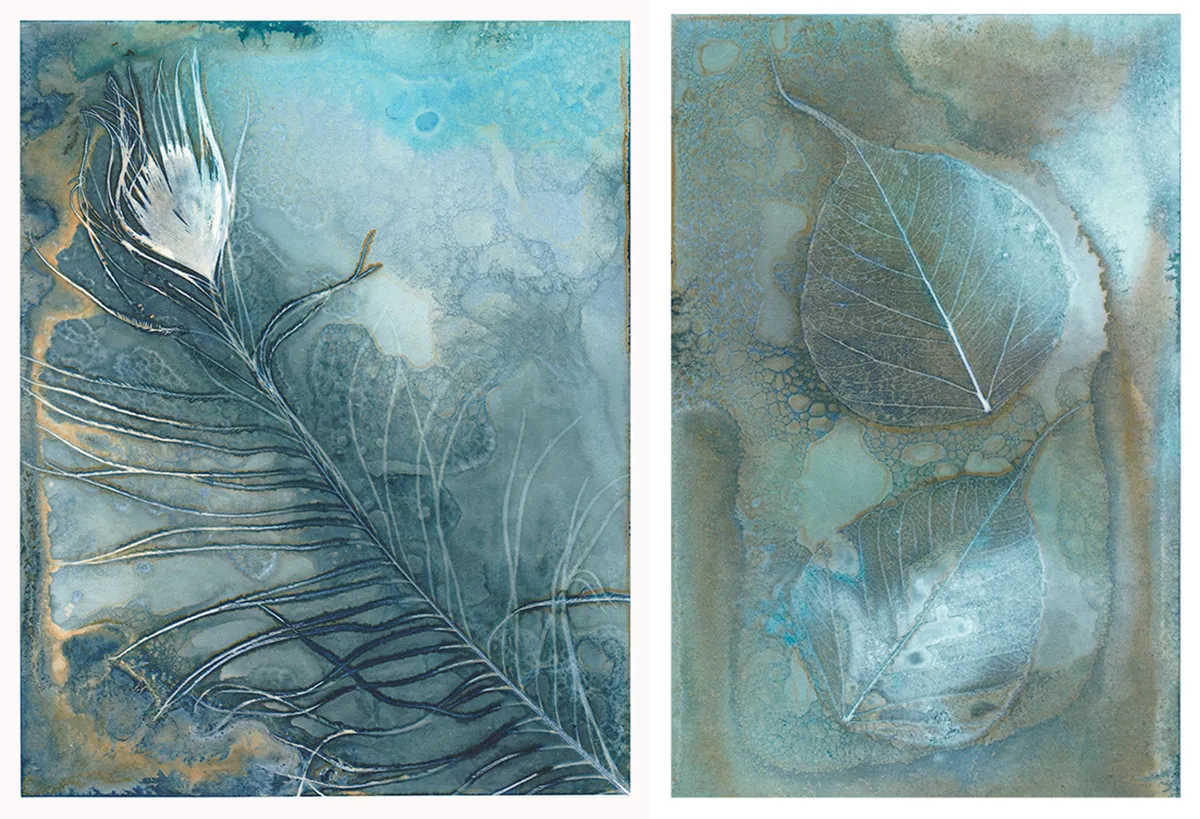
For those of you who fancy getting really creative with your prints, you can take things one step crazier by making wet cyanotypes.
It works in much the same way as traditional cyanotype printing, but by adding extra liquid elements onto your wet surface as it develops creates different chemical reactions and markings that will produce interesting effects.
Artist and photographer Jo Stephen has written an excellent guide on how to add soap bubbles and diluted vinegar to wet cyanotype prints, as well as incorporating other elements such as salt and spices to create interesting effects.
It is worth mentioning that you should be careful with making wet cyanotypes. You are essentially adding contaminants to a chemical reaction, so there is a chance that you could potentially create fumes or irritants.
For this reason, research your ingredients, work in a well ventilated area and wear a protective mask, gloves and eye protection.
8. Search out your subjects
So far we’ve shown you lots of interesting ways to have fun with your cyanotype surface, but of course your subject matter is the main area where you can get really creative.
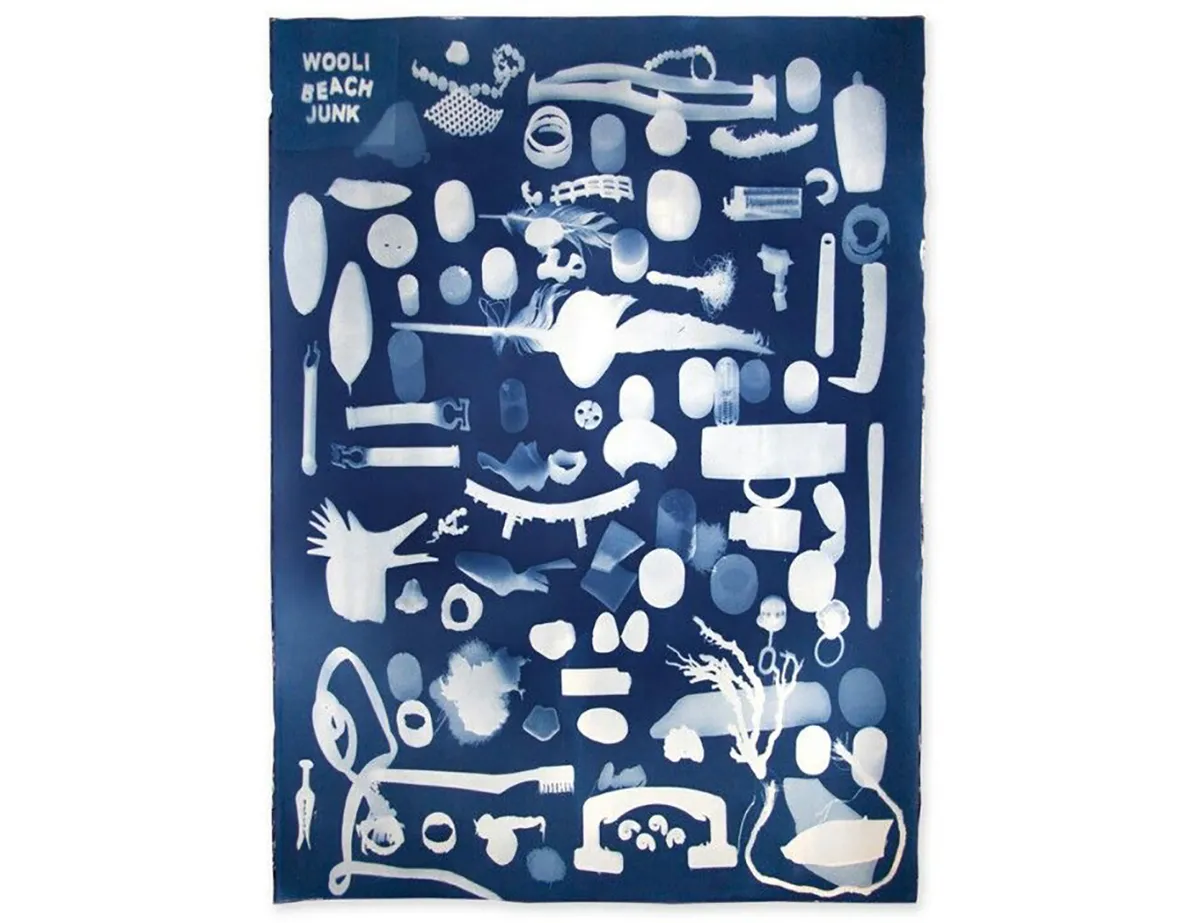
We’ve got plenty of inspiring ideas for objects you can use in your prints, although you really can use absolutely anything – and here’s proof.
This cyanotype print by artist and photographer David Spowart was made entirely from junk found on a beach in New South Wales.
It’s worth keeping an open mind for your print objects, as what could be just a piece of rubbish could add an interesting texture or have a unique transparency that you can make use of.
The old saying is certainly true – one person’s trash is another person's treasure.
9. Not to be negative
Remember when cameras weren’t on your phone? Further back still, remember when cameras weren’t digital?
If you’re over 30 you might just still have some photographic negatives stored away with your old photos… if you’re under 30, raid your parents’ attic!
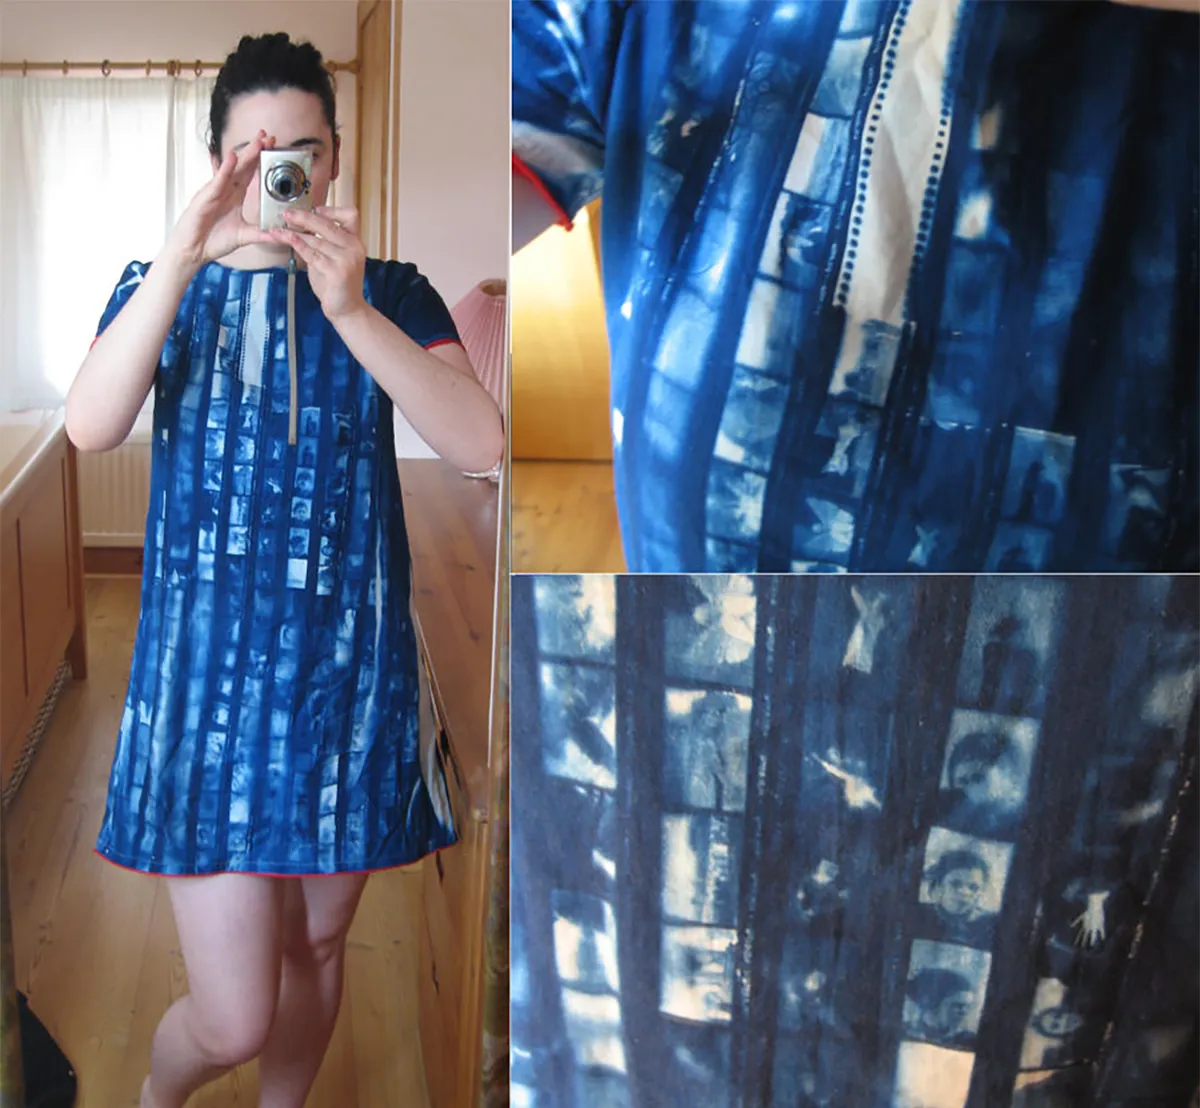
Film negatives are essentially reverse images, and much in the way traditional photographs are made, exposing them to light on a photosensitive surface (such as a cyanotype) will reproduce the image correctly.
Perhaps the most ingenious use of negatives we’ve found is this amazing dress, where strips of film negatives are used to create a fantastic striped pattern. We love it when cyanotype ideas can turn into wearable items.
10. Cyanotype clothes – yes, please!
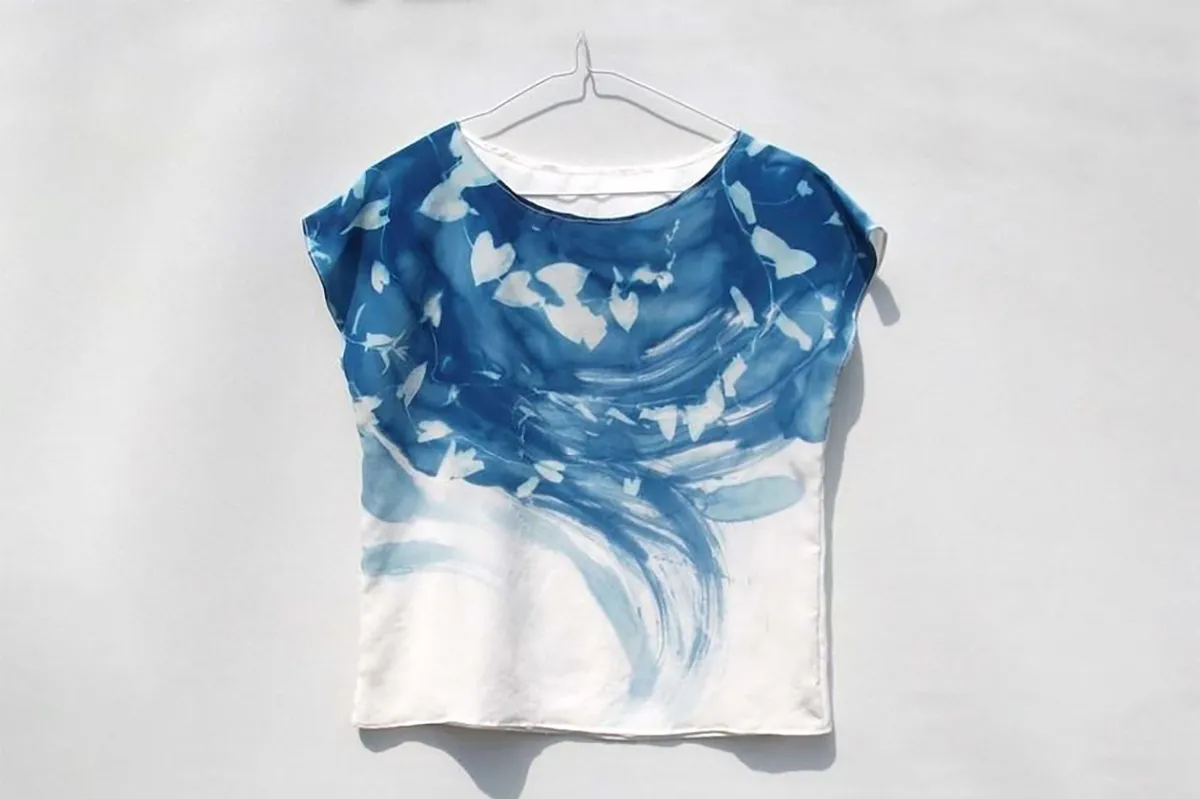
If you’re an experienced sewer you can make your own cyanotype fabrics and transform them into clothes, but even if you don’t have sewing skills you could always transform plain clothes or fabric items with some fun prints too.
Cyanotype printing works best on 100% natural fibres such as cotton or silk, with the best results using white or light-coloured garments.
To keep your creations looking their best it’s wise to hand wash any fabrics that you have printed on.
Make your own funky fabrics
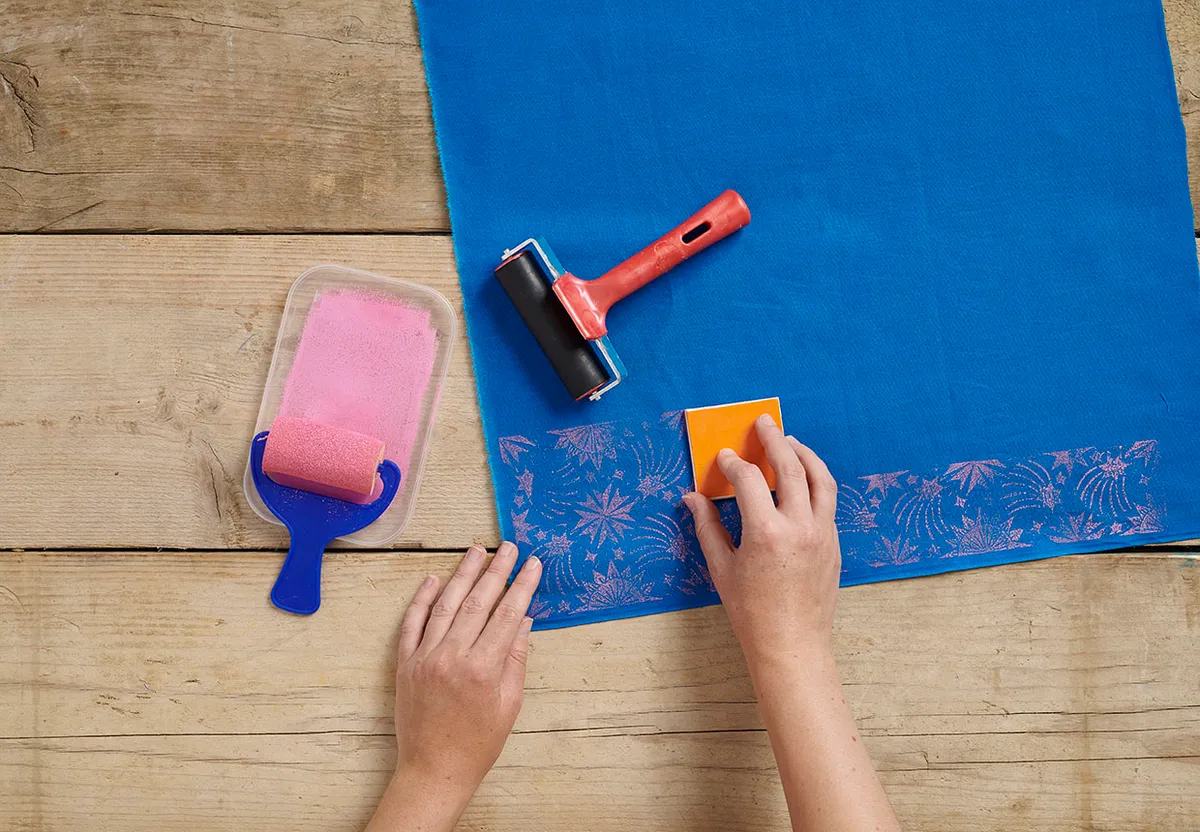
If you love the idea of making your own custom-printed fabrics to use in your sewing projects, check out our how to block print on fabric tutorial.
11. Consider your composition
If all of this seems a bit abstract for you, remember that it doesn’t have to be.
While cyanotype art is great for experimenting and creating unique one-off pieces, how you arrange your objects will make a huge difference to how aesthetically pleasing your final print will be.
Many of the biggest names in the art world have used repetition to create impactful effects – Andy Warhol being the most obvious that used repeated prints, but also modern artists such as Damien Hirst and Yayoi Kusama.
When it comes to planning your cyanotype prints, think about how you’ll lay out your objects beforehand. If you have multiples of the same object, would it look good being repeated in a uniform pattern?
Remember that composition can make or break a piece of art.
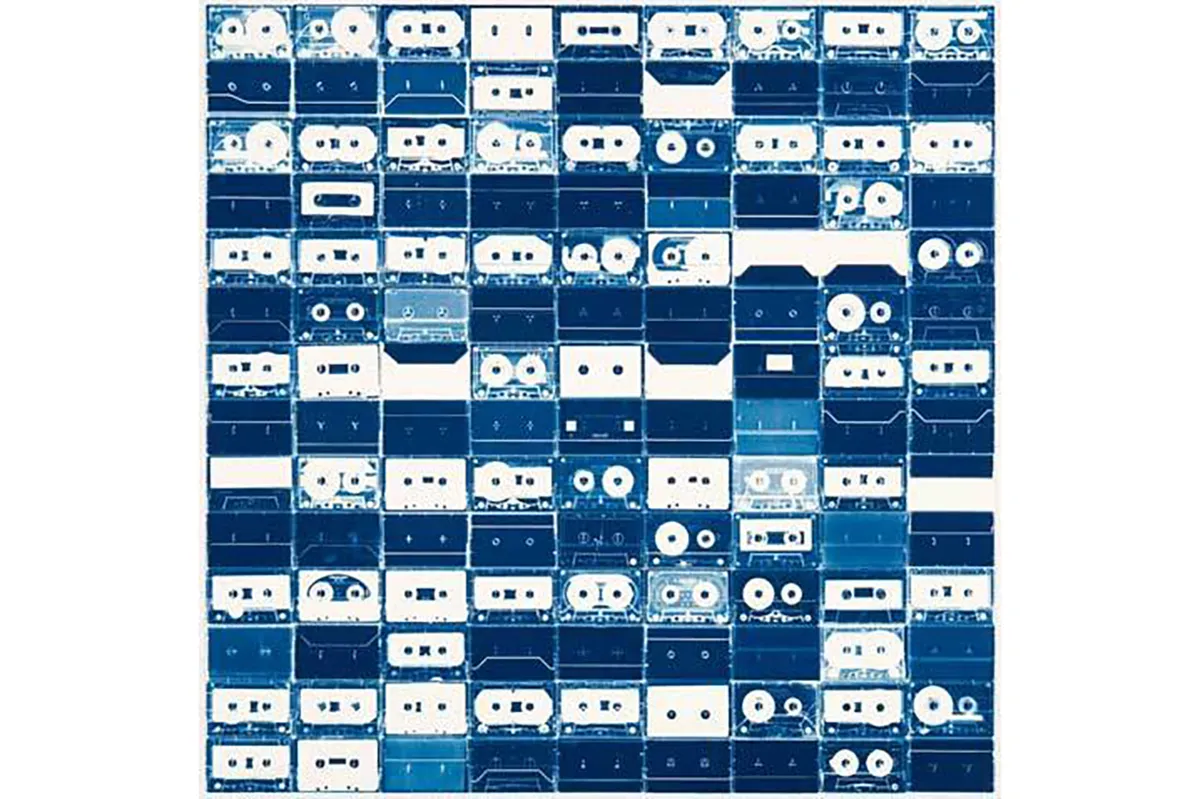
12. Give your prints a fruity theme
Once you’ve made sure you’ve eaten your five fruit and veg a day, why not use any leftovers as inspiration for your next solar print?
When thinly sliced, items like oranges, lemons, grapes and even apples will let enough light through to create an interesting X-ray effect – better than them going mouldy in the fruit bowl!

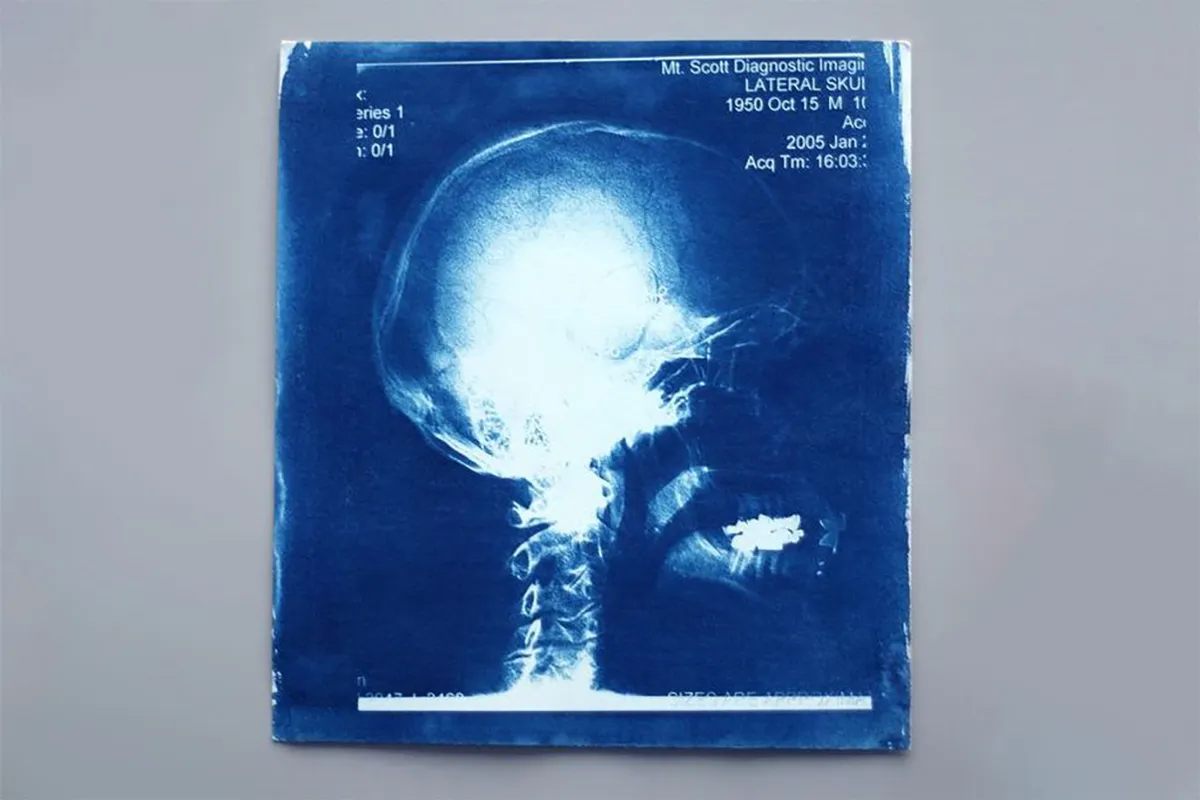
13. Cyanotype ideas: Solar print skull and bones
Here’s an idea that we sincerely hope you don’t have resources for.
If you’ve ever spent time in a hospital, had an X-ray and managed to persuade the doctors to let you keep it, you can use X-ray films to create photographic cyanotype prints too.
Sure it’s a bit macabre… you can’t deny that it’s one of the more unique cyanotype ideas though!
14. Work your magic on wood
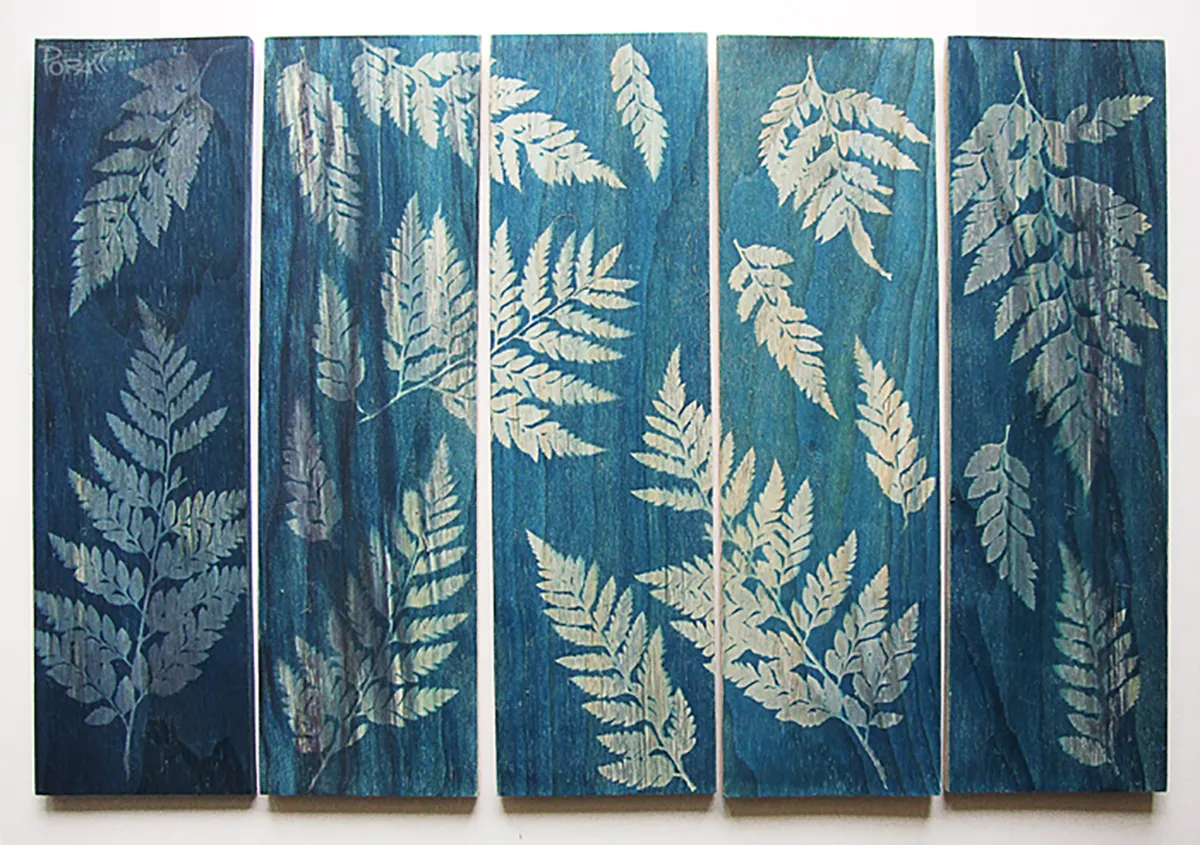
So we’ve covered that you can make cyanotype art on paper, card, fabric and even stones, however there’s one more surface that we love working with – wonderful wood.
The beauty of using a surface such as wood is that the grain will show through the cyanotype solution, giving you a whole extra dimension of detail.
You can use it to make lovely display pieces, or even to create signage by using letter templates on your print. It’s best to use a smooth, sanded and relatively flat piece of wood to make sure your sun print transfers cleanly.
15. Show off those stitches
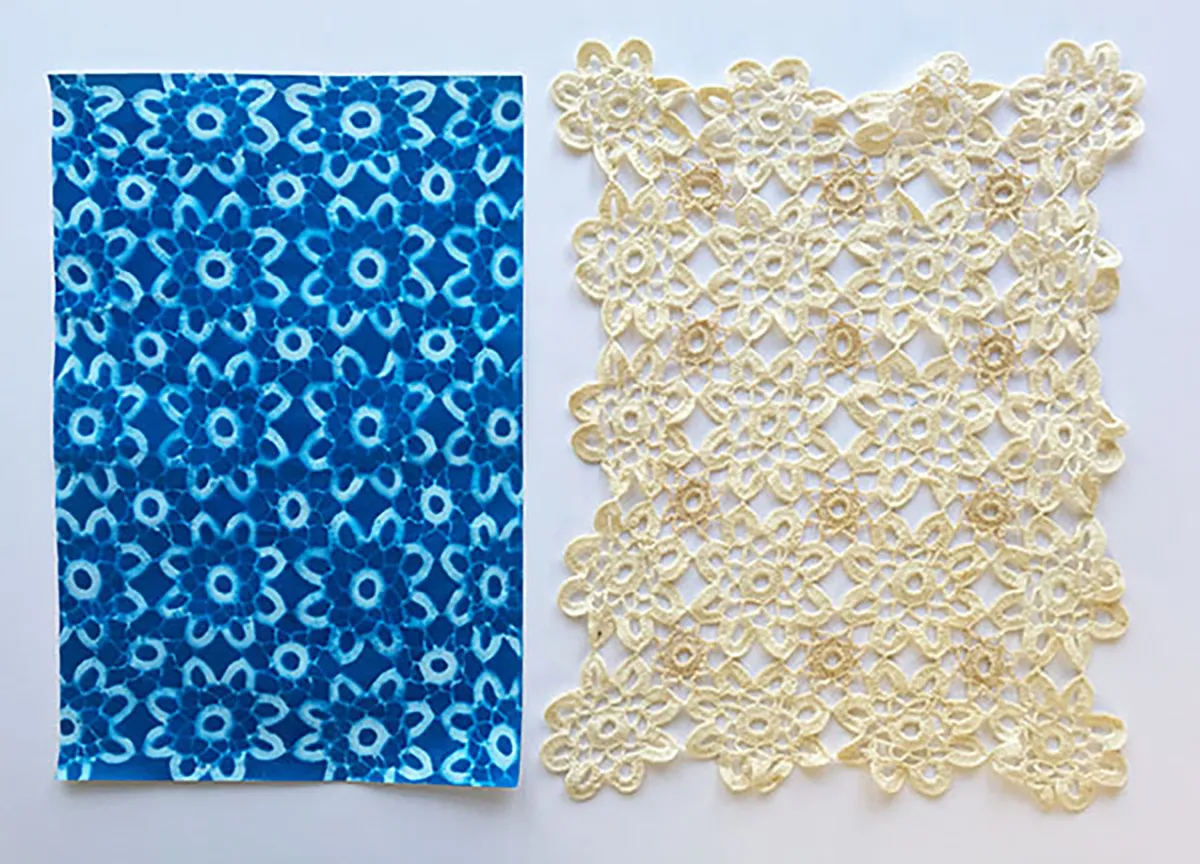
We’ve already mentioned using stencils in your cyanotype art, but there is another way of creating pretty patterns with ease – by using lovely lace.
Whether you’ve got a stash of doilies in a drawer, are a whiz with a crochet hook or knitting needles, or even just have an old lacy garment, the patterned holes in those fabrics will make fantastic solar stencils.
If you are able to knit or crochet your own shapes, you could try making lots of motifs to create a repeating pattern. Or if you’re using old lace that is past its best, you could try cutting it into your desired shape.
While this is a great technique, cyanotype solution can stain so it’s wise not to use it on anything precious.
16. Presenting your cyanotype ideas
Regardless of the way you’re preparing your print, there’s one way to bring out the best in everyone's cyanotype art: presentation.
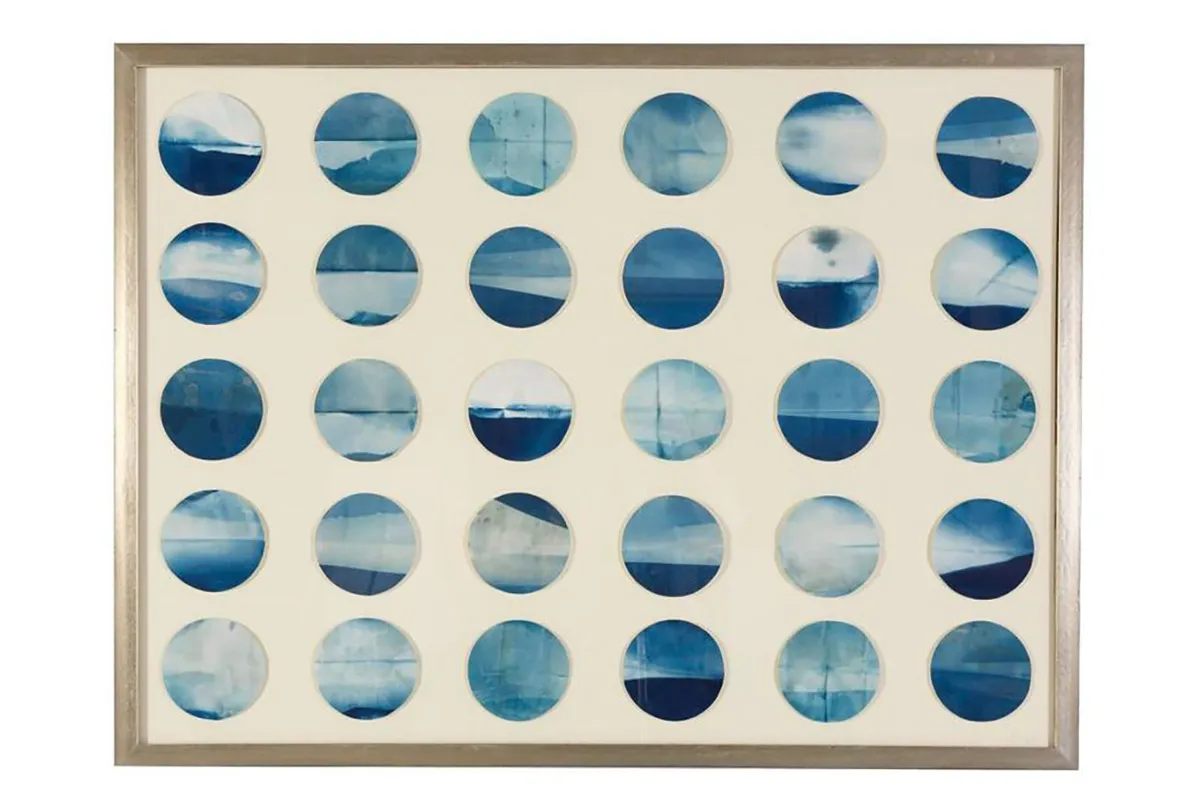
Everything looks better in a frame! If you’re only making small prints, then arranging them in a series in a large frame can transform them from a nice print to a stunning piece of art.
You could use a random selection of prints or create multiple prints around a theme (for example, using leaves of different shapes).
Or you could try cutting out your favourite parts from your prints in specific shapes and arranging them in series like in this artwork by Abby Kasonik.
17. Add embroidery to your cyanotype fabric
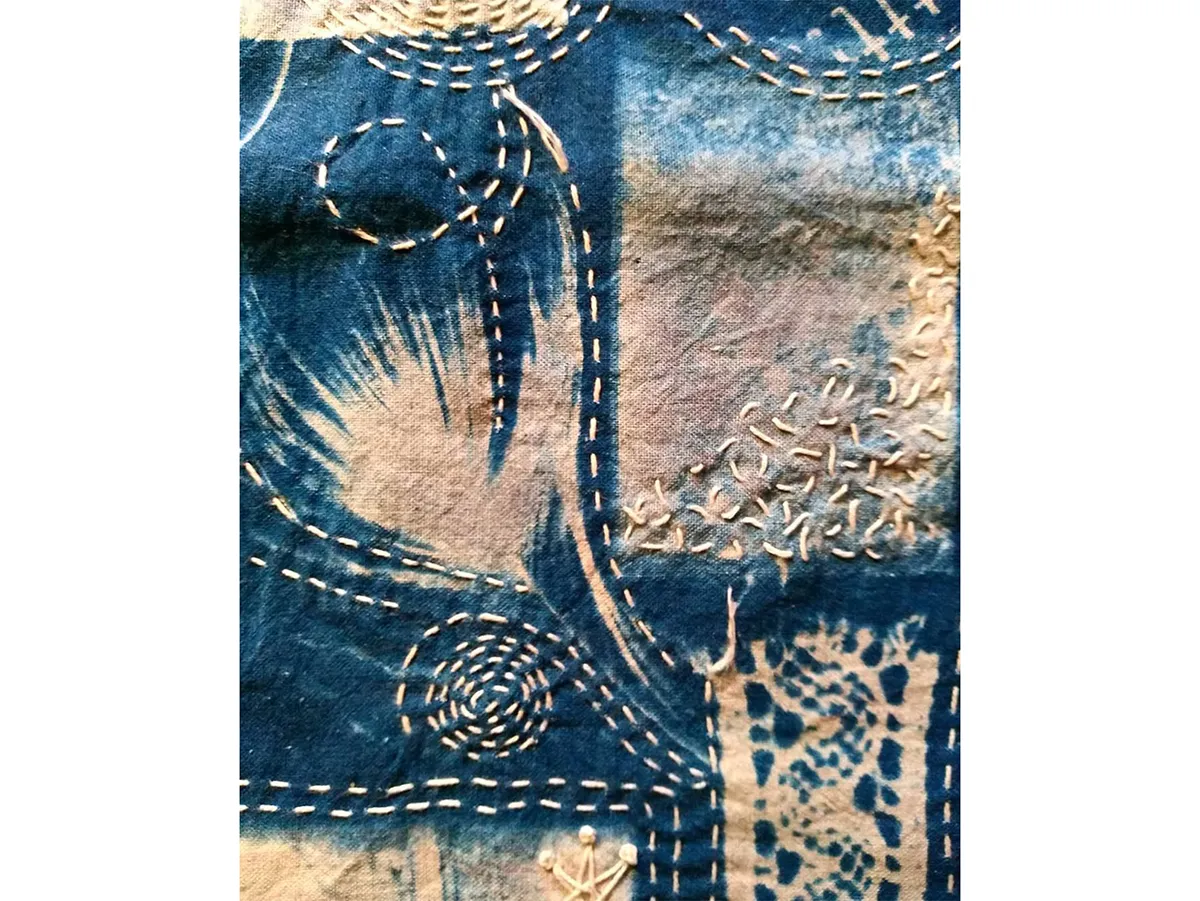
If you’ve made some cyanotype fabric and want to give it an extra level of crafty magic, you can make those sun print images really stand out by adding embroidery stitches!
Sashiko is particularly well-suited, as you can use those simple stitches to add line work or pattern stitches onto your fabric.
If you want to learn more about this awesome embroidery technique, check out our guide on how to do Sashiko embroidery.
18. Turn your prints into patchwork
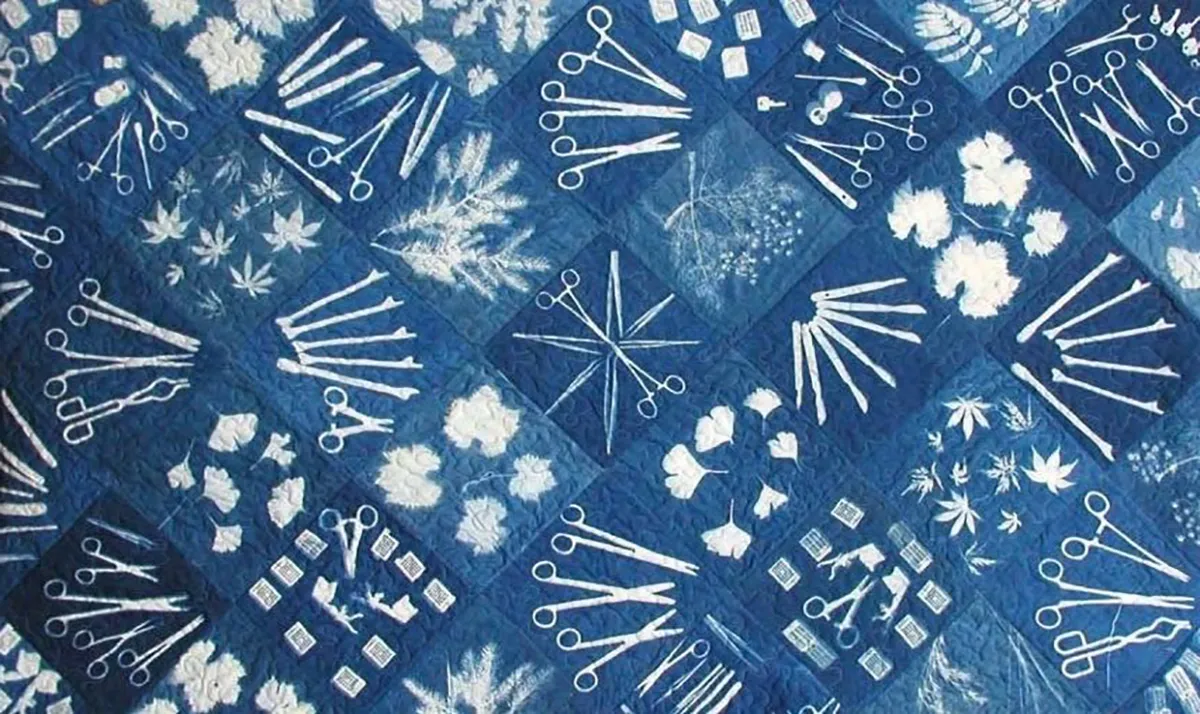
Many of the cyanotype kits for printing on fabric often use small pieces that are perfect for patchwork. Even if you’re printing on paper you can still use this traditional technique to create a unique piece of artwork.
Patchwork is simplest if you cut your paper or fabric into a perfect square first. Then comes the fun part – arranging your squares.
You can use the subject matter to be the defining focal point of your patchwork squares. Alternatively, you can experiment with differences in development to create lighter and darker print colours.
19. Pay homage to your houseplants
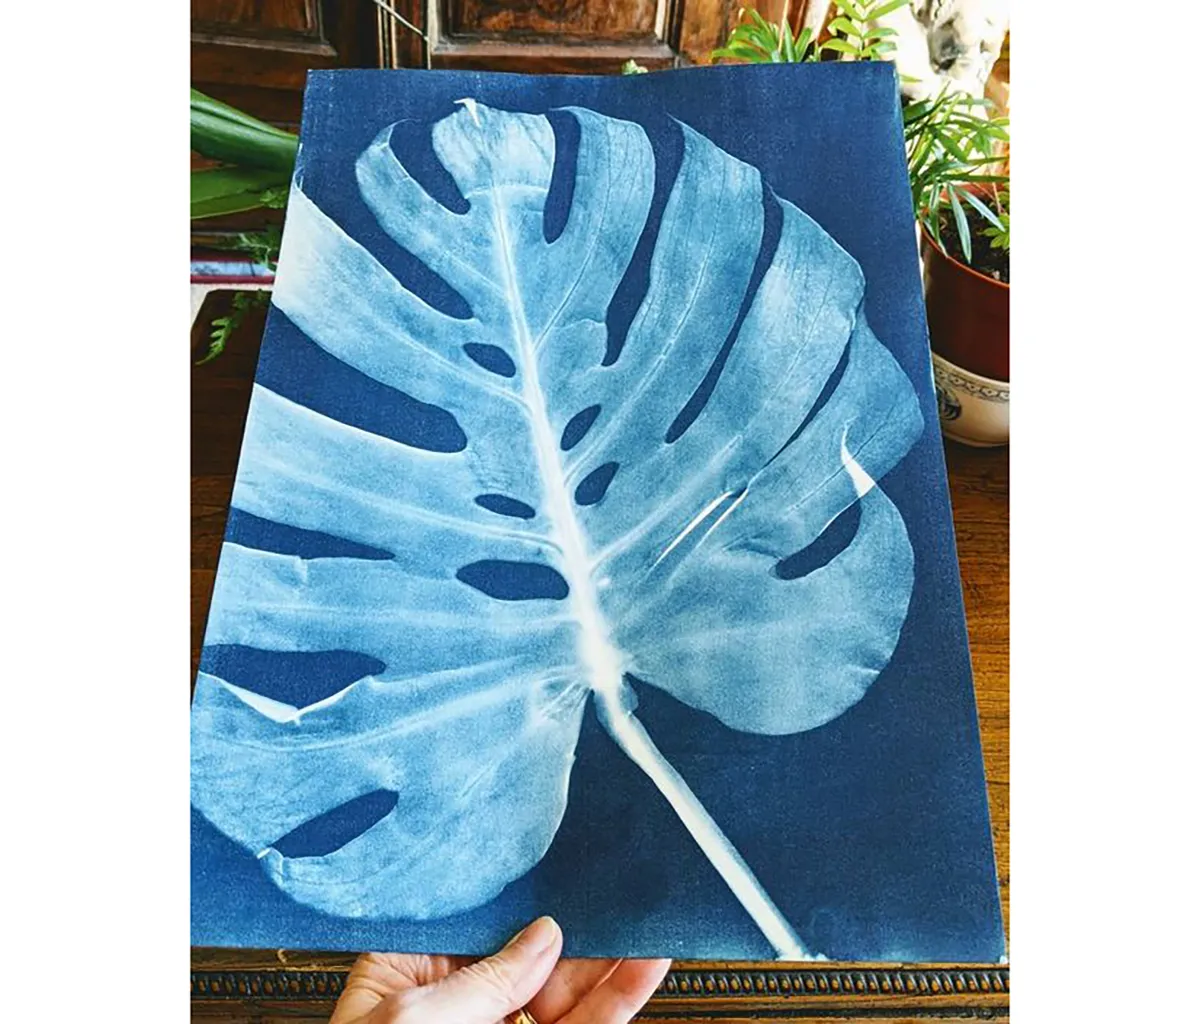
Botanical prints are one of the most popular subjects for cyanotype art, but you don’t need to be a green-fingered gardener or go out on epic foraging walks. Cyanotype ideas don't have to be complicated, simply use your houseplants as the subject.
Monstera leaves are one of the most iconic shapes in the houseplant world, and those holes in the leaves of the affectionately named ‘swiss cheese’ plant make them perfect for sun printing.
20. Use tea tones to transform your cyanotype art
Here’s another cyanotype idea that allows you to continue being creative even after you’ve made your sun print.
This tutorial by Jo Howell uses household bleach to effectively ‘edit’ or erase the blue of the cyanotype once it’s been developed.
Once that’s been washed off, a cold brew of tea is used to add a brown staining effect. A bit like how you used to make letters or treasure maps look old when you were a kid (surely we weren’t the only ones to do that?).
We love the idea of creatively experimenting with our prints after they’ve been developed, and of course you could try using other things than tea to create stains. You could try using the vinegar from pickled beetroot to create a pink stain.
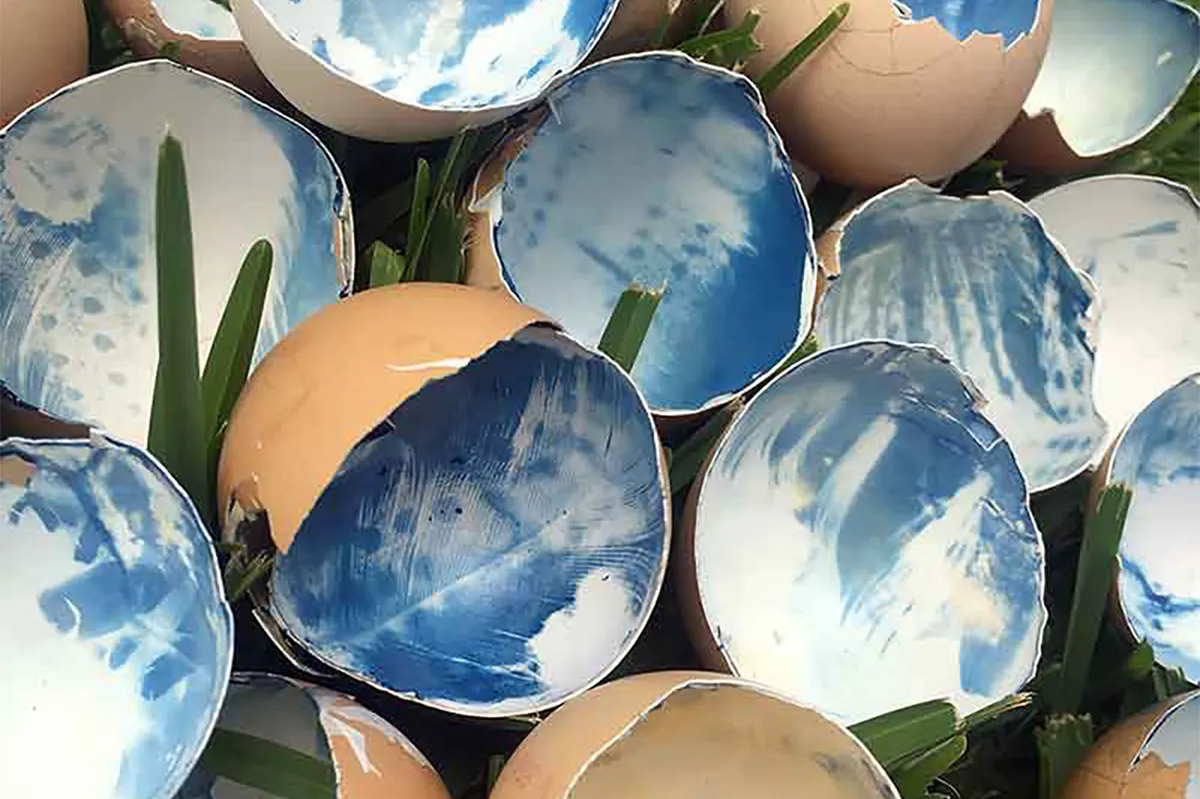
21. Experiment... with egg shells!
Our final cyanotype idea is one of the wilder ones to encourage you to try making sun prints on different surfaces.
If you’re applying cyanotype solution yourself then you can add it to loads of different mediums – you can even try making cyanotype art in egg shells.
That is just one example though. You could try printing on ceramics, bone, glass, cardboard or anything else you can think of!
Putting your cyanotype ideas into practice
Now that we’ve given you plenty of inspiration, it’s time to get making!
Remember that while there are no rules on how creative you can be. It’s important to have fun and stay safe at the same time. It’s wise to wear an apron and gloves to protect your clothes and skin if you’re applying the cyanotype solution yourself.
If you are using anything that could potentially react with the cyanotype solution, ensure that you wear a mask and safety goggles as well as working in an environment that has good ventilation.
Learn how to do lino printing
Lino printing is another fun craft that creates two-tone print images. Try it out with the Lino printing for beginners guide from Gathered.
